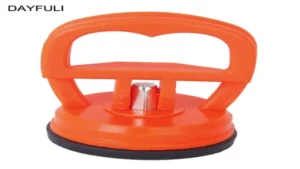
Are you tired of driving around with unsightly dents on your car’s exterior? Don’t worry, we’ve got you covered! Using an aluminum dent puller might seem intimidating at first, but with a step-by-step guide, it’s quite easy to use. An aluminum dent puller is a tool that can be used to remove minor dents from aluminum panels. It works by grabbing onto the metal and pulling it back into its original position.
With this tool handy, you can say goodbye to unsightly dents and restore your car’s exterior to its former glory. In this blog post, we will guide you through the process of using an aluminum dent puller to remove dents from your car’s aluminum panels. We’ll cover everything from preparing your car for the task to the final step of admiring your handiwork.
So, roll up your sleeves and let’s get to work!
What is an Aluminum Dent Puller?
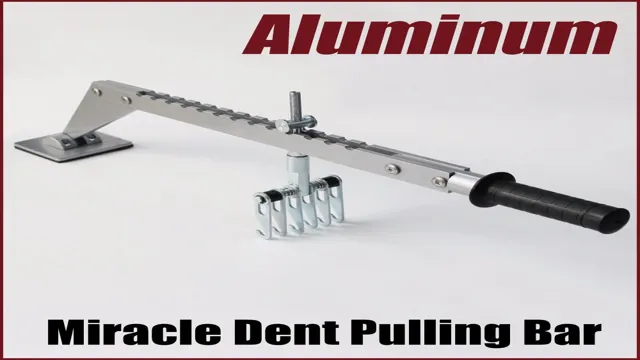
An aluminum dent puller is a tool used to remove dents from vehicles without damaging the paint job. It’s a highly effective tool that requires minimal effort to use, making it a top choice for DIY auto body repair enthusiasts. To use the aluminum dent puller, first, you’ll need to clean the area around the dent thoroughly and make sure it’s dry.
Then, place the suction cup of the puller over the center of the dent and press it firmly against the metal. Next, pull the handle of the puller until the dent pops out. Keep in mind that the aluminum dent puller is only effective on small to medium-sized dents.
For larger dents or those in hard to reach areas, it’s best to seek professional assistance. Using an aluminum dent puller is a cost-effective and safe way to restore your vehicle’s exterior to its former glory.
Overview of Aluminum Dent Pullers
An aluminum dent puller is a specialized tool used in the automotive industry for removing small dents from aluminum panels. It’s a handheld device that uses suction or adhesive to pull the dent out of the surface, effectively restoring the original appearance of the panel. This type of dent puller is particularly useful for repairing minor damage caused by hail, minor accidents, or simple wear-and-tear.
One advantage of aluminum dent pullers is their ability to work on curved or irregular surfaces, making them suitable for use on vehicle doors, fenders, and hoods. They are also easy to operate and are an affordable alternative to expensive professional repair services. However, they may not be effective for larger or more severe dents, in which case a more advanced repair solution may be necessary.
Overall, aluminum dent pullers offer a convenient and cost-effective way to repair minor dents on aluminum panels, allowing vehicle owners to keep their cars looking great without breaking the bank.
Preparing for the Repair
If you’re looking to repair aluminum dents, using an aluminum dent puller is an excellent choice. But before you start, it’s important to prepare for the repair. To begin, make sure you have the proper safety equipment, such as gloves and eye protection.
Next, clean the area around the dent thoroughly, so the area is free of dirt, grease, and other contaminants that may interfere with the repair process. Once the area is clean, you’re ready to use the aluminum dent puller. Simply attach the puller to the dent and apply pressure until the dent pops out.
You may need to use the tool a few times to work out all the dents, but the process is straightforward and easy. And remember, always follow manufacturer instructions to ensure maximum safety and effectiveness when using an aluminum dent puller.
Inspecting the Dent
When inspecting a dent on your vehicle, it’s important to prepare adequately for the repair process. You can’t simply jump into fixing the dent without assessing the extent of the damage. First, ensure you have access to the back of the damaged area, especially when dealing with dents that aren’t so visible.
Observe the dent’s size, depth, and location. It’s crucial to use the right tools to restore the dent to its initial shape and size. If you’re a DIY enthusiast, you can purchase a dent repair kit to aid in the process.
However, for complex dents, it’s best to seek professional assistance from an auto body shop. Additionally, ensure you have taken pictures of the dent before starting the repair process so you can measure progress in the repair process. Preparing for the dent repair process can ensure you’re successful in restoring your vehicle’s flawless condition.
Cleaning the Area
Before embarking on any home repair project, it’s essential to ensure the area is clean and free of any debris. This is particularly important when preparing for a repair, as any dirt or dust can contaminate the area and affect the quality of the work. To clean the area, start by removing any loose debris, such as rocks, leaves, or twigs.
If there are any plants or shrubs in the way, trim them back to ensure you have enough space to move around. Next, sweep the area and use a wet cloth to wipe down any surfaces that will be repaired. This step may seem tedious, but it can make a significant difference in the outcome of your repair.
By taking the time to clean the area properly, you’ll avoid any unnecessary complications and ensure that the repair is completed to the highest possible standards. Remember, a little bit of elbow grease now can save you a lot of time and money in the long run, so don’t skip this crucial step.
Using the Aluminum Dent Puller
When it comes to fixing dents on your car, using an aluminum dent puller can be a highly effective and simple solution. So, how do you go about using it? First, you need to choose the right size and shape of the puller for the dent you want to remove. Next, you’ll need to attach the puller to the center of the dented area using a strong suction cup.
Then, slowly and steadily pull the handle of the puller until the dent pops back into place. Make sure to keep equal pressure on the puller throughout the process to avoid causing further damage to your vehicle. Once you’ve successfully pulled out the dent, you may need to use some finishing tools to smooth out the surface.
Overall, the aluminum dent puller can be an excellent tool for those seeking an easy and efficient way to fix dents in their cars.
Attaching the Dent Puller
To use the aluminum dent puller, the first step is to attach it to the surface of the dent. This will require finding a flat surface on the vehicle that is close to the dent and placing the suction cup of the dent puller onto it. Next, you need to apply firm pressure to the center of the suction cup and push it all the way down to ensure there is a proper seal.
This creates a vacuum, which creates the suction needed to pull the dent out. The aluminum dent puller comes with a handle that you can use to add extra force, which will help break the suction and pull the dent out further. With a few strong pulls, you should see the dent start to pop back out, leaving you with a smooth surface.
It’s important to use caution and avoid using too much force, as this can cause damage to the surface of the vehicle. By using the aluminum dent puller correctly, you can save time and money on costly repairs, all while restoring your car’s appearance to its former glory.
Pulling the Dent
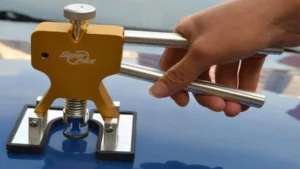
Pulling out a dent from a car can be a frustrating and daunting task, especially when you don’t have the right tools at hand. However, with the aluminum dent puller, you can easily get the job done without breaking a sweat. This tool is specially designed to attach to the dent surface and then pull out the panel to its original shape.
The first step to using the aluminum dent puller is to assess the size and location of the dent. Next, prepare the surface by cleaning and drying it up. Apply the adhesive material, attached to the dent puller, and place the suction pad in the center of the dent.
Push the puller handle down, and as you release it, the dent will pop out. If the dent is still visible, repeat the process until you achieve a smooth surface. With this tool’s efficiency, you don’t have to spend so much time and money at the auto body shop.
You can be your repair specialist, and you’ll be surprised at how easy and achievable it is.
Releasing the Dent Puller
Releasing the Dent Puller is a matter of precision and technique. Using the Aluminum Dent Puller is an easy process, but it requires patience and care to achieve the best results. Once you have attached the puller to the dent with the suction cup, it is essential to apply steady and even pressure to the handle to lift the dent.
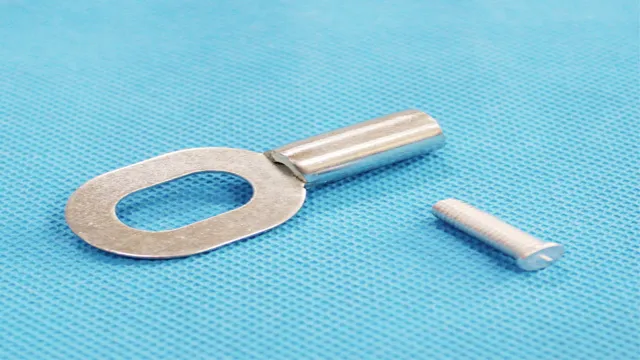
However, removing the puller from the dent needs a lot of attention too. It’s crucial to pull the tab protruding from the plate slowly and consistently to avoid any additional damage to the surface. The key here is not to rush the process and be gentle with the metal.
With a bit of practice, releasing the dent puller will become an easy task, and you’ll soon master the art of restoring the original form to your car.
Finishing the Repair
If you want to know how to use an aluminum dent puller to finish repairing your damaged vehicle, then you’ve come to the right place. Using an aluminum dent puller is a fairly simple process, but it does require some patience and practice to get it just right. To start, you need to clean the surface of the damaged area thoroughly and ensure that it is free from any dirt or debris.
Once you’ve done that, apply the suction cups of the dent puller to the surface of the dent and gently pull back on the handle until the dent pops out. Be sure to repeat this process several times until the dent is completely removed. Finally, inspect the repaired area for any imperfections, and if necessary, make any final adjustments using a finishing hammer.
By following these simple steps, you’ll be able to quickly and easily remove any unsightly dents from your vehicle using an aluminum dent puller.
Smoothing the Area
To complete the repair, the final step is to smooth the area. This involves using sandpaper to smooth out the surface and remove any bumps or rough spots. It’s important to make sure the surface is completely smooth before moving onto the next step, as any imperfections will show through the paint or finish.
Start with a coarse grit sandpaper and work your way up to a finer grit for an ultra-smooth finish. Once the area is smooth, use a damp cloth to remove any dust or debris before proceeding. Now the area is ready for a new coat of paint or finish, and it will look as good as new.
Remember, taking the time to properly smooth the area will ensure a long-lasting and professional-looking repair.
Inspecting the Repair
After inspecting the repair work, it’s time to finish the repair project. Make sure that everything is in good condition and working correctly. Test the systems and appliances to confirm their proper functioning before finishing the project.
A job well done is one that is thoroughly checked and tested. It would be best if you also cleaned the work area after completing the repair work. A cluttered work area is not only inconvenient but also poses a safety hazard.
A clean workspace will allow you to complete your next project quickly and without any accidents. It’s like how an artist cleans their tools after creating a masterpiece. If you want to create another masterpiece, you must clean your tools.
In conclusion, inspecting the repair is just as crucial as finishing the repair. Clean up your work area, test the systems and appliances, and make sure everything is in good condition before ending the project.
Conclusion
In conclusion, using an aluminum dent puller is a breeze! Just attach the suction cup to the dent, pull back and watch as the dent magically disappears before your very eyes. It’s like having a magic wand in your hand (except it’s made of aluminum and doesn’t come with a sparkly cape). So go forth and conquer those pesky dents with your trusty aluminum dent puller – just be sure to resist the urge to yell “Abracadabra!” while you work your magic.
“
FAQs
What is an aluminum dent puller and how does it work?
An aluminum dent puller is a tool used to remove dents from aluminum surfaces. It works by attaching to the surface of the dent and using suction to gently pull the dent out.
Can aluminum dent pullers be used on all types of vehicles?
Yes, aluminum dent pullers can be used on any type of vehicle with an aluminum surface.
Are there any safety precautions that should be taken when using an aluminum dent puller?
Yes, always wear eye protection and gloves while using an aluminum dent puller. Make sure the surface is clean and dry before using the tool.
Can an aluminum dent puller cause damage to the vehicle’s paint or finish?
No, an aluminum dent puller should not cause any damage to the vehicle’s paint or finish if used properly.
Are there any limitations to the size or depth of dents that an aluminum dent puller can repair?
Yes, there may be limitations to the size or depth of dents that an aluminum dent puller can repair. It is best used on smaller dents rather than larger, more complex ones.
How long does it typically take to repair a dent using an aluminum dent puller?
The time it takes to repair a dent using an aluminum dent puller depends on the size and depth of the dent. Smaller dents may take only a few minutes, while larger ones may take several hours.
Can aluminum dent pullers be used by non-professionals or should a professional be hired?
While aluminum dent pullers can be used by non-professionals, it is recommended that a professional be consulted for larger or more complex dents to ensure proper repair and avoid further damage.
