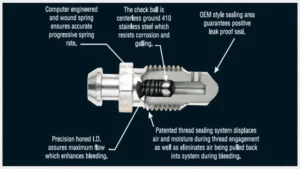
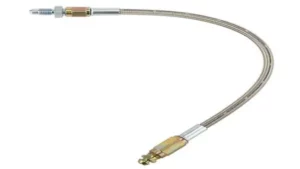
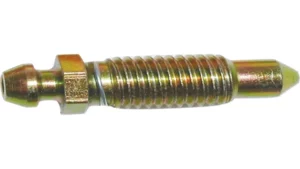
Looking to save money on costly brake repairs and maintenance? You’re in luck! By using a vacuum pump brake bleeder, you can easily and effectively remove air from your vehicle’s brake system, preventing the need for costly trips to the mechanic. But how exactly do you use a vacuum pump brake bleeder? Fear not, as we’ll go through the step-by-step process to ensure your brakes are in tip-top shape. With this handy tool, you can rest assured that your brakes are well-maintained, safe, and smooth, without breaking the bank.
Let’s get started!
What you’ll need
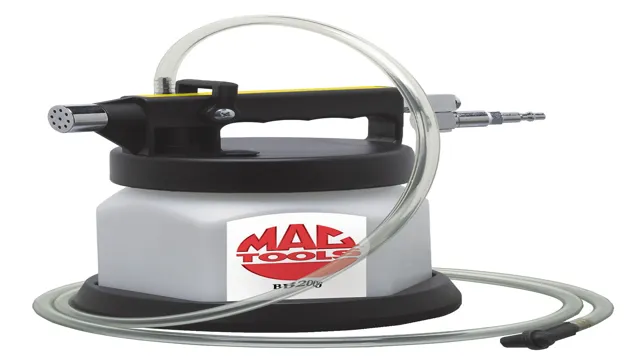
If you’re looking to bleed your brakes using a vacuum pump brake bleeder, there are a few things you’ll need to get started. First and foremost, you’ll need a vacuum pump brake bleeder. You can find them at most automotive stores or online.
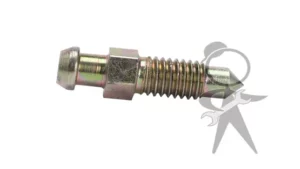
Next, you’ll need brake fluid. Be sure to use the type of fluid recommended by your vehicle’s manufacturer. You’ll also need a wrench to open the bleed screws on your vehicle’s brake calipers or wheel cylinders.
Lastly, it’s a good idea to have a rag or two on hand to clean up any spills or drips. Now that you have all of your materials, you can begin the process of bleeding your brakes using a vacuum pump brake bleeder.
Vacuum pump brake bleeder kit
If you’re looking for an easy and efficient way to bleed the brakes on your vehicle, a vacuum pump brake bleeder kit is a great option. But what exactly do you need to get started? Firstly, you’ll need a vacuum pump that can be used for brake bleeding. There are several different types on the market, but make sure to choose one that is rated for automotive use.
Additionally, you’ll need a brake bleeder kit, which typically includes attachments for the vacuum pump as well as tubing to connect to the bleed screws on your vehicle’s brake calipers. You may also want to have a container for catch the old brake fluid as it is removed. Remember, safety is key when working with brake fluid.
Be sure to wear gloves and safety glasses, and always follow proper procedure. With the right tools and a bit of know-how, you’ll be able to quickly and easily bleed your vehicle’s brakes and ensure optimal performance.
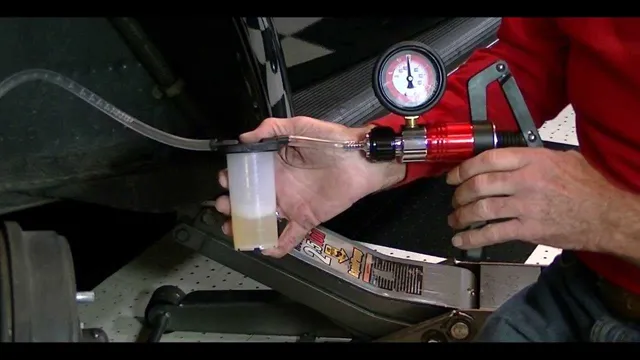
Brake fluid
If you’re going to change or maintain your brake fluid, there are a few things you’ll need before you get started. First and foremost, you’ll need fresh brake fluid, which you can purchase at any auto parts store. It’s important to make sure you choose the correct type of brake fluid for your vehicle, as different types are designed to work with different brake systems.
You’ll also need a brake bleeder kit, which will help you remove air from the brake lines and ensure that the brakes work properly. Finally, you’ll need a wrench or socket set to loosen the brake bleeder screws and access the brake master cylinder. With these tools on hand, you’ll be ready to tackle brake fluid maintenance with confidence.
Remember, it’s always better to be safe than sorry when it comes to your vehicle’s brakes, so take your time and follow the manufacturer’s instructions carefully.
Wrench or pliers
When it comes to fixing things around the house, having the right tools is crucial. One common question is whether you’ll need a wrench or pliers. The answer to this will depend on the specific task you’re performing.
A wrench is a tool used to tighten or loosen bolts and nuts. On the other hand, pliers are used for gripping and turning objects. If you’re working with a plumbing project, you’ll likely need both a wrench and pliers.
A wrench will be useful for tightening pipes and fittings, while pliers can help with turning water valves on and off. When you’re selecting these tools, pay attention to their size – using tools that are too big or small for the job can cause damage. You’ll also want to select tools that are made of durable materials, such as steel, for longevity.
Additionally, having a variety of sizes and types of wrenches and pliers is important, as different projects will require different tools. Overall, whether you need a wrench or pliers will depend on the task at hand. It’s always best to have both on hand, and to select high-quality, durable tools for the job.
Don’t forget to use them safely, and always follow manufacturer instructions to ensure both efficiency and safety.
Preparing your vehicle
If you’re looking to learn how to use a vacuum pump brake bleeder, there are a few things you’ll need to know before getting started. Firstly, it’s important to make sure your vehicle is properly prepared for the process. This means ensuring that the brake fluid reservoir is filled to the correct level, and that the brake system is free from any leaks or other issues.
Additionally, you’ll want to make sure that your vacuum pump brake bleeder is in good condition and has all the necessary components. Once you’ve completed these steps, you’ll be ready to begin the process of bleeding your brake system using a vacuum pump brake bleeder. With a little bit of patience and attention to detail, you can ensure that your brakes are functioning at their best and that your vehicle is safe to drive.
Locate the brake fluid reservoir
Preparing your vehicle to ensure its safety and performance requires knowledge of its different components, including the brake fluid reservoir. To locate it, you need to open the hood of your car and look for a small, translucent white or yellowish container near the master cylinder. The reservoir’s location may vary depending on your car’s make and model, so it’s essential to consult the owner’s manual for specific instructions.
The brake fluid reservoir is essential because it stores the brake fluid that allows your vehicle’s brakes to work effectively. Checking the fluid level and condition regularly can help prevent accidents and save you from costly repairs in the long run. Remember to never open or touch the brake fluid reservoir cap unless you know what you’re doing, as the fluid is toxic and can damage your vehicle’s paint and other components.
Always consult a professional mechanic if you suspect any brake problems, and never take chances with your safety on the road.
Remove the reservoir cap
Before you start any type of vehicle repair or maintenance, it’s important to prepare both your vehicle and yourself. One of the crucial steps in preparing your vehicle is to remove the reservoir cap. The reservoir cap is located on the coolant reservoir and is usually a screw-on cap.
The purpose of the reservoir cap is to keep the coolant from boiling over and to maintain the pressure in the cooling system. If your vehicle has recently been running, wait until the engine cools down before removing the cap. It is also essential to ensure that the coolant level is not too high before opening the cap.
By removing the reservoir cap, you allow the system to release any built-up pressure and prevent any accidental spraying of hot coolant. Always use caution when handling the reservoir cap, as it may be hot and may release hot steam. With this small but significant step in preparing your vehicle, you ensure both your safety and the proper functioning of your cooling system.
Fill the reservoir with brake fluid
When it comes to maintaining your vehicle’s braking system, one of the essential tasks is ensuring the brake fluid reservoir is topped up. As the brake pads wear down, the fluid level in the reservoir drops, making it crucial to keep an eye on it. Before you begin, make sure you have the correct brake fluid for your vehicle, as the wrong type can damage the braking system.
Once you have the correct fluid, locate the brake fluid reservoir, which is usually on the driver’s side of the car, and remove the cap. Then, using a funnel, you can slowly pour the fluid into the reservoir until it reaches the “Max” line. It’s worth noting that brake fluid can be corrosive, so it’s essential to avoid getting it on your skin or paintwork.
With the reservoir filled, you can now test your brakes to ensure they are working correctly. By taking the time to fill the reservoir with the correct brake fluid, you can help keep your brakes in good condition and ensure your safety while on the road.
Setting up the brake bleeder
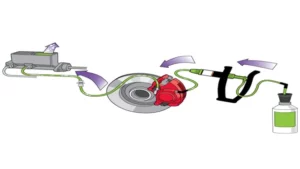
If you’re wondering how to use a vacuum pump brake bleeder, it’s actually quite simple! First, you’ll want to gather all the necessary tools and parts, including the vacuum pump, brake fluid, and bleeder kit. Next, locate the bleeder valve on the brake caliper and attach the provided hose to it. Once the hose is securely in place, connect the other end to the vacuum pump and pump the handle to create a vacuum.
This will draw the old brake fluid and air out of the system, allowing you to replace it with fresh fluid. Keep an eye on the fluid level in the reservoir and continue pumping until you see new fluid coming out of the bleeder valve. Repeat this process on all four calipers, and you’re done! Using a vacuum pump brake bleeder not only makes the process easier and more efficient, but it also ensures that your brakes are working at their best.
Attach the pump to the bleeder valve
The brake bleeder is an essential tool for maintaining your vehicle’s brake system, and setting it up is a relatively simple process. Once you’ve selected the correct bleeder valve for your vehicle, it’s time to attach the pump. Start by ensuring that all connections are secure and leak-free.
Next, attach the pump to the bleeder valve, making sure that the hose is securely attached to both. Once everything is secure, you’re ready to start the bleeding process. Keep in mind that this process requires patience and attention to detail, as air pockets and other issues can arise.
With the pump properly attached, you’re one step closer to ensuring your vehicle’s braking system is in top condition. Don’t forget to test the system thoroughly once you’re finished to ensure that everything is functioning as it should be. Remember, safety always comes first, so if you’re unsure about any aspect of the brake bleeder setup or process, don’t hesitate to seek out professional assistance.
With these steps, you’re ready to tackle brake maintenance with confidence!
Place the drainage container below the valve
When it comes to setting up a brake bleeder, there are a few important steps to follow. One of the most important is to make sure you place the drainage container below the valve. This is crucial because it ensures that any fluid or air that comes out during the bleeding process is caught and contained, rather than spilling out onto the ground.
Without the drainage container in place, you risk making a mess and potentially damaging your vehicle or the surrounding area. So, before you begin the bleeding process, take the time to locate a suitable container and position it appropriately. This might involve using a specialized brake bleeding kit or simply finding a container that fits snugly beneath the valve.
Whatever approach you take, just be sure to double-check that everything is in place before you start opening up the valves to bleed the brakes. By doing so, you can ensure a clean and effective bleeding process that keeps your vehicle running smoothly and safely on the road.
Open the valve
When it comes to setting up the brake bleeder, it is essential to know how to open the valve. First, locate the valve on the brake bleeder and make sure that it is closed. Then, attach the hose from the brake bleeder to the brake caliper or wheel cylinder.
Once the hose is securely attached, you can open the valve using a wrench or other specialized tool. As you do so, be sure to keep an eye on the brake fluid level in the master cylinder. If the fluid gets too low during the bleeding process, it can cause air to enter the brake lines, compromising the braking system’s effectiveness.
With the valve open, you can begin the bleeding process by pumping the brake pedal or manually pressing the brake caliper or wheel cylinder’s piston. This action forces brake fluid through the system and expels any air trapped within. By properly opening the valve and bleeding the brakes, you can ensure the safety and efficiency of your vehicle’s braking system.
Bleeding the brakes
If you’re looking to bleed the brakes on your vehicle, using a vacuum pump brake bleeder can make the process much easier and efficient. To begin, attach the vacuum pump to the brake bleeder valve and open the valve. Next, pump the brake pedal several times until the brake fluid runs smoothly without any bubbles or air.
Tighten the valve and check the brake fluid level. Repeat the process for the remaining brake calipers. Keep in mind that bleeding the brakes can be a messy and difficult task, so it’s important to have the right equipment and take your time.
By using a vacuum pump brake bleeder, you can ensure a thorough and successful brake bleed.
Pump the vacuum pump until you see brake fluid in the tubing
Bleeding the brakes is an essential maintenance task for any vehicle owner. It’s important to ensure that no air is trapped in the brake lines, as this could cause a loss of pressure and potentially lead to brake failure. The process involves using a vacuum pump and a clear tube to draw out any air bubbles that may have formed in the brake lines.
First, locate the brake fluid reservoir and remove the cap. Then, connect the clear tube to the bleed valve, which is usually located on the brake caliper. Pump the vacuum pump until you see brake fluid in the tubing, and then close the valve.
Repeat this process for each brake caliper until all of the air bubbles have been removed and only clear brake fluid is present. Once you’ve completed the process, be sure to check the brake fluid level in the reservoir and top it up if necessary. Keeping your brakes properly bled will ensure that they function correctly and keep you safe on the road.
Remember to always prioritize your safety whenever you’re performing maintenance on your vehicle.
Close the valve and remove the pump
Bleeding the Brakes If you notice that your brakes are feeling spongy or not as responsive as they should be, it may be time to bleed your brakes. Bleeding your brakes is an essential maintenance task that helps ensure the safety and reliability of your vehicle. By bleeding your brakes, you remove any air bubbles that may have become trapped in the brake lines, which can compromise your braking ability.
To bleed your brakes, you’ll need a few tools, including a brake bleeding kit and a wrench. Start by filling the master cylinder reservoir with fresh brake fluid and then locate the bleeder valve on each of the brake calipers. Connect the brake bleeding kit to the bleed valve and open the valve to release the old brake fluid and air bubbles.
You’ll want to repeat this process on each brake caliper until you’ve flushed out all of the old brake fluid and replaced it with fresh fluid. Remember to close the valve and remove the pump when you’re finished. Bleeding your brakes is an easy task that can be done at home, and it’s an important step in keeping your vehicle’s braking system functioning properly.
Repeat with the other brakes
Bleeding the brakes is a crucial step in maintaining your vehicle’s safety and optimal performance. Once you have finished bleeding one brake, it is important to repeat the process with the other brakes. It may seem tedious, but it is worth the effort to ensure that your vehicle is operating smoothly.
The last thing you want is to have a brake fail while driving on the road. So take the time to bleed each brake properly and thoroughly. This will not only help your brakes function better but also prolong their lifespan.
Remember, safety should always be your top priority when it comes to your vehicle. So don’t take any shortcuts and give each brake the attention it deserves.
Wrapping up
In conclusion, now you know how to use a vacuum pump brake bleeder properly. This piece of equipment is a game-changer when it comes to bleeding your brakes quickly and efficiently. Always start by preparing your brake system, connecting the vacuum pump to the bleeder valve, and then proceeding to pump the brake pedal until all air bubbles disappear.
It’s important not to over-pump the brake pedal, as this could lead to other issues. Remember to regularly check the brake fluid level, and keep the bleeders clean to prevent any contamination. By following these steps, you can keep your brakes in top condition and ensure optimal safety on the road.
So, go ahead and try it out, your vehicle will thank you!
Remove the drainage container
After successfully completing the drainage process, it’s time to wrap up by removing the drainage container. This step is essential as it ensures that the container does not contaminate the environment or pose a danger to nearby surfaces. Once the container is removed, dispose of its content safely, and clean and sterilize it as necessary.
It’s important to know that drainage containers should be disposed of in designated facilities to comply with local regulations and prevent ecological harm. As you wrap up, take the time to assess your procedures to identify any areas for improvement and implement the necessary changes. Ultimately, the goal is to execute the drainage procedure safely and efficiently while minimizing any risks.
Replace the reservoir cap
Replacing your car’s reservoir cap may seem like a small, insignificant task, but it can actually have a significant impact on your vehicle’s performance. Over time, the cap can become damaged or worn, which can lead to leaks and pressure loss in the system. This can ultimately lead to overheating and engine damage, which no one wants.
To replace the cap, simply remove the old one and screw in the new one. Be sure to check the manufacturer’s recommendations for the correct type of cap to use. By taking care of this simple task, you can ensure that your car stays running smoothly and avoid costly repairs down the road.
Test your brakes on a safe, flat surface
When it comes to driving, safety should always be a top priority. One of the most important safety features of any vehicle is its brakes. In order to ensure that your brakes are in good working condition, it’s important to test them on a safe, flat surface.
This can help you determine if there are any issues with your brakes, such as poor response time or squeaking. Additionally, testing your brakes can give you peace of mind when driving, knowing that you have a reliable way to stop your vehicle if needed. So, next time you get behind the wheel, take a few moments to test your brakes and make sure that they are working properly.
Your safety is worth it!
Conclusion
In summary, using a vacuum pump brake bleeder is like having a trusty sidekick to help you conquer the daunting task of bleeding your brakes. It’s quick, efficient, and leaves you with a feeling of empowerment knowing that you’ve taken care of maintenance on your own. Just grab your pump, attach it to the brake, and let the magic happen.
Your brakes will be thanking you for a job well done, and you’ll be feeling like a superhero in no time. Happy bleeding!”
FAQs
What is a vacuum pump brake bleeder and how does it work?
A vacuum pump brake bleeder is a tool used to remove air bubbles from the brake system by creating a vacuum which pulls the air out through the bleeder valve. It works by attaching the vacuum pump to the brake bleeder valve and creating a suction that draws the brake fluid and air out of the system.
Can I use a vacuum pump brake bleeder on my car alone?
Yes, you can use a vacuum pump brake bleeder on your car alone, but it would be easier and safer to have someone assist you.
How often should I use a vacuum pump brake bleeder?
You should use a vacuum pump brake bleeder every time you replace your brake fluid or if you notice any issues with your braking system such as sponginess or a soft brake pedal.
How long does it take to bleed brakes with a vacuum pump brake bleeder?
The time it takes to bleed brakes with a vacuum pump brake bleeder varies based on the complexity of the brake system. Generally, it can take between 10 to 30 minutes per wheel to bleed the brakes.
What is the difference between a vacuum pump brake bleeder and a manual brake bleeder?
A vacuum pump brake bleeder uses a vacuum to pull the brake fluid and air out of the system, while a manual brake bleeder uses pressure from the brake pedal to force the fluid and air out.
Do I need to replace the brake fluid after using a vacuum pump brake bleeder?
Yes, it is recommended to replace the brake fluid after using a vacuum pump brake bleeder to ensure that the brake system is free of any contaminants or debris.
Is it safe to use a vacuum pump brake bleeder on ABS brakes?
Yes, it is safe to use a vacuum pump brake bleeder on ABS brakes, but it may require a slightly different technique or process to avoid damaging the ABS unit. It is recommended to consult the vehicle manual or a professional mechanic before attempting to bleed ABS brakes.
