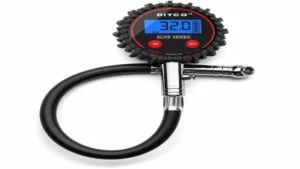
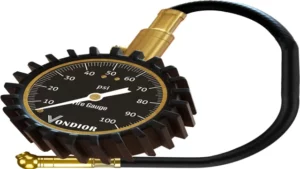
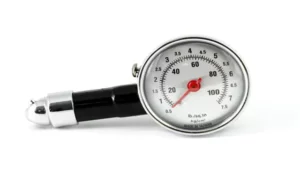
Maintaining the right tire pressure is crucial when it comes to ensuring safety and maximizing fuel efficiency while driving. However, many car owners tend to overlook this vital aspect of car maintenance, which can lead to problems down the road. That’s where the tire pressure gauge pen comes in handy! This little tool accurately measures the air pressure in your car’s tires and helps you maintain them at the recommended levels.
But, are you wondering how to use this gadget correctly? Worry no more! In this comprehensive guide, we will show you how to use a tire pressure gauge pen efficiently and effectively to keep your tires in tip-top shape. Stick around, and we’ll make sure you become a tire pressure gauge pro in no time!
Step 1: Check Your Tire Pressure Gauge Pen
If you want to ensure your car runs smoothly and safely, checking your tire pressure on a regular basis is essential. The best way to do this is by using a tire pressure gauge pen, which is a handy tool that gives you an accurate reading in seconds. So, how do you use one of these pens? The first step is to check the gauge pen itself.
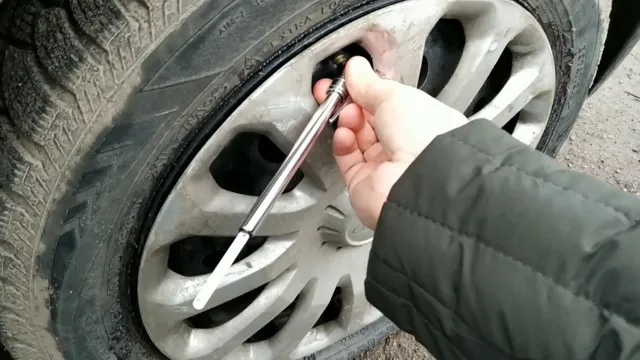
Make sure that it is not damaged or has any signs of wear and tear. Once you have done this, unscrew the cap and remove it from the valve stem. Then, press the pen onto the valve stem firmly and wait for the reading to appear on the gauge.
Compare this reading to the recommended psi for your car and, if necessary, use an air compressor to adjust the tire pressure. Remember, properly inflated tires will not only help you save on fuel costs, but will also ensure maximum safety on the road.
Make sure the gauge pen has enough pressure and the display is working properly.
Checking your tire pressure regularly is crucial for maintaining your vehicle’s performance and safety on the road. The first step in checking your tire pressure is ensuring that your gauge pen has enough pressure and the display is working correctly. A faulty gauge pen can cause inaccurate readings, leading to under or over-inflated tires, which can lead to tire wear irregularities and reduce fuel efficiency.
To make sure your gauge pen is working correctly, you should check the condition of the batteries and the display. The easiest way to do this is by turning on the pen and checking the readings. If the readings seem inaccurate or the display is not working correctly, replace the batteries or consult a mechanic.
Once you have checked and ensured that your gauge pen is in good working condition, you can move on to checking your tire pressure regularly to ensure a smooth and safe driving experience. Remember, by spending a few minutes regularly monitoring your tire pressure, you can save yourself a lot of money in tire replacement and fuel expenses over time.
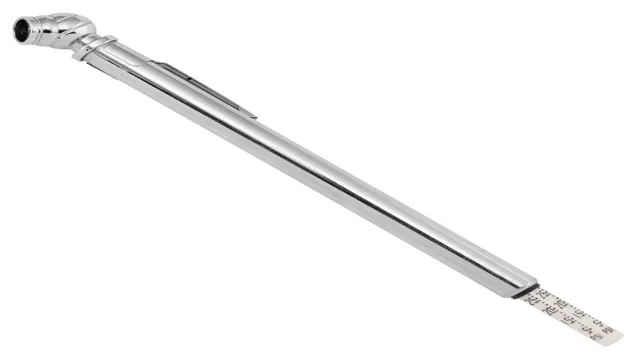
Step 2: Find the Valve Stem
Now that you have your tire pressure gauge pen ready, the next step is to find the valve stem. The valve stem is the small black stem-like structure that protrudes from your tire. It’s where you attach your gauge pen to measure the pressure inside your tire.
You can usually find it in the center of the wheel’s rim. Sometimes, it might be hidden behind a hubcap or a disc brake. If you’re not sure where to find it, don’t worry.
You can consult your vehicle owner’s manual to get a better idea of where the valve stem is located. Once you’ve located the valve stem, remove the cap that covers it and you’re ready to take the measurement. Remember to hold the gauge pen straight onto the valve stem to get an accurate reading.
With practice, you’ll be able to find the valve stem quickly and easily every time.
Locate the valve stem for the tire you want to check. It’s typically black and located on the rim of the tire.
When it comes to checking your tire pressure, the first thing you need to do is find the valve stem. This little black tube is typically located on the rim of the tire and is where you can easily access the air inside the tire. If you’re not familiar with what a valve stem looks like, think of it like a straw that’s poking out of the tire.
It’s important to note that every tire will have its own valve stem, so if you’re checking all four tires, make sure you’re looking in the right spot for each one. Don’t worry if you’re having trouble finding the valve stem at first – it can be a bit tricky if you’re not used to looking for it. Just take your time and look around the rim until you find the little black tube.
Once you’ve located the valve stem, you’re ready to move on to the next step in checking your tire pressure.
Step 3: Remove the Valve Cap
Now that you’ve removed the dust cap, it’s time to remove the valve cap as well. The valve cap protects the valve stem from dirt and other damage, but you need to remove it in order to attach the gauge properly. Gently unscrew the cap and set it aside, making sure not to misplace it.
Be careful not to let any dirt or debris enter the valve stem or the tire while you’re removing the cap. Once the cap is removed, you’re ready to move on to the next step in using a tire pressure gauge pen: attaching the gauge to the valve stem.
Use your fingers to unscrew the valve cap and set it aside in a safe place.
As you get ready to check your tire pressure, the first thing you need to do is to remove the valve cap. Using your fingers, unscrew the little cap and keep it in a safe place so it doesn’t get lost. The valve cap is an essential part of your tire’s air-pressure system, as it helps to prevent dirt and debris from clogging the valve and causing damage.
So, ensure that you don’t misplace it. Think of the valve cap like a tiny shield for your tire’s air-pressure system, keeping the valve protected from any unwanted invaders. You wouldn’t leave your front door open and let the wind and dust blow in, right? That’s the same principle at play here.
By removing the cap, you’re taking the first step towards ensuring a well-maintained tire. So, don’t skip this step, even if it seems like a minor detail. Removing the valve cap is also a perfect time to take a quick look at its condition.
If you see any damage or cracks in the cap, it’s a sign that it’s time to replace it. A damaged valve cap can lead to air leaks, which in turn can result in low tire pressure. Low pressure can cause uneven wear on your tires and reduce your fuel efficiency, not to mention the danger it poses on the road.
In summary, unscrewing the valve cap and setting it aside is a simple but crucial step in checking your tire pressure. It helps ensure that your tire’s air-pressure system is free from debris and damage, and that your tire’s pressure readings are accurate. So, don’t forget to put the cap back on once the pressure has been checked.
Step 4: Press the Gauge Pen onto the Valve Stem
If you want to know how to use a tire pressure gauge pen, then you’ve come to the right place. After understanding how tire pressure impacts your vehicle’s performance, it’s essential to keep the pressure at the recommended level. That’s where a tire pressure gauge pen comes in handy.
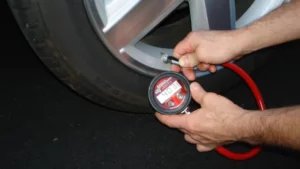
Once you’ve removed the valve cap, place the gauge pen’s head onto the valve stem. Make sure you press it down firmly enough so that it forms an airtight seal. Once that’s done, you’ll get an accurate reading of your tire’s pressure.
The great thing about using a gauge pen is that it’s effortless to use and provides accurate results compared to other pressure testing methods. Remember, keeping your tire pressure within the recommended range ensures safe driving conditions and optimal tire performance.
Insert the gauge pen onto the valve stem and press down firmly until you hear a hissing sound.
One essential step in checking your tire pressure is pressing the gauge pen onto the valve stem. This involves inserting the pen onto the valve stem and pressing down firmly until you hear a hissing sound. It’s important to make sure that the pen is in a straight and upright position before pressing down.
This allows for accurate measurement of the tire pressure. The hissing sound you hear is the air flowing into the gauge, which gives you a reading of the tire pressure. It’s important to pay attention to the hissing sound and the reading on the gauge, as this will determine whether you need to inflate or deflate your tires.
Remember that maintaining proper tire pressure is essential to ensure safety, tire longevity, and overall vehicle performance. So, take your time while pressing the gauge pen onto the valve stem and make sure to do it accurately.
Step 5: Record the Reading
Now that you’ve attached the tire pressure gauge pen to the tire’s valve stem, it’s time to record the reading. Make sure the gauge pen is perpendicular to the valve stem as you take the measurement. Press the gauge pen down firmly onto the valve stem until you hear a hissing sound.
This is air escaping as the gauge pen takes an accurate reading of the tire’s pressure. It’s essential to get an accurate reading, so take your time and double-check that the gauge pen is properly aligned with the valve stem. Once you have the reading, note it down on a piece of paper or your phone, so you don’t forget it.
Remember to repeat this process for all your tires as they may have different pressures. Using a tire pressure gauge pen is easy and straightforward, and it’s an essential tool to ensure your tires are performing optimally.
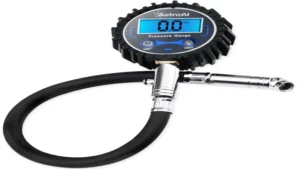
The pressure reading will appear on the digital display. Take note of it for reference.
Now that you’ve successfully connected your blood pressure cuff and started the device, it’s time to take note of the reading. This is an essential step as it allows you and your doctor to monitor any changes in your blood pressure over time and make necessary adjustments to your treatment plan. The digital display on your blood pressure monitor will show the reading, usually displayed in two numbers separated by a slash, for example, 120/80.
The top number is your systolic blood pressure, while the bottom number is your diastolic pressure. Be sure to record the reading accurately, and if you’re measuring your blood pressure at home, make a note of the date and time as well. It’s also a good idea to keep track of any symptoms you may be experiencing or any medication you’ve taken before the reading.
By doing this, you’ll be able to provide your healthcare provider with a comprehensive overview of your blood pressure and make informed decisions about your health.
Step 6: Repeat for Other Tires
Now that you’ve successfully checked the tire pressure on one tire using your handy tire pressure gauge pen, it’s time to repeat the process for the other tires. Start with the tire closest to the one you just checked, and work your way around the vehicle. Remember to take note of the recommended tire pressure for your vehicle and compare it to the reading on the gauge after every check.
If a tire’s pressure is too low or too high, adjust it accordingly. Ensuring all your tires are properly inflated can help improve fuel efficiency, extend the life of your tires, and keep you safe on the road. So, don’t skip this important step and get to work checking those tires with your trusty tire pressure gauge pen!
Check each tire using the same process. Make sure to record the readings for each tire.
Now that you’ve successfully checked the pressure for one tire, it’s time to repeat the process for the rest. Every tire on your vehicle is equally important for your safety, so make sure to check each one individually. Start by unscrewing the valve cap on your next tire and attach the pressure gauge until you hear a brief hiss of air.
Repeat the same steps you did for the first tire, recording the readings as you go. Keep in mind that each tire may have a slightly different pressure, so it’s important to check them all. By doing so, you ensure that your vehicle remains stable, fuel-efficient, and most importantly, safe on the road.
Once you’ve completed this step, you can move onto other tire maintenance tasks or hit the road with the confidence that your tires are properly inflated and ready to roll.
Step 7: Inflate or Deflate as Needed
When it comes to using a tire pressure gauge pen, the final step is to inflate or deflate the tire as needed. For accurate and safe driving, it’s crucial to have the right amount of pressure in your tires. The ideal tire pressure is typically specified in the vehicle owner’s manual or on a sticker located on the driver’s side door jamb.
Once you have the reading from the tire pressure gauge pen, compare it to the recommended pressure and adjust your tires accordingly. To inflate your tire, insert the air hose into the valve stem and add air until you reach the recommended pressure. If you need to deflate your tire, use the valve stem core tool to remove the valve core and gently press down on the tire’s valve stem to release the air.
Remember to replace the valve core before re-inflating the tire. With the help of a tire pressure gauge pen, you can make sure your tires are properly inflated, providing a safer and more comfortable driving experience.
If the tire pressure is below or above the recommended range, inflate or deflate the tire as necessary.
When it comes to tire maintenance, ensuring that your tires are properly inflated is key to a smooth and safe ride. If you notice that your tire pressure is below or above the recommended range, don’t hesitate to take action. To inflate or deflate your tires, you’ll need an accurate tire pressure gauge and a tire pump.
If your tire pressure is too high, use the tire gauge to let some air out until it falls within the recommended range. Similarly, if your tire pressure is too low, use the tire pump to add more air until it reaches the right pressure. Be sure to check the tire pressure regularly and adjust as needed to ensure optimal performance and safety on the road.
Remember, properly inflated tires can extend their lifespan, improve fuel efficiency, and reduce the risk of a blowout. Don’t neglect this simple but important maintenance task and keep your tires rolling smoothly.
Conclusion
Well, now that you’re equipped with a trusty tire pressure gauge pen, you’re ready to retire those instincts of guessing and eyeballing tire pressure. With a tire gauge pen, you’ll have the precision of a scientist and the confidence of a pro. It’s as easy as removing the cap, pressing the pen onto the valve stem, reading the measurement, and nodding your head in satisfaction.
So go ahead, be the envy of your friends and impress your mechanic with your newfound tire pressure knowledge. And if anyone asks, just tell them you’re a tire whisperer now. Happy gauge-ing!”
Using a tire pressure gauge pen is a simple process that can save you a lot of headaches and money in the long run.
Using a tire pressure gauge pen is a breeze, and it could save you a lot of headaches and money in the long run. Once you’ve checked your tire pressure, and you’ve found that it’s too high or too low, it’s time to inflate or deflate your tires as needed. You might be wondering how you can do this, and the solution is quite simple.
If your tires are overinflated, you can release air using a tire valve tool until you reach the recommended pressure. On the other hand, if your tires are underinflated, you can add air until you reach the recommended pressure. Keep in mind that inflating your tires too much or too little could result in poor handling and reduced fuel economy, so it’s crucial to follow the recommended tire pressure range for your vehicle.
By using a tire pressure gauge pen and keeping your tires at the right pressure, you’ll extend the life of your tires, save money on fuel, and avoid costly repairs in the future.
FAQs
What is a tire pressure gauge pen?
A tire pressure gauge pen is a handheld device used to measure the air pressure in tires.
How do I use a tire pressure gauge pen?
To use a tire pressure gauge pen, remove the cap and press the gauge onto the tire valve stem. The gauge will read the air pressure and display it on the screen.
When should I use a tire pressure gauge pen?
It is recommended to use a tire pressure gauge pen at least once a month to ensure your tires are properly inflated. It is also important to use it before long trips or when you notice a change in handling or fuel efficiency.
How do I know what pressure to set my tires at?
The recommended tire pressure can be found in your vehicle’s owner’s manual or on the tire information placard located on the driver’s side door jamb. You can also consult with a professional mechanic or tire specialist.
What are the benefits of using a tire pressure gauge pen?
Using a tire pressure gauge pen can help improve vehicle handling, fuel efficiency, and tire life. It can also improve safety by reducing the risk of blowouts or accidents due to underinflated tires.
Can a tire pressure gauge pen be used on any type of tire?
Tire pressure gauge pens can be used on most tires, including car, truck, motorcycle, and bicycle tires. However, it is important to ensure the gauge is compatible with the valve type on your specific tire.
How do I maintain my tire pressure gauge pen?
To ensure accuracy and longevity, it is recommended to store your tire pressure gauge pen in a cool, dry place and to calibrate it periodically. Check the manufacturer’s instructions for specific maintenance tips.
