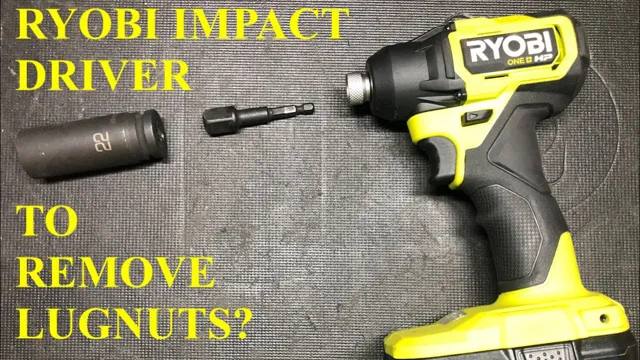
Have you recently acquired a Ryobi Impact Driver and are unsure how to use it effectively? Look no further! This powerful tool is designed to deliver high torque for tough applications and requires proper handling to achieve the desired results. In this blog, we will guide you through the steps to use a Ryobi Impact Driver like a pro. Just like a chef uses the right knife for specific tasks, using the correct bit for your project can make all the difference! We’ll provide tips and tricks for choosing the right bit and adjusting the settings on your impact driver to maximize efficiency.
So, let’s gear up and get started!
Step 1: Familiarize Yourself with the Impact Driver
When it comes to getting into DIY projects and home repairs, having the right tools is crucial. One tool that can make a big difference is the Ryobi impact driver. If you’re new to using one, the first step is to familiarize yourself with it.
Take some time to read the instruction manual and do some practice drills before diving into a project. Ryobi impact drivers are powerful tools that can make quick work of tough fastening jobs, but they also require some knowledge to use safely and effectively. With some practice and a bit of knowledge, you’ll be well on your way to mastering the art of how to use a Ryobi impact driver.
Unboxing the impact driver
When unboxing your new impact driver, the first thing you should do is familiarize yourself with it. Take some time to read the instructions manual that comes with it, and look at all the different parts of the tool. Make sure you know how to insert and remove the battery, adjust the speed settings, and switch between forward and reverse modes.
If there are any safety features, like a trigger lock or a belt clip, make sure you know how to use them properly. Get a feel for the weight and balance of the tool in your hand. This will help you when it comes time to use it for your next project.
By taking the time to learn about your new impact driver, you’ll be able to use it more efficiently and effectively. Plus, you’ll avoid any potential accidents or mishaps that could occur from not using it correctly.
Identifying the components
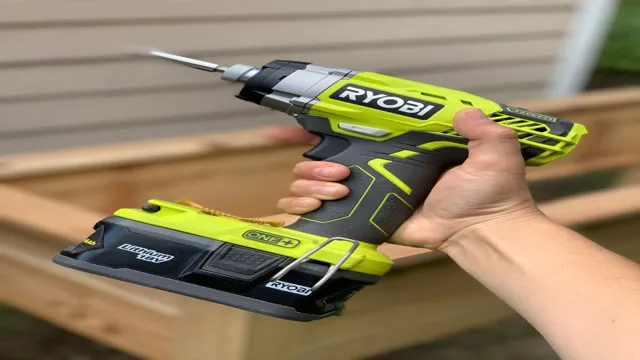
Before diving into the components of your impact driver, it’s important to become familiar with the tool itself. An impact driver is a type of power tool that is mainly used for loosening or tightening screws and bolts. It has a unique mechanism that uses rotational force and concussive blows to remove or insert screws quickly and with more power than a regular drill driver.
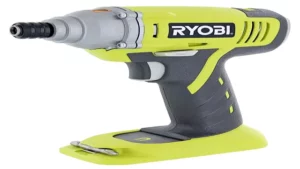
The tool typically has a pistol grip handle, with a trigger and speed control, a chuck adapter to hold the bits, and a motor that powers the rotational force. Understanding how your specific impact driver operates and familiarizing yourself with its features will make identifying its individual components easier. By taking the time to get to know your impact driver, you’ll be able to use it more efficiently and safely, and ultimately get better results out of your DIY projects.
Step 2: Preparing the Driver for Use
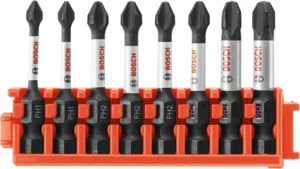
When it comes to using a Ryobi impact driver, there are a few steps you need to take to prepare it for use. Firstly, make sure you have the appropriate bits for the task at hand. The impact driver can only function effectively with the right bits, so check the manufacturer’s instructions to find out which ones are suitable.
Once you have the right bits, attach them to the driver by inserting them into the chuck and tightening it firmly. It’s important that the bits are secured tightly, otherwise they can come loose during use and cause damage or injury. Finally, check the battery to ensure it’s fully charged before using the impact driver.
A low battery can negatively affect the driver’s performance, so it’s best to be fully prepared before starting your project. With these steps, you’re now ready to use your Ryobi impact driver efficiently and safely.
Inserting the battery
To begin using your driver, you’ll need to insert the battery. This might seem like a simple step, but it’s important to get it right to ensure your driver works correctly. First, locate the battery compartment on the driver.
It’s usually on the bottom or back of the tool. Once you’ve found it, open the compartment and insert the battery. Make sure the battery is inserted in the proper orientation, as indicated by the markings on the battery and tool.
Once the battery is in place, close the compartment securely. It’s important to note that you should always use the correct battery type and size recommended by the manufacturer for your driver to work properly and safely. By following this simple step, you’ll be ready to use your driver in no time!
Attaching the bit
Now that you’ve got your impact driver out of the box and have familiarized yourself with its parts, it’s time to get it ready for use. The first step in preparing the driver is to attach the bit securely. Most impact drivers come with a quick-release chuck that allows you to easily swap out bits.
To attach the bit, simply insert it into the chuck and twist it to lock it in place. Make sure it’s snug and won’t come loose during use. If you’re not sure which bit to use, refer to the project instructions or ask someone with more experience.
Remember, choosing the right bit is crucial to achieving the desired outcome. Lastly, always wear protective gear like gloves and eyewear when using an impact driver, for added safety. With the bit securely attached and all safety precautions in place, you’re now ready to start your project with your trusty impact driver.
Step 3: Using the Impact Driver
Now that you have your Ryobi impact driver and the right bit attached, it’s time to put it to work. Using an impact driver is a breeze, and it can save you time and energy when you need to fasten screws or bolts. First, hold the driver firmly with both hands and align the bit with the screw or bolt head.
Next, apply steady pressure to the trigger and watch as the driver automatically begins to pulse, delivering quick bursts of force to the fastener. Be sure to apply enough pressure to keep the driver engaged with the workpiece, and let the tool do the work for you. You’ll feel the impact driver kick lightly in your hand with each pulse, and you’ll know you’re making progress.
Repeat the process until the fastener is fully seated or loosened. With practice, you’ll quickly get the hang of using your Ryobi impact driver and wonder how you ever managed without it.
Setting the torque
Once you have chosen the correct drill bit and inserted it into the impact driver, the next step is to set the torque. Torque simply refers to the twisting force of the drill, which is important to get the job done correctly. Most impact drivers come with multiple torque settings, so it is important to choose the appropriate one for your specific task.
The torque setting will depend on the size and type of screws you are using. For small screws, a lower torque setting will suffice, while larger screws will require a higher setting. It’s important to use caution when setting the torque, as too much force can damage the screw or even strip the material you are working on.
Using the right amount of torque will ensure that the screw is securely installed without causing any damage to the surrounding material.
Understanding the speed options
When it comes to using an impact driver, understanding the speed options can make a big difference in the success of your project. Most impact drivers come with multiple speed settings, including high and low. Using the right speed setting can mean the difference between a smooth insertion and a stripped screw.
For instance, if you are working with soft materials, such as drywall, it’s best to use a lower speed setting to prevent overdriving or damaging the material. However, if you’re working with harder materials like hardwood or metal, use the higher speed setting to ensure the screw goes in smoothly and efficiently. Remember, always pay attention to the material you’re working on and adjust the speed setting accordingly.
By doing so, you’ll get the most out of your impact driver every time.
Drilling with the impact driver
When it comes to using an impact driver for drilling, there are a few key things to keep in mind. First and foremost, you need to make sure you have the right type of bit for your project. Impact drivers work best with hex-shanked bits, so be sure to have those on hand.
Once you have your bit secured, you’ll want to position it carefully on your work surface and make sure it’s perfectly straight before you begin drilling. When you’re ready to go, start slow to get a feel for the tool, gradually increasing speed as you go. Remember, the impact driver works by applying bursts of torque, so you don’t need to push down too hard.
And always be sure to wear eye protection and other safety gear while using your impact driver. With a little practice, you’ll quickly become comfortable using this powerful tool to make quick work of your drilling tasks.
Step 4: Safety Precautions
When it comes to tools, safety is always a top priority. Before using your Ryobi Impact Driver, it’s important to take certain safety precautions to avoid injuries or accidents. First and foremost, make sure to wear appropriate protective gear such as safety goggles and earplugs.
Additionally, avoid using damaged or worn-out bits or accessories. Keep a firm grip on the tool and always check your surroundings before beginning a project. If you need to make any adjustments or repairs, be sure to turn off and unplug the tool first.
Following these safety tips will help ensure that you can use your Ryobi Impact Driver effectively and without any harm to yourself or others.
Wearing protective gear
Protective gear is an essential safety measure, perhaps the most crucial one, when indulging in activities that entail the risk of injury. This gear can range from helmets to gloves to knee and elbow pads, depending on the specific activity in question. For instance, if you’re cycling, a helmet is non-negotiable.
If you’re handling tools at a construction site, gloves are a must. Even if the activity you’re pursuing seems harmless, like skating or skateboarding, protective gear can go a long way in minimizing the damage of potential falls. Always ensure that the protective gear you choose is of high quality and fits well.
Wearing improperly sized gear can cause more harm than good during an accident. It might be tempting to skip out on protective gear, but it’s always advisable and safer to prioritize your safety.
Avoiding hazards
Safety Precautions When it comes to avoiding hazards, the best course of action is always prevention. Taking the necessary safety precautions can significantly reduce the chances of accidents or injuries happening. It’s important to be aware of potential hazards in your environment and take steps to minimize the risk.
This can include wearing protective gear such as helmets or safety goggles, properly maintaining equipment, and following established safety protocols. Remember, accidents can happen to anyone, so it’s crucial to stay vigilant and take safety seriously. By prioritizing safety, you can protect yourself and those around you from harm, and prevent potentially dangerous situations from occurring.
Step 5: Maintenance and Care Tips
After using your Ryobi impact driver for various projects, it’s vital to care for it properly to ensure its longevity. Firstly, make sure to clean the tool frequently using a dry cloth to remove dirt and debris. Additionally, lubricate the driver’s motor and bearings occasionally to avoid wear and tear while in use.
Secondly, check the battery’s charge regularly, as an empty battery can damage the motor of your Ryobi impact driver. Hence, always store the battery in a dry and cool place to increase its lifespan. Finally, keep the driver in a sturdy case or a tool bag for proper storage and transportation.
By following these tips, you can use your Ryobi impact driver efficiently and get the best possible performance.
Cleaning the driver
When it comes to maintaining your golf driver, cleaning it regularly is essential to keep it in its best shape. Dirt, grass, and sweat can accumulate on your driver, causing it to lose grip and performance. To clean your driver, you will need a soft cloth, warm water, and mild soap.
Avoid using harsh chemicals and abrasive tools that can damage the club. Gently wipe the driver head and shaft with a damp cloth, and if necessary, use soap to remove stubborn stains. Rinse the cloth and wipe off any remaining soap residue.
Once you have cleaned your driver, store it in a dry place to prevent rust. Following these maintenance and care tips will help prolong the life of your golf driver and ensure optimal performance on the course.
Storing the impact driver properly
When it comes to storing your impact driver, it’s important to keep it in a clean and dry place where it won’t be exposed to any corrosive materials or moisture. This will help prevent rust and other damage to the tool. Additionally, you should keep the driver in its original case or a protective sleeve to help prevent any scratches or dings.
When it comes to maintenance and care, regularly wiping down the tool with a soft cloth can help keep it clean and in good working condition. It’s also important to inspect the driver regularly for any signs of wear and tear, such as loose screws or a damaged chuck. By taking proper care of your impact driver and storing it correctly, you can help prolong its lifespan and keep it working at its best for years to come.
Conclusion
In conclusion, using a Ryobi impact driver is like unleashing a tiny but mighty superhero onto your DIY projects. With its power and precision, it can easily tackle any stubborn screw or bolt with ease. But like any superhero, you must handle it with care and respect.
Use the proper bits and settings, and don’t forget to charge its battery. With the Ryobi impact driver by your side, you’ll be a DIY master in no time. As they say, with great power comes great responsibility.
..and great results.
“
FAQs
What is a Ryobi impact driver and how does it work?
A Ryobi impact driver is a powerful tool used to drive screws, bolts, and nuts. It works by using a rotating hammering motion to deliver much higher torque than a regular drill.
Can a Ryobi impact driver be used for drilling holes?
Yes, a Ryobi impact driver can be used for drilling holes in wood, plastic, and metal with the right drill bit attachment.
What kind of projects would a Ryobi impact driver be useful for?
A Ryobi impact driver is useful for a wide range of projects, including building furniture, installing cabinets, framing walls, and construction work.
What are the advantages of using a Ryobi impact driver over a regular drill?
The main advantages of using a Ryobi impact driver over a regular drill include higher torque, faster driving speed, and less strain on the user’s hand and wrist.
How do I choose the right Ryobi impact driver for my needs?
Consider factors such as the size of the project, the type of materials you will be working with, and your budget. Look for features such as variable speed control, comfortable grip, and a long battery life.
What are some safety tips for using a Ryobi impact driver?
Always wear eye protection, avoid loose clothing or jewelry that could get caught in the tool, and use the appropriate size and type of driver bit for the job.
How do I maintain my Ryobi impact driver?
Keep it clean and free of debris, store it in a dry place, and follow the manufacturer’s recommended maintenance schedule for the battery and motor.
