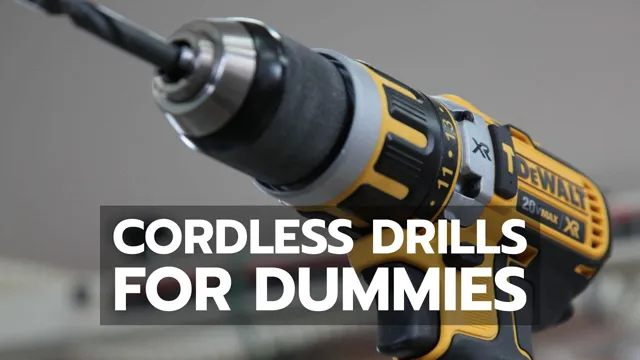
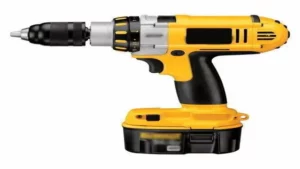
Welcome to the world of power tools! As a beginner, using a cordless drill can feel intimidating. From the different settings to the safety precautions, it can seem overwhelming. But fear not, even if you are a dummy when it comes to cordless drills, this blog is here to guide you through the basics.
Think of a cordless drill as your new best friend. Like any friendship, it takes some time to get to know each other and become comfortable. But once you understand the ins and outs of your cordless drill, it can make any DIY project a breeze.
Before jumping straight into operating your cordless drill, it’s essential to understand how to safely handle the tool. It may not look dangerous, but it can cause serious injury if not used correctly. Don’t worry, we’re here to walk you through the safety basics.
Once you feel confident with the safety aspects, it’s time to start drilling! We’ll cover the different types of drill bits, how to change them, and what settings you should use for different materials. With our help, you’ll be able to drill like a pro in no time! Whether you’re a beginner or have some experience with power tools, this blog will teach you everything you need to know about using a cordless drill. Let’s get to work!
Safety First
If you’re new to using a cordless drill, it’s crucial to start with safety first. Always wear safety glasses to protect your eyes from debris and sawdust. Additionally, avoid wearing loose clothing or jewelry, as they can easily get caught in the drill bit.
Next, before starting your project, make sure your drill is fully charged. You wouldn’t want your drill to lose power halfway through a job, causing the bit to jam and potentially injuring you. Finally, be sure to select the right bit for your project.
Using the wrong bit can result in a less efficient job and potentially damage your drill. By following these safety tips and taking the time to get comfortable with your cordless drill, you’ll be well on your way to mastering this essential tool.
Wear Eye and Ear Protection
When it comes to safety, it’s better to be proactive than reactive. That’s why it’s essential to always wear eye and ear protection when engaging in activities that present a risk of injury. Whether you’re working with power tools, shooting at the range, or attending a loud concert, protecting your senses should be your top priority.
Your eyes and ears are precious, and when damaged, they can lead to permanent disabilities and health conditions. So, invest in good quality earplugs and safety glasses, and make sure you wear them every time. Trust us, it’s better to be safe than sorry.
Secure the Workpiece
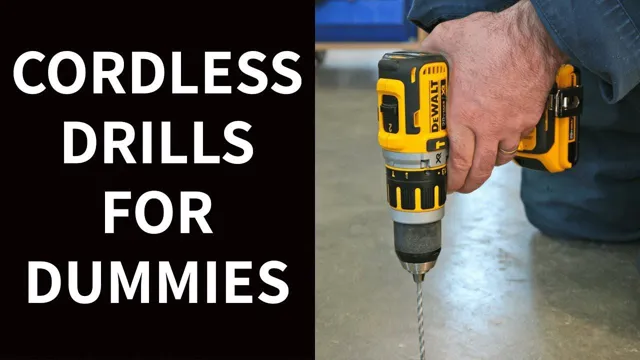
When working with power tools, it’s important to always prioritize safety. One of the most crucial steps in staying safe is to properly secure the workpiece before beginning any cutting or drilling. This not only ensures your own safety but also the accuracy and quality of your work.
There are different methods for securing the workpiece, depending on the tool being used. For example, when using a table saw, it’s best to use a specialty jig or clamps to hold the wood in place, while a handheld drill often requires a vice grip. By taking the time to properly secure your workpiece, you’ll reduce the risk of injuries, mistakes, and wasted materials.
Remember, safety should always be your first priority when working with power tools.
Use Clamps or a Vice
When working with tools or materials, safety should be the top priority. One way to ensure that you are working safely is to use clamps or a vice. These tools can be used to hold objects securely in place, preventing them from moving or slipping while you are working on them.
When you use clamps or a vice, you have both hands free to manipulate the object and your tools, reducing the risk of injury. Additionally, if you are using power tools such as saws or drills, clamping the object in place can help to prevent kickback which is a common cause of injury. It’s important to choose the right type of clamp or vice for the job and to ensure that it is properly secured before you begin working.
By taking these simple steps, you can help to ensure that you are working safely and reduce the risk of accidents or injuries.
You May Also Love:
Getting Familiar with Your Drill
If you’re new to DIY projects and are wondering how to use a cordless drill for dummies, don’t worry, it’s not as complicated as it may seem. The first step is to get familiar with your drill. This means reading through the instructions that came with it, which will describe what each part does, how to charge it, and any safety precautions you should take.
Once you’ve got a good understanding of how it works, practice with some scrap wood or other materials to familiarize yourself with the different settings and speeds. Make sure you wear eye protection and keep the drill straight and stable while in use. With a little bit of practice, you’ll become a pro in no time.
Remember, using a cordless drill is all about technique, so take your time, be safe, and have fun!
Charge the Battery
When you first get your drill, it’s important to familiarize yourself with it before diving into any projects. One of the first things you need to do is charge the battery. Most drills come with a rechargeable battery that needs to be charged completely before use.
To ensure longer battery life, it’s recommended to fully discharge the battery before recharging it again. Once the battery is fully charged, you’re ready to start using your drill. It’s important to note that different drills have different battery lives, so make sure you read the manual to understand how long your drill can last on a single charge.
By taking this step, you’ll be able to use your drill without any hiccups and prevent any potential damage to the battery. So go ahead, plug in your drill, and let it charge up!
Attach the Drill Bit
When it comes to the world of drilling, one of the most important steps is attaching the drill bit. This may seem like a simple task, but it can make or break the success of your drilling project. Before getting started, it’s essential to understand the type of drill bit you need for the task at hand, as each bit is designed for specific materials and projects.
Once you have your drill bit, it’s time to attach it to the drill chuck. Make sure the drill is turned off and the chuck is fully open before inserting the bit. Align the flat side of the bit with the jaws of the chuck, then tighten the chuck until the bit is secure.
You can do this by holding the drill bit in place with one hand and using the other hand to turn the chuck clockwise. Once the bit is in place, give it a gentle tug to ensure it’s secure before beginning your drilling project. With these simple steps, you are on your way to becoming a pro-driller and accomplishing your drilling tasks with ease.
Adjust the Clutch Settings
If you’re new to using a drill, getting familiar with the clutch settings is an essential step. The clutch is a feature that controls the amount of torque delivered to the drill bit. By setting the clutch correctly, you can ensure that you’re using the right amount of power for your specific drilling task.
First, you’ll want to locate the clutch ring on the chuck of your drill. This ring will typically have numbers or symbols that represent different torque settings. For example, a setting with the image of a screw would be appropriate for driving screws into wood while a higher number setting would be better for drilling through metal.
Play around with the clutch settings to get a feel for the level of power your drill is exerting. With practice, you’ll be able to adjust the clutch with ease and complete your drilling tasks with precision.
Choose the Right Speed
When it comes to drilling, choosing the right speed is crucial for achieving the desired results. Every drill comes with different speed settings, which can take a little time to get used to, but once you’ve got the hang of it, you can complete your drilling tasks quickly and effectively. Before you start drilling, make sure to adjust the speed according to the material you’re drilling into.
Hard materials require slower speeds, while softer materials need faster speeds to prevent the drill bit from getting jammed. Generally, it’s best to start with a low speed and gradually increase it until you find the right pace. The keyword for this post is “drilling,” which is a crucial aspect of using a drill in any DIY or professional project.
By mastering the speed settings of your drill, you can ensure accuracy and excellence in your work.
Drilling Techniques for Beginners
If you’re new to the world of DIY, figuring out how to use a cordless drill can be intimidating. But with a bit of practice, you’ll be drilling like a pro in no time. The first step in using a cordless drill is to make sure you have the right bit for the job.
For example, if you’re drilling into wood, you’ll want to use a wood bit, whereas if you’re drilling into metal, you’ll need a metal bit. Once you have the right bit, insert it into the chuck of the drill and tighten it securely. Next, adjust the torque setting on the drill to match the level of resistance you expect to encounter during the drilling process.
Finally, place the tip of the bit against the surface you want to drill and squeeze the trigger. As you drill, keep the drill perpendicular to the surface to ensure a straight hole. With just a bit of practice, you’ll soon be using your cordless drill with confidence.
Start with a Pilot Hole
If you’re new to drilling holes, it’s important to start with a pilot hole. A pilot hole is a small hole that you drill before you drill a larger hole. It’s like a guide hole that helps the larger drill bit stay on track.
The size of the pilot hole depends on the size of the larger hole you need to drill. A good rule of thumb is to use a bit that’s about a quarter of the size of the larger bit. Starting with a pilot hole can make your drilling experience much easier and safer.
Without a pilot hole, your larger bit may wander and create an uneven hole. This can be especially hazardous if you’re drilling into something like metal or concrete. By creating a pilot hole, you’ll have more control over your drill and be able to create a precise, clean hole.
So, next time you’re about to tackle a drilling project, don’t forget to start with a pilot hole. It may seem like an extra step, but it’s a crucial one that can save you time and frustration in the long run. Happy drilling!
Align the Drill Bit
Drilling Techniques for Beginners: Align the Drill Bit If you’re just starting out with drilling, it’s crucial to master the basics. One important technique to focus on is aligning the drill bit. A misaligned drill bit can cause all sorts of issues, including uneven or angled holes, damage to your workpiece or drill bit, and even injury.
To ensure proper alignment, start by selecting the right drill bit for your project and securing it tightly in your drill. Then, hold your drill perpendicular to the work surface, making sure the bit is directly over the spot where you want to drill. As you start to drill, maintain a firm grip on both the drill and the workpiece, keeping the bit straight and steady.
A good way to check your alignment is to periodically stop drilling and check the angle of the hole. If it seems off, adjust your grip or the angle of your drill until you get it right. By mastering this fundamental technique, you’ll be well on your way to becoming a skilled driller!
Use a Steady Hand
If you’re new to drilling, the first key to success is to keep a steady hand. It can be tempting to rush through the process and just get the job done quickly, but taking your time and ensuring that your hand is steady will make a world of difference in the accuracy of your holes. Start by finding a comfortable position where you can lock your elbow against your body for stability.
Then, make a small indentation in the center of the spot where you want to drill, using a center punch or sharp nail to guide the drill bit. Finally, start drilling slowly, using even pressure and making sure to keep the drill bit perpendicular to the surface. With practice, you’ll soon be able to drill perfect, straight holes every time.
So go ahead and take your time, and remember to keep your hand steady!
Control the Depth of the Hole
As a beginner, controlling the depth of the hole can be a bit tricky when using a drill. However, with the right drilling technique, it’s possible to achieve the desired hole depth. One useful technique is the use of a depth stop, which is an accessory designed to regulate the depth of the hole.
The depth stop is attached to the drill, and it helps prevent the drill bit from going deeper than required. Another technique is to use markings on the drill bit to guide you on when to stop drilling. To do this, place a piece of tape on the drill bit to mark the desired depth.
As you drill, the tape will indicate when you’ve achieved the required depth. These techniques are simple yet effective ways to control the depth of the hole when using a drill. By applying them, you can be confident that your holes will be of the right depth.
Using Your Drill for Different Tasks
If you’re a newbie to DIY or just inherited a cordless drill from a relative, you might be confused about how to get the most out of it. Fortunately, using a cordless drill for dummies is easier than you might think. The first step is to get familiar with the different types of bits and accessories available.
For example, if you’re drilling into wood, you’ll want to use a spade bit, while a masonry bit is best for drilling into brick or concrete. Additionally, make sure to adjust the clutch setting on your drill to avoid overdriving screws or damaging material. Don’t be afraid to experiment and try out different attachments like sanding pads or wire brushes to add versatility to your tool.
With a little practice, you’ll soon find that using a cordless drill is a breeze, and you’ll be well on your way to tackling any DIY project that comes your way.
Driving Screws
When it comes to construction or home improvement projects, driving screws is a task that cannot be avoided. Thankfully, with the use of a drill, this task can be accomplished quickly and efficiently. However, not all drills are created equal.
Some are better suited for driving screws than others. When selecting a drill, look for one with a keyless chuck, which allows for easy one-handed bit changes. Additionally, choose a model with variable speed control to ensure the screws are driven at the proper speed without damaging the surface.
A few tips for driving screws with a drill include selecting the correct size bit, making sure the drill is set to the proper direction, and positioning the drill perpendicular to the surface. With a little practice and the right equipment, driving screws can be a breeze!
Mixing Paint and Adhesives
When it comes to DIY projects, your drill is a versatile tool that can help you accomplish a variety of tasks. One of those tasks is mixing paint and adhesives. While it may seem odd to use your drill for something other than drilling holes, it can actually save you time and effort.
By attaching a stirring attachment to your drill, you can easily mix paint or adhesive without having to do it manually, which can be quite tiring. Plus, the combination of the high-speed of your drill and the stirring attachment can provide an even and thorough mix that you may not be able to achieve by hand. If you’re looking to streamline your DIY projects and make them more efficient, consider using your drill for mixing paint and adhesives.
It’s a simple but effective solution that can save you both time and energy.
Sanding and Polishing with Attachments
Sanding and polishing may not be the most exciting tasks, but they can be made much easier with the right attachments for your drill. By using your drill for multiple tasks, you can increase its versatility and save yourself from having to purchase multiple tools. Sanding attachments can help you achieve a smooth finish on wood, metal, and even automotive surfaces.
Polishing attachments usually consist of a foam or wool pad that can bring a nice shine to car surfaces, metal objects, and more. It’s important to note that when using these attachments, you’ll want to start with a low speed to avoid damaging the surface, and gradually increase the speed as needed. With a little practice, you’ll be able to achieve professional-grade results in no time!
Troubleshooting Tips for Common Problems
If you’re a beginner when it comes to using a cordless drill, don’t worry! With a little bit of practice and some troubleshooting tips, you’ll be using your new power tool like a pro in no time. One common issue that users experience is a drill bit that keeps slipping out of the chuck. This can be frustrating, but the solution is usually simple.
Make sure the bit is seated properly in the chuck and tighten it securely. If you’re still having issues, try cleaning the chuck and bit to ensure that there isn’t any debris causing the slipping. Another common issue is a battery that won’t hold a charge.
This can typically be resolved by fully charging and then fully discharging the battery a few times to condition it. Additionally, check to make sure that the battery is compatible with your drill and that it’s properly inserted. By keeping these troubleshooting tips in mind, you’ll be able to confidently use your cordless drill for any DIY project.
Battery Not Charging
If your battery is not charging, it can be frustrating and inconvenient, especially if you rely on your device or laptop to get work done. Fortunately, there are several troubleshooting tips that can help you resolve common problems. First, check that your power cord and adapter are working properly and connected securely.
If the cord or adapter is damaged, replace it with a new one. Next, make sure that your settings are set to allow charging when the device is plugged in. If this doesn’t work, try resetting the device by turning it off and on again.
If none of these steps work, you may need to replace the battery or seek professional help. Remember, regularly charging your device and taking care of the battery can also help prevent future charging problems. With a little bit of patience and effort, you can get your device up and running again in no time.
Drill Bit Getting Stuck
One of the most frustrating problems a DIY enthusiast can encounter is when a drill bit gets stuck. This can be due to a number of factors, including the type of material being drilled, the quality of the drill bit, or the condition of the drill itself. However, before you throw in the towel and call in a professional, try these troubleshooting tips to help free your bit.
First, make sure that you are applying the right amount of pressure and using the correct speed for the material. If the bit is still stuck, try using pliers or a vise to grip the bit and twist it out. If that doesn’t work, apply some lubricant to the area and try again.
Remember to always wear proper safety gear and take your time to avoid causing any further damage. With these tips, you can hopefully avoid getting stuck and finish your project with ease.
Drill Slowly Losing Power
If you’re experiencing a loss of power with your drill, there are a few common troubleshooting tips to keep in mind that can help you get it working again. One issue may simply be a worn out battery, so try charging it fully or replacing it altogether. Another possibility is a clogged air filter, which can cause the drill to overheat and lose power.
Cleaning or replacing the air filter should take care of this problem. If neither of these solutions work, it’s possible that the drill’s motor is burnt out and needs to be replaced. It’s important to address these issues promptly so that you can get back to working with your drill at its full potential.
Remember, taking time to properly maintain your tools can save you from future headaches, so don’t put off addressing problems as they arise.
Conclusion and Final Thoughts
Congratulations, you’re no longer a dummy when it comes to using a cordless drill! With these simple steps, you can now tackle any project with ease. Remember to always prioritize safety, choose the right drill bits for the job, and keep the battery charged. Now go forth and drill like a boss!”
FAQs
What safety precautions should I take when using a cordless drill?
Always wear eye protection and gloves to prevent injury from flying debris. Keep your fingers away from the drill bit, and do not wear loose clothing that could get caught in the drill.
How do I choose the right power setting on my cordless drill?
Start with a low power setting and gradually increase to avoid over-driving screws or damaging materials. Experiment with different power settings on scrap materials before beginning your project.
Can I use a cordless drill for drilling through metal?
Yes, but it’s important to use the correct drill bit and a low speed setting to avoid overheating the bit or causing damage to the metal surface.
How do I change the drill bit on my cordless drill?
Hold the chuck in place and turn the drill in reverse mode to loosen the bit. Insert a new bit and tighten the chuck by turning the drill in the forward direction.
How do I maintain my cordless drill battery?
Keep the battery charged between uses and avoid leaving it completely drained. Store the battery in a cool, dry place and replace it if it shows signs of wear or damage.
Can I use my cordless drill to mix paint or other materials?
Yes, but be sure to use a mixing attachment and follow the manufacturer’s instructions for safe usage.
How do I clean my cordless drill after use?
Wipe the drill clean with a damp cloth and dry thoroughly. Use a brush to remove any debris from the chuck or other parts, and lubricate moving parts as needed.
