How to Use a Compressed Air Paint Sprayer for Professional Results: Tips and Tricks

Have you ever struggled with achieving a smooth, even coat of paint on your project? A compressed air paint sprayer might just be the solution to your painting problems! This tool allows you to paint larger areas quickly, efficiently, and with a professional finish. But how do you use one correctly? Don’t worry, we’ve got you covered. In this blog, we’ll go over all the steps you need to know to get the best results out of your compressed air paint sprayer.
From setting it up to cleaning it, we’ll make sure you’re fully equipped to take on your next painting project. So let’s dive in and get spraying!
Gather Materials
To effectively use a compressed air paint sprayer, the first step is to gather all necessary materials. Of course, you will need the paint sprayer itself, as well as an air compressor, paint, and any additional accessories specific to your project. It’s important to read the manufacturer’s instructions carefully to ensure you have everything you need for your particular paint sprayer model.
You also want to make sure you have the appropriate protective gear such as goggles, a mask or respirator, and gloves to keep yourself safe during the painting process. Taking the time to gather materials beforehand can save you from the frustration of having to stop mid-project to track down missing components or gear. With everything in hand, you’ll be ready to get started painting with your compressed air paint sprayer in no time.
Compressed air paint sprayer, paint, thinning agent, safety gear
When it comes to using a compressed air paint sprayer, it is essential to gather all the necessary materials before starting. Firstly, you will need the paint of your choice, which should be compatible with the sprayer. It is best to follow the manufacturer’s recommendations for the ideal type of paint to use.
Additionally, a thinning agent may be necessary if the paint is too thick to spray efficiently. Safety gear is also essential when using a paint sprayer. This includes a respirator mask to protect against the harmful fumes emitted from the paint sprayer.
Eye protection goggles and gloves are also necessary to prevent the paint from coming into contact with your skin or eyes. Properly gathering all materials ensures a smooth and efficient painting process while maintaining your safety. Always remember to clean up properly once you’ve finished the job to prolong the lifespan of your compressed air paint sprayer.

Preparation
If you’re looking to use a compressed air paint sprayer, it’s important to prepare properly beforehand. First, make sure you have the right safety equipment, such as a respirator mask, gloves, and eye protection. Next, clean your workspace thoroughly and cover anything you don’t want painted with drop cloths or plastic sheeting.
It’s also important to prepare your paint in advance by thinning it to the proper consistency and straining out any clumps or debris. Finally, make sure you have the right air pressure and nozzle size for your specific project and adjust the spray pattern accordingly. By taking the time to prepare properly, you’ll ensure a smooth and successful paint job with your compressed air paint sprayer.
Protective clothing, ventilation, surface preparation, safety precautions
To ensure proper surface preparation and guarantee a secure and safe environment when performing any task, it’s essential to take the necessary precautions. The use of protective clothing such as gloves, masks, goggles, and footwear can provide protection against harmful chemicals, debris, and dust. Moreover, the workspace needs to have proper ventilation to avoid exposure to toxic gases or chemicals that can be detrimental to one’s health.
Additionally, the preparation of the surface must include an assessment of the materials present and their susceptibility to damage, which can affect the overall outcome of the task. Always consider the tools and equipment used to perform the job, ensuring they are in good working order to avoid accidents. The attention to safety measures can reduce the risks and prevent injuries or accidents from happening.
By incorporating these safety measures, we can be confident in the quality of work completed while not compromising our health and safety.
Setting up the Sprayer
Painting can be a tedious task, but using a compressed air paint sprayer can save you time and effort. To set up your sprayer, first, ensure that the paint is properly mixed and strained to avoid clogging in the sprayer. Next, adjust the spray pattern and flow rate to your desired level.
To do this, test the sprayer on a small surface to get a feel for how it works and adjust the settings accordingly. It’s also important to wear protective gear such as a respirator, gloves, and goggles during the process. Once you’ve set up the sprayer and are ready to paint, make sure to keep the sprayer moving continuously and slowly, covering one area at a time to avoid overlapping.
Using a compressed air paint sprayer allows for a smooth and even finish, making your painting project easier and more efficient.
Attach air hose, fill the paint cup, adjust pressure, test spray
Setting up your paint sprayer can be a bit intimidating, especially if you’re new to the world of DIY painting. But with a few simple steps, you can get your sprayer up and running in no time. The first step is to attach the air hose to the sprayer.
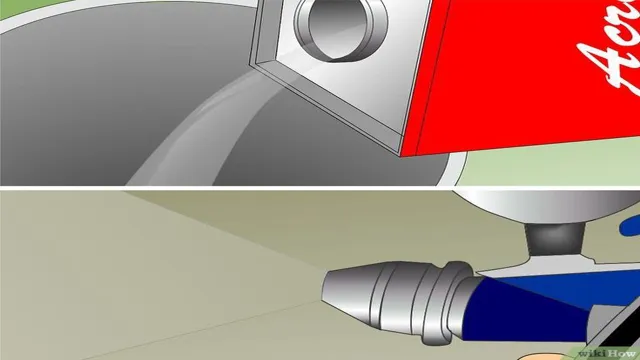
Make sure it’s securely fastened before moving on to the next step. Next, fill the paint cup with your paint of choice. Be sure to mix it thoroughly before pouring it into the cup, as this will ensure an even and smooth application.
Once you’ve filled the paint cup, it’s time to adjust the pressure on your sprayer. This will vary depending on the type of paint you’re using, so be sure to check the manufacturer’s instructions before making any adjustments. Once you’ve adjusted the pressure, it’s important to test spray your paint on a scrap piece of material to make sure everything is working properly.
This will also give you a chance to make any final adjustments before starting your project. By following these simple steps, you’ll be able to set up your paint sprayer with ease and achieve professional-looking results in no time. Remember to take your time and follow the instructions carefully, and soon you’ll be a pro at using your sprayer to tackle all sorts of DIY painting projects!
Spraying Technique
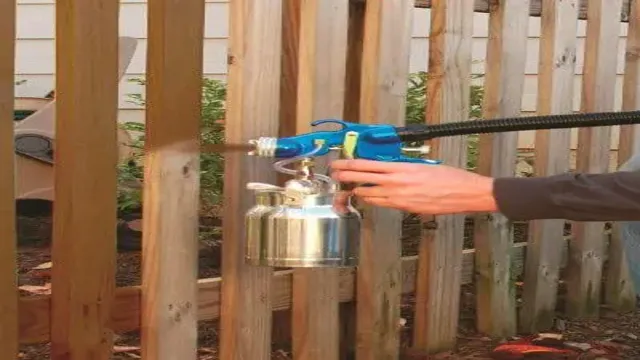
When it comes to using a compressed air paint sprayer, there are several techniques to keep in mind to achieve a smooth and even finish. First and foremost, it’s essential to maintain the right distance between the sprayer and the surface of the material being painted. Generally, a distance of 6-8 inches works best, but this can vary depending on the type of paint being used.
Secondly, it’s crucial to move the sprayer in a consistent, steady motion, starting and ending each stroke off the material to avoid any uneven lines or drips. Additionally, it’s essential to practice good coverage by ensuring that each stroke overlaps slightly with the previous one, creating a cohesive finish. With these techniques in mind and a little practice, anyone can become a pro at using a compressed air paint sprayer.
Maintain consistent distance, overlap strokes, use even pressure, clean the nozzle
Spraying Technique Maintaining a consistent distance and overlap while using even pressure is key to achieving a smooth and professional finish when spray painting. It’s important to start spraying before reaching the surface and finish spraying after passing it to ensure even coverage and prevent drips. Additionally, cleaning the nozzle frequently can prevent clogging and ensure a steady flow of paint.
Think of spray painting like mowing the lawn; you want to use even strokes and overlap each section to ensure a uniform finish. With the right techniques and equipment, your spray painting projects can look as good as any professional job. Just remember to take your time and use a steady hand, and you’ll be creating works of art in no time!
Cleanup
One of the most important aspects of using a compressed air paint sprayer is proper cleanup. After use, it is crucial to fully clean all parts of the sprayer to prevent clogging or damage. Start by following the manufacturer’s instructions for disassembling the sprayer and removing any excess paint or debris.
Next, use a cleaning solvent or water (depending on the type of paint used) to flush out the sprayer’s hoses, gun, and other components. Be sure to check and clean any filters or screens as well. Once everything is clean, reassemble the sprayer and test it to ensure proper functioning.
Proper cleanup will not only extend the life of your sprayer but also ensure a quality finish for your next project.
Empty paint cup, disassemble sprayer, flush with cleaning solution, store properly
Cleaning up after a painting project is essential to ensure the longevity and proper functioning of your paint sprayer. To start the cleanup process, begin by emptying out any remaining paint in the cup. Then, disassemble the sprayer by removing the tip and guard, along with the filter and inlet valve.
Once disassembled, flush the sprayer with an appropriate cleaning solution until the paint is completely removed. It’s important to read the manufacturer’s instructions on which cleaning solution to use, as different materials require different cleaning agents. Once the sprayer is fully cleaned, it should be stored properly to prevent any damage or wear and tear.
Following these steps will ensure that your sprayer will remain in top condition and ready for your next painting project.
Conclusion
So, there you have it – the magical mystery of a compressed air paint sprayer has been demystified! With these simple tips, you can now become a paint spraying pro without wasting time or making a mess. Remember to always read the instructions, choose the right nozzle and pressure, and practice your technique. And if all else fails, just remember Van Gogh’s words of wisdom: “It is good to love many things, for therein lies the true strength, and whosoever loves much performs much, and can accomplish much, and what is done in love is well done.
” Happy painting!”
FAQs
What is a compressed air paint sprayer?
A compressed air paint sprayer is a tool used for painting surfaces that uses compressed air to atomize and spray paint onto the surface.
How does a compressed air paint sprayer work?
A compressed air paint sprayer works by using an air compressor to push pressurized air through a spray gun and into a paint container, which then atomizes and sprays the paint onto a surface.
What types of surfaces can be painted with a compressed air paint sprayer?
Compressed air paint sprayers can be used to paint a variety of surfaces, including walls, furniture, cars, and other large or small objects.
Are there different types of compressed air paint sprayers?
Yes, there are different types of compressed air paint sprayers, including gravity feed, pressure feed, and siphon feed sprayers.
How do I choose the right compressed air paint sprayer?
Choosing the right compressed air paint sprayer depends on the project’s size and complexity, the type of paint being used, and personal preferences. Consider factors such as nozzle size, paint capacity, and ease of use when selecting a sprayer.
Can a compressed air paint sprayer be used with different types of paint?
Compressed air paint sprayers can be used with a variety of paints, including latex, oil-based, and enamel.
How do I clean a compressed air paint sprayer?
To clean a compressed air paint sprayer, first, empty any remaining paint and rinse out the paint container. Then, flush the spray gun with a cleaning solution and rinse it with water. Repeat until the gun is clean, then let it dry thoroughly before storing.


