How to Use a Caulking Gun for the First Time: Tips and Tricks for Perfect Sealing

If there’s one tool that even the most seasoned home improvement enthusiasts can find daunting, it’s the humble caulking gun. If you’re a DIY newbie, the prospect of using one for the first time can be even more intimidating. But fear not! Whether it’s filling gaps around windows or sealing a bathtub, a caulking gun can be your best friend when it comes to making your home watertight and draft-free.
In this blog post, we’ll walk you through how to use a caulking gun for the first time, without any fuss or frustration. From loading the gun to applying a smooth, even bead of caulking, we’ve got you covered. So let’s dive in!
What You Will Need
If you’re wondering how to use a caulking gun for the first time, don’t worry! It’s a simple process that just requires a few tools and some patience. First, you’ll need a caulking gun, of course. Make sure you choose a size and type of gun that’s appropriate for your project.
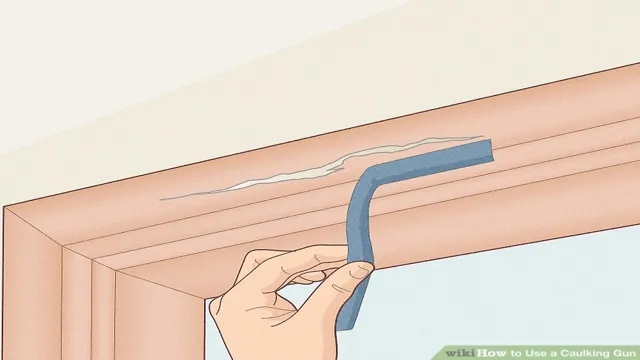
Next, you’ll need a tube of caulking that matches the material you’re sealing. You may also need a utility knife to cut the tip of the caulking tube to the appropriate size. Additionally, having a damp cloth or sponge nearby can help you clean up any excess caulking.
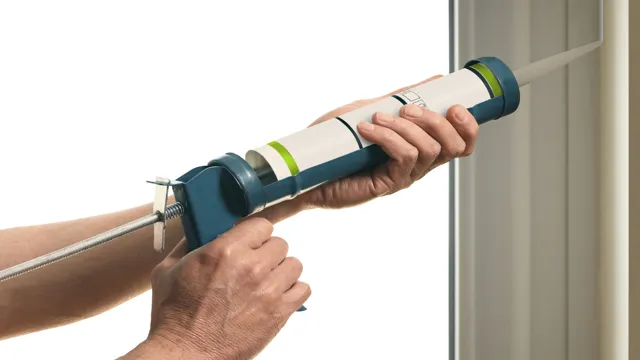
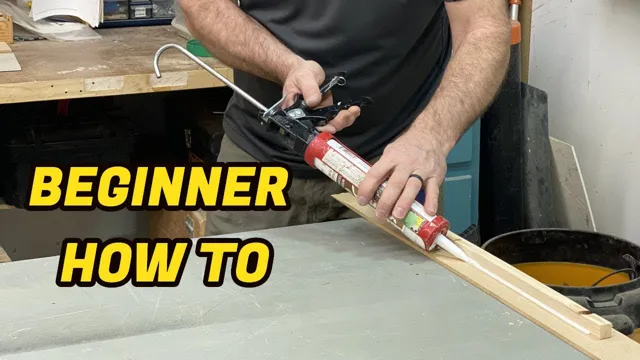
Once you have all of your tools, it’s time to start practicing! Hold the gun at a 45-degree angle, apply pressure on the trigger, and steadily move the gun along the seam you’re sealing, using even pressure. Remember to release the trigger before pulling the gun away to avoid excess caulking from oozing out. With a little practice, you’ll be a caulking gun pro in no time!
Caulk
If you’re wanting to caulk something around your home, it’s important to have the right tools and materials. First, you’ll need the caulk itself, which can come in either a tube or a cartridge. For smaller projects, a tube of caulk is typically sufficient, but for larger jobs, a cartridge may be necessary.
You’ll also need a caulk gun to apply the caulk evenly. Next, you’ll want to have a caulking tool or a putty knife on hand to smooth out the caulk and remove any excess. In addition, having a clean rag or paper towels nearby can be helpful for wiping away any mistakes or excess caulk.
Finally, before applying the caulk, make sure the surface is clean and dry to ensure the best adhesion. With these tools and materials, you’ll be able to successfully tackle your caulk project.
Caulking Gun
If you’re planning on tackling a home improvement project that involves sealing or repairing gaps, you will likely need a caulking gun. Here are a few things you’ll need to keep in mind before you get started. First, you’ll need the right type of caulk.
There are several different types, including silicone, latex, and polyurethane, each with their own unique properties and best uses. You’ll also want to pick up a caulk smoothing tool, as this will make it easier to achieve a professional-looking finish. Additionally, it’s important to choose the right size of caulking gun for your project.
A smaller gun is ideal for small jobs, while larger guns are better for bigger jobs. And of course, you’ll need some rags and a steady hand to ensure a neat and tidy application. With the right tools and a bit of practice, your caulking project will be a breeze.
Caulking Gun Tips
One of the essential tools that every DIY enthusiast should have in their arsenal is a caulking gun. Not only is this tool inexpensive, but it is also incredibly versatile. It is useful for sealing gaps and cracks in different areas of your home.
To effectively use a caulking gun, you will need a cartridge of caulk, a caulking gun, and a sturdy, sharp utility knife or scissors to cut off the tip of the cartridge. Before you start using the caulking gun, you should make sure that the tip of the cartridge is the proper size for the job at hand. If you need a small gap filled, start by cutting the tip of the cartridge at a 45-degree angle using a sharp utility knife.
For larger gaps, cut the tip of the cartridge closer to the top. The closer to the top, the bigger the gap you can fill. Once you have cut the tip of the cartridge, load it into the caulking gun.
Make sure that the plunger is pushed all the way in. Now, place the tip of the caulking gun where you want to apply the caulk, and gently squeeze the trigger. The pressure created will force the caulk out of the cartridge and into the gap.
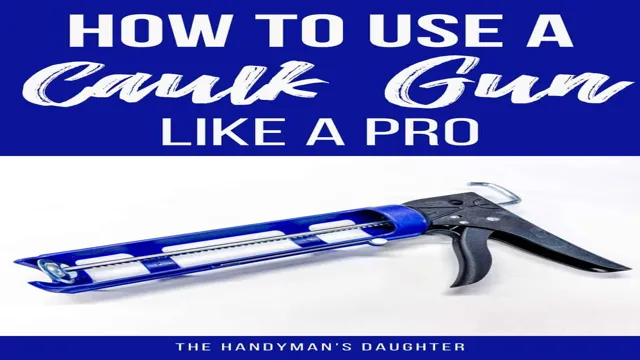
When you’re finished, release the trigger and pull the caulking gun away from the gap. To prevent any additional caulk from being pushed out, make sure to release the pressure on the trigger before you pull away entirely. And that’s it! Now, you know how to use a caulking gun like a pro.
Remember to clean up any excess caulk before it dries out and hardens. With practice, you’ll be caulking like a pro in no time!
Preparing the Caulk Gun
If you are using a caulking gun for the first time, it can be confusing to figure out how to prepare it correctly. To start, you need to select the right type of caulk for your project. Then, you should cut the tip of the caulk tube at a 45-degree angle to the desired bead size and puncture the seal at the base of the nozzle with a long nail or wire.
Once you’ve done that, load the tube into the gun and squeeze the trigger a few times until the caulk is flowing evenly. Finally, adjust the control lever or dial to the right speed and pressure settings for your job. Following these steps will help you get started with using a caulking gun with ease.
Loading the Caulk Tube
Preparing the caulking gun is a critical step before loading the caulk tube. First, find the release latch on the gun and pull it back to loosen the plunger. Next, make sure the nozzle is clean and cut it to the desired size.
Insert the caulk tube into the gun, with the nozzle facing outwards, and push the plunger until it touches the back of the tube. Then, tighten the release latch to secure the plunger in place. Squeeze the trigger a couple of times to make sure the caulk flows smoothly, and you’re ready to start caulking! Remember to keep a steady hand and apply even pressure to avoid gaps and uneven lines.
With these simple steps, you’ll be able to prepare your caulking gun in no time and achieve impressive results on any caulking project.
Cutting the Caulk Tube Tip
When it comes to using a caulk gun, preparing the tube of caulk is just as important as handling the tool itself. One crucial step in this process is cutting the caulk tube tip. To do this properly, you’ll need a sharp utility knife or a pair of scissors and a steady hand.
The first thing you want to do is remove the plastic nozzle that comes with the tube. Next, hold the caulk tube so that the nozzle end is pointing up, and make a diagonal cut across the tip at a 45-degree angle. The size of the hole you cut will vary depending on the job you’re doing.
For bigger jobs, you’ll want a larger hole, while smaller jobs may require a smaller cut. The key is to make the hole gradually larger until you reach the desired size. When you’re finished, insert the nozzle that comes with the caulk gun into the end of the tube, and you’re ready to start caulking.
Remember, the key to a successful caulk job is all in the preparation.
Inserting the Caulk Tube into the Gun
Inserting the caulk tube into the gun may seem like a simple task, but it’s easy to get wrong if you’re not prepared. Before you start, make sure the caulk gun is clean and free of any debris. Then, pull back on the plunger and unlock it from the catch mechanism so that it moves smoothly.
Next, locate the small metal rod inside the gun’s body and push it all the way forward to create some space for the caulk tube. Now, remove the cap from the end of the tube and insert it into the gun, pushing it all the way down until you hear a click. Make sure the nozzle is pointing away from you and then re-engage the plunger catch, so it holds the tube in place.
Finally, test the gun by squeezing the trigger a few times until the caulk begins to flow from the tip. And that’s it! With a little bit of practice, you’ll be able to load the caulk gun in seconds and start working on your home renovation project in no time.
Using the Caulk Gun
If you’re trying to figure out how to use a caulking gun for the first time, don’t worry – it’s easier than it looks! A caulking gun is a handy tool for sealing gaps around your home or office, and once you get the hang of it, you’ll wonder how you ever managed without one. First, load the caulking tube into the gun by cutting off the tip of the nozzle and inserting it into the gun’s cradle. Then, squeeze the trigger until the plunger rod is flush with the end of the nozzle.
Position the nozzle against the surface you want to caulk, then apply pressure to the trigger to dispense a bead of caulk. Try to maintain a consistent speed and pressure, and use a steady hand to avoid making a mess. Don’t worry if it’s not perfect the first time – with a little practice, you’ll be a caulking pro in no time!
Positioning the Caulking Gun
When it comes to using a caulk gun, positioning is key to achieving a clean, precise bead of caulk. First, load the caulk tube into the gun by pulling back on the plunger and inserting the tube into the chamber, making sure to puncture the seal at the end of the tube. Next, hold the gun at a 45-degree angle to the surface you will be caulking, making sure to keep the nozzle perpendicular to the joint you are sealing.
Squeeze the trigger gently to start the flow of caulk, and use a steady hand to guide the gun along the joint, applying consistent pressure to ensure even coverage. Remember, practice makes perfect, so if you find yourself struggling with positioning or applying the caulk smoothly, don’t hesitate to try again or seek out tips from experienced professionals. With a bit of patience and practice, you’ll soon be caulking with confidence and precision every time.
Squeezing the Trigger
When it comes to using a caulking gun, squeezing the trigger may seem easy enough, but there are some tips that can help ensure a smooth application. First, it’s important to choose the right type of caulk for the job – silicone for areas that will be exposed to water, acrylic for general purpose work, and urethane for large gaps or areas that need to be sealed against air infiltration. Once you have your caulk, load it into the gun and cut the tip of the tube at a 45-degree angle to create the size of the bead you need.
Then, apply steady pressure to the trigger while moving the gun along the joint or gap. Use a smooth, consistent motion to avoid bumps or unevenness in the caulk. After applying the caulk, use a caulk smoothing tool or your finger to smooth it out and ensure a tight seal.
With these tips, you’ll be able to use your caulking gun like a pro!
Applying the Caulk in a Smooth and Even Bead
When it comes to applying caulk in a smooth and even bead, using a caulking gun can make all the difference. With a caulking gun, you have better control over the flow rate of the caulk and can apply it more evenly. To use a caulking gun, first, cut the tip of the caulk tube at a 45-degree angle.
Insert the tube into the gun and gently squeeze the trigger until the caulk starts to flow. Begin at one end of the surface you’re caulking and apply a steady amount of pressure as you move the gun along the seam, keeping the nozzle tip at a 45-degree angle to the surface. To avoid air pockets, avoid stopping and starting as you work.
Finally, use your finger or a smoothing tool to flatten and smooth the bead of caulk. With practice, you’ll be able to apply caulk like a pro in no time!
Finishing Up
Using a caulking gun for the first time can be a bit intimidating, but don’t worry, it’s a fairly simple process. First, make sure you have the right type of caulk for the job. Different types of caulk are designed for different purposes.
Once you’ve selected the right one, load it into the gun by pulling back the plunger and inserting the caulk tube. Push the plunger back in until you can see the caulk starting to come out of the nozzle. Hold the gun at a 45-degree angle and apply even pressure to the trigger while running the nozzle along the seam or gap you want to fill.
You may need to use a caulking tool to smooth out the caulk and ensure an even finish. Once you’re finished, be sure to clean up any excess caulk with a damp cloth. Remember, practice makes perfect, so don’t give up if your first attempt doesn’t turn out exactly as planned.
With a little bit of practice, you’ll be a caulking pro in no time!
Cleaning the Caulk Gun
Cleaning a caulk gun is an essential step that should not be overlooked after completing a project. To avoid any issues with your caulk gun, it’s important to remove any leftover caulk before storing it away. Start by placing a small amount of mineral spirits onto a fresh cloth, then wipe down the body and nozzle of the caulk gun.
Ensure all the crevices are reached to remove any old caulk residue that can clog the gun and cause it to malfunction. Once the caulk residue has been removed, thoroughly rinse the cloth and repeat the process to ensure all mineral spirits are removed. Finally, let the caulk gun dry naturally and store it in a safe place.
With this simple cleaning routine, you can extend the life of your caulk gun and ensure it will be ready for your next project.
Storing the Caulk Gun Safely
When you’re finished with your caulking project, it’s important to store your caulk gun properly to ensure it stays in good condition for your next project. The first thing you want to do is make sure that the caulk gun is free of any excess caulk by wiping it off with a damp cloth. Once you’ve done that, you can move on to storing it.
It’s best to store your caulk gun in a cool, dry place where it won’t be exposed to the elements. If you have a toolbox or a workbench with a drawer, this would be the ideal spot for storage. If you don’t have a designated area for your caulk gun, you can use a plastic bag to keep it clean and protected.
Just make sure to label the bag so you know what’s inside when you’re searching for it later. By taking these simple steps, you can ensure that your caulk gun stays in great shape and is ready for your next project when you are!
Conclusion
Congratulations! You’ve now learned all the tricks of the trade and are ready to tackle any caulking project like a pro. Remember, practice makes perfect, so don’t be afraid to get your hands dirty and experiment with different techniques. And most importantly, always remember to clean and store your caulking gun properly to ensure it lasts for many projects to come.
So go ahead, unleash your creative potential and let the caulking gun be your trusty companion on the journey to home improvement glory!”
FAQs
What are the steps to prepare a caulking gun for use?
To prepare a caulking gun for use, first ensure that it is clean and free of debris. Then, cut the tip of the caulk tube at a 45-degree angle to fit the size of the joint. Next, insert the tube into the gun and secure it tightly. Finally, squeeze the trigger a few times to ensure that the plunger is engaged.
How do I load a caulk tube into a caulking gun?
To load a caulk tube into a caulking gun, first remove the cap from the tube. Then, pull the plunger of the gun all the way back and insert the open end of the tube into the slot. Push the plunger forward until it is tight against the tube. Finally, squeeze the trigger to push the caulk out of the tube.
How do I choose the right caulk for my project?
Choosing the right caulk for your project depends on several factors, including the type of surface you are working with, the size of the gap or joint you are filling, and the location of the project (indoor or outdoor). Consider consulting with a hardware store or manufacturer for specific recommendations.
What is the best way to apply caulk using a caulking gun?
The best way to apply caulk using a caulking gun is to start at one end of the joint or gap and apply steady pressure to the trigger as you move the gun along the joint. Be sure to maintain a consistent speed and pressure to ensure a smooth application. Use a caulk smoothing tool or your finger to smooth the caulk as you go.
How do I remove excess caulk from a surface?
To remove excess caulk from a surface, wait until the caulk is dry or use a damp cloth to remove any wet caulk. Use a razor blade or a caulk removing tool to gently scrape away any excess. Avoid using too much pressure, as this could damage the surface.
How can I ensure that caulk is properly sealed?
To ensure that caulk is properly sealed, use a caulk smoothing tool or your finger to smooth the caulk and ensure that it is evenly distributed. Check for any gaps or voids, and add more caulk as needed. Allow the caulk to dry completely before using the area.
How do I clean a caulking gun?
To clean a caulking gun, first remove any remaining caulk from the tube and gun. Then, fill a bucket with warm, soapy water and use a brush or cloth to clean the gun thoroughly. Rinse the gun with clean water and allow it to dry completely before storing.


