Have you ever experienced a spongy brake pedal or poor braking performance? If so, it could be time to bleed your brakes. Bleeding your brake system ensures that there is no air trapped in the lines, guaranteeing optimal braking performance. To do this, you will need a brake bleeder vacuum pump kit.
But how do you use one? Thankfully, it’s a straightforward process that you can do at home without needing to take your vehicle to a mechanic. In this blog post, we’ll go through step-by-step directions on how to use a brake bleeder vacuum pump kit, so you can bleed your brakes correctly. We’ll also give you some tips on how to make the process smoother and the mistakes to avoid.
Once you know how to use a brake bleeder vacuum pump kit, it’s an easy process that you can do on your vehicle as often as required to avoid costly repairs. Let’s dive right in and learn how to efficiently use this tool!
Gather Your Tools and Equipment
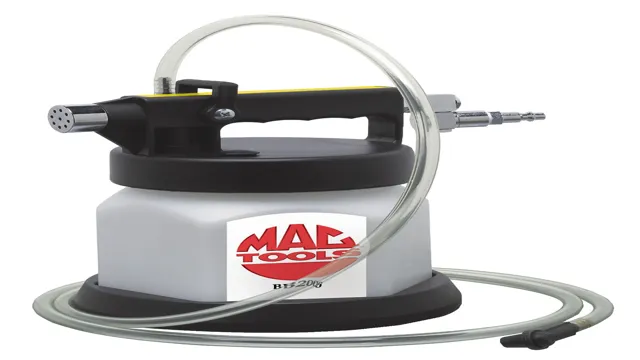
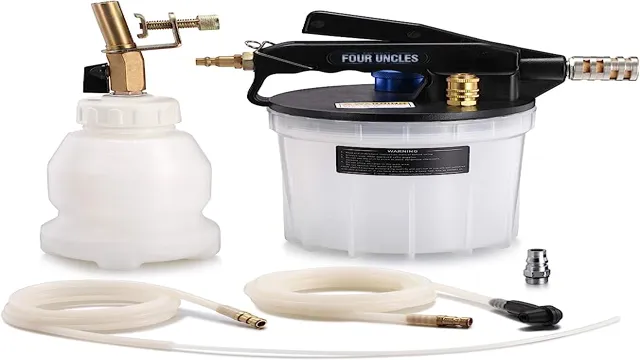
Before diving into how to use a brake bleeder vacuum pump kit, it’s important to gather your tools and equipment. Here’s what you’ll need: the brake bleeder vacuum pump kit, a wrench, a brake fluid catch container, brake fluid, and a helper. The brake bleeder vacuum pump kit typically includes a vacuum pump, hoses, adaptors, and a reservoir jar.
The wrench will be used to open and close the brake bleeder valves. The brake fluid catch container will capture any old brake fluid that needs to be drained. Lastly, it’s important to have a helper to assist with pumping the brakes while you use the vacuum pump kit.
By gathering all of the necessary tools and equipment beforehand, you’ll be able to smoothly transition into using the brake bleeder vacuum pump kit and complete the task at hand efficiently.
Brake Bleeder Vacuum Pump Kit
If you’re looking to bleed your brakes at home, you’ll want to invest in a brake bleeder vacuum pump kit. This kit makes the process much easier and more efficient, but you’ll need a few additional tools and pieces of equipment to get started. First, you’ll need a jack and jack stands to elevate the car and access the brake calipers.
You may also need a wrench or pliers to loosen the bleeder valve. It’s important to have safety gear like gloves and eye protection on hand as well. Once you have your kit and equipment gathered, you’ll be ready to start the brake bleeding process.
Vehicle Owner’s Manual
As a vehicle owner, it’s important to have all the necessary tools and equipment on hand to ensure you can make repairs and perform routine maintenance tasks. Your vehicle owner’s manual should provide you with a comprehensive list of the tools and equipment you’ll need, including things like wrenches, pliers, sockets, and screwdrivers. It’s a good idea to invest in high-quality tools that will last you a long time, as you’ll likely be using them frequently.
Additionally, you may want to purchase some specialty tools specific to your vehicle, such as a code scanner or an oil filter wrench. By having all the necessary tools on hand, you’ll be prepared to handle any unexpected maintenance or repair needs that may arise. So check your owner’s manual, gather your tools, and get ready to become a DIY vehicle maintenance and repair expert!
Locate the Brake Bleeder Valve
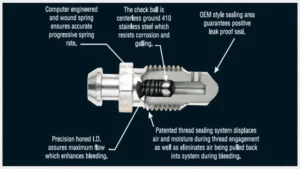
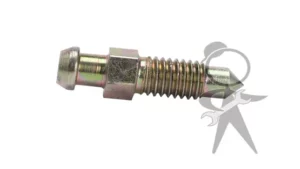
If you’re wondering how to use a brake bleeder vacuum pump, your first task is to locate the brake bleeder valve. Normally, this valve is found on the caliper or the wheel cylinder on your brake system. You’ll need to lift your vehicle first before you proceed to locate this valve.
Once you’ve found it, you can attach the suction hose from your brake bleeder vacuum pump kit to the bleeder valve. Before you start pumping, make sure your brake pedal is in the up position so that the air can move out of the brake lines. Once everything is secured, create a negative pressure using the vacuum pump kit to extract the air and fluid from the brake lines.
This simple process ensures that your brakes work efficiently and safely. Depending on the condition of your brake system, you may need to repeat this process until all air and debris have been removed. Remember to take your time and use caution when working on your brake system.
Wheel Removal
When removing a wheel, it’s important to locate the brake bleeder valve. This valve is typically found on the back of the caliper and is used to release any air that may be trapped in the brake system. If air is present in the system, it can cause a spongy feeling when you apply the brakes, which can be dangerous.
To locate the brake bleeder valve, start by identifying the brake caliper. This is the part of the brake system that houses the brake pads and holds them against the rotor. Once you’ve located the caliper, look for a small valve on the backside.
This is the brake bleeder valve. To remove the wheel, you’ll need to use a lug wrench to loosen the lug nuts first. Then, you can safely lift the wheel off the ground and remove it from the vehicle.
Remember, always consult your vehicle’s owner’s manual before attempting to remove a wheel or perform any maintenance on your vehicle.
Brake Bleeder Valve Location
To bleed your brakes effectively, you need to locate the brake bleeder valve. This tiny valve is usually located somewhere on the brake caliper or wheel cylinder, depending on your vehicle’s braking system. It’s essential to locate the valve before beginning the bleeding process, as it’s the access point for releasing trapped air and allowing fresh brake fluid to flow through the system.
The location can vary based on the make and model of your vehicle, so it’s best to refer to your owner’s manual for precise directions on where to find it. Once you’ve located it, open the valve slightly and connect a tube to it, allowing the old fluid and air bubbles to exit the system and making way for fresher fluid. Don’t forget to always use fresh brake fluid when topping up the system after bleeding.
Remember, properly bleeding your brakes is essential for a safe and effective driving experience.
Prepare the Vacuum Pump
If you are wondering how to use a brake bleeder vacuum pump kit, the first step is to prepare the vacuum pump. The vacuum pump is a key component in the process of bleeding your brake system. Before getting started, ensure that the pump is in good working condition and that all the accessories are present.
Once you have confirmed this, connect the pump to a power source and ensure that the hoses are properly connected. It is important to follow the manufacturer’s instructions on how to properly connect and operate the vacuum pump. Once everything is set up, you are ready to begin the process of bleeding your brakes.
Remember that safety is key and always double-check that the vehicle is properly supported and that you have all the necessary tools before proceeding. By properly preparing your vacuum pump, you can ensure a smooth and successful brake bleeding experience.
Connecting the Pump
Before starting any vacuum pumping process, it’s essential to prepare the vacuum pump properly. To connect the pump, you first need to ensure that it’s in good working condition and is well-maintained. Check the oil level in your pump and ensure that it’s at the right level.
It’s also vital to make sure the pump is turned off before connecting it to avoid damage. Once you’ve done that, connect the pump to the vacuum chamber by using a hose or pipe and make sure that there are no leaks. The keyword for this blog is “Vacuum Pump,” a device used in various industries to create suction and remove gas molecules from a sealed chamber or system.
With proper preparation and connection, a Vacuum Pump can perform effectively, ensuring the required pressure for different processes can be achieved without any issues.
Priming the Pump
If you’re looking to use a vacuum pump, preparing it is essential to ensure optimal performance. The first step is priming the pump, which involves filling it with the appropriate fluid to create a vacuum. To do this, make sure the pump is unplugged and disconnected from any equipment.
Then locate the fill port and remove the cap. From there, you’ll need to pour in the appropriate fluid, following manufacturer instructions for the amount needed. Once filled, replace the cap and plug in the pump.
It’s also important to check for any leaks, as this could indicate a problem that needs to be addressed before use. By following these steps, you can prepare your vacuum pump for use and ensure it’s working at its best.
Bleed the Brakes
If your brakes are feeling spongy or you’ve recently replaced brake components, it’s time to bleed the brakes. Bleeding your brakes removes any air bubbles from the brake lines that can cause your brakes to not function properly. Investing in a brake bleeder vacuum pump kit can make the process easier and more efficient.
To use the kit, first locate the brake bleeder valve on the caliper or wheel cylinder. Attach the clear tubing from the kit and open the valve slightly. Then, connect the vacuum pump and start pumping until brake fluid flows through the tubing without any bubbles.
Keep an eye on the brake fluid level in the reservoir and continue to pump until all four brakes have been bled. Properly bleeding your brakes with a brake bleeder vacuum pump kit ensures your brakes will function at their best and keep you safe on the road.
Attach the Hose to the Bleeder Valve
If you’re looking to bleed the brakes on your vehicle, the first step is ensuring you have the right tools. You’ll need a brake bleeding kit, which usually consists of a hose and a bottle to collect the old brake fluid. Once you have your kit, it’s time to attach the hose to the bleeder valve.
This valve is usually located on the backside of the brake caliper, and it’s what allows you to release air trapped in the brake line. To attach the hose, first, insert one end of the hose over the bleeder valve, making sure it fits snugly. Then, attach the other end of the hose to the collection bottle.
From there, you’re ready to begin the bleeding process. The key to successfully bleeding your brakes is to make sure you’re patient and thorough, taking the time to ensure you’ve removed all the air from the line. With a bit of time and care, though, you’ll be able to properly bleed your brakes and ensure your vehicle is safe and reliable on the road.
Open the Valve
When it comes to maintaining your vehicle, few things are more important than ensuring your brakes are in top working order. Bleeding the brakes is a crucial part of this process, as it involves removing any air bubbles that may have collected in the brake lines. To bleed the brakes, you’ll need to first open the valve on each brake caliper or wheel cylinder.
Once this valve is open, you can use a special tool or a simple length of tubing to pump the brake pedal and force out any trapped air. This process may take some time, especially if there is a significant amount of air in the lines, but it’s well worth the effort to ensure your brakes are working as they should. If you’re unsure how to perform this task, it’s always a good idea to contact a professional mechanic to help you get the job done right.
By properly bleeding your brakes, you can enjoy safer, more effective braking and greater peace of mind on the road.
Vacuum Pump Operation
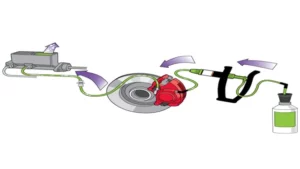
Bleeding the brakes is a crucial part of maintaining your vehicle’s safety and performance. A vacuum pump is an essential tool that helps to make this job easier and more efficient. To use a vacuum pump for bleeding brakes, start by attaching the pump to the brake bleeder valve and following the pump’s instructions to create a vacuum.
This will draw the brake fluid through the system and remove any air bubbles that may be causing the brakes to feel spongy or unresponsive. One of the great benefits of bleeding the brakes using a vacuum pump is that it requires minimal effort and can be done by one person. By eliminating the need for a helper to pump the brakes, you can save time and reduce the risk of introducing air into the system.
Remember to always check your vehicle’s owner’s manual to determine the manufacturer’s recommended schedule for brake maintenance, including bleeding the brakes, to ensure optimal performance and safety.
Check Brake Fluid Level and Repeat
If you’re looking to use a brake bleeder vacuum pump kit, the first thing you should do is check the brake fluid level. This will ensure that you have enough fluid to complete the job and prevent any potential damage to your brakes. Once you have checked the fluid level, you can proceed with the bleeding process.
Simply attach the vacuum pump to the bleeder valve and pump the vacuum until the brake fluid begins to flow through the hose. Repeat this process until all the air bubbles have been removed from the brake lines. It’s important to keep an eye on the fluid level during the process and add more as needed.
Remember, a brake bleeder vacuum pump kit can be a great tool for maintaining the safety and efficiency of your braking system, but it should be used with care and attention to detail.
Check Brake Fluid
Checking the brake fluid level in your car on a regular basis is a crucial safety measure that every responsible driver should take. Low brake fluid can affect the performance of your brakes, making it difficult to stop or slow down your car effectively. To check the brake fluid level, start by locating the brake fluid reservoir under the hood of your car.
The reservoir is usually located near the brake master cylinder, and it is marked with a minimum and maximum level indicator. If the level is below the minimum mark, you need to add more brake fluid until it reaches the maximum level mark. Repeat this process regularly to ensure that your brake system is functioning optimally.
Checking your brake fluid level takes only a few minutes, and it can make a significant difference in ensuring the safety of you, your passengers, and other road users.
Repeat Bleeding Process if Necessary
After you have bled your brakes, it’s important to check the brake fluid level. If the level is low, you may need to repeat the bleeding process until all air bubbles are removed. To do this, you’ll need to refill the brake fluid up to the maximum level and then repeat the bleeding process all over again.
This process will ensure that the brakes are fully bled and will be effective in stopping your vehicle. However, if after repeating the process, you’re still experiencing spongy brakes or a low brake pedal, you may need to consult a professional mechanic to diagnose the issue. Don’t take any chances when it comes to your brakes, as they are essential to ensuring your safety on the road.
Regular maintenance and proper bleeding techniques can help keep your braking system in top condition and prevent potential accidents on the road. Remember to always prioritize safety and never compromise when it comes to maintaining your vehicle’s brakes.
Final Checks and Clean up
Once you have finished bleeding the brakes with a vacuum pump kit, it is important to do some final checks and clean up. First, make sure all brake fittings, hoses, and bolts are tight and secured. Look for any leaks or loose parts that could compromise the system.
Next, turn on the car and press down the brake pedal to check for proper responsiveness. If the brakes feel spongy or there is a delay in response, you may need to bleed them again. Finally, clean up any spilled brake fluid using a clean rag and brake cleaner.
Brake fluid can be corrosive and damaging to other components under the hood, so it’s important to clean up any spills immediately. By taking these final steps, you can ensure the safety and reliability of your car’s braking system. And don’t forget to properly dispose of any used brake fluid and materials according to local regulations.
Check for Leaks
Check for Leaks – Final Checks and Clean up Before packing up all your tools and calling it a day, it’s important to perform some final checks to ensure everything is in proper working order. Firstly, it’s necessary to check for any leaks in the area where you’ve been working. This could be the sink, toilet, or any other fixture that you have worked on.
Leaks can be a nuisance as they can cause water damage to the floors and walls if left unchecked. It’s essential to look for any signs of water on the floor, walls, or ceiling. Also, listen carefully for any dripping sounds that may indicate a leak.
In case you notice any leak, troubleshoot the root cause of the problem and fix it before leaving the job site. Aside from checking for leaks, performing a clean-up is equally important. Clean up the workspace and ensure that all trash and debris are properly disposed of, and the area is left tidy and presentable.
Not only does this help you maintain a good reputation as a responsible contractor, but it also ensures that the area remains safe for future use. Avoid leaving any tools lying around as they can pose a tripping hazard, and discard any damaged materials that are no longer needed. Remember to take some time to inspect the entire job site before leaving; double-check that everything is in good shape and free from potential hazards such as sharp edges and exposed wires.
In conclusion, checking for leaks and performing a clean-up is a crucial part of any plumbing project. Doing so guarantees the safety and satisfaction of the client and helps to uphold the reputation of the contractor. By taking the time to perform final checks and clean up, you’ll ensure that the project is up to the highest standards and meets the expectations of everyone involved.
Always remember to leave the workspace cleaner than you found it!
Replace Wheel and Lower Vehicle
After successfully replacing the wheel and raising the vehicle, it’s essential to carry out a few final checks and clean up before hitting the road. Firstly, it’s crucial to ensure that all tools used during the process are in place and secure. Loose tools in the car may cause unnecessary noise and distractions during the ride.
Therefore, pack them up and keep them in the trunk safely. As for the spare wheel, make sure it’s firmly secured onto the car’s mount. The last thing anyone wants during their ride is the spare wheel falling off.
Secondly, don’t forget to lower the car to the ground before driving. Failure to do so may damage the car’s suspension system or cause an accident by affecting the vehicle’s balance. Lastly, do a quick clean up around the area where you repaired your car.
Clear all debris, including nuts, bolts, and any metal shavings. You wouldn’t want to cause any harm to the environment or leave any sharp objects laying around for unsuspecting people to step on. With these final checks and clean up done, you’re ready to hit the road with confidence.
Clean Up
As the project comes to a close, final checks and clean up are essential to ensure everything is in order and the client is satisfied. This involves going back over the work completed and checking for any errors or omissions that may have been missed. It’s important to make sure everything is consistent and meets the agreed upon standards.
Once this is done, the team can start tidying up and making sure everything is organized and in its place. This may involve deleting unnecessary files or archiving older versions of documents. Finally, it’s essential to get client feedback and address any concerns they may have before wrapping up the project.
By taking these final steps, the project can be successfully completed and everyone can be proud of the work that was done.
Conclusion
In summary, using a brake bleeder vacuum pump kit is like giving your car’s brakes a spa day – a much-needed flush to improve their performance and longevity. Just like getting a mud mask, your brakes need some TLC too. So, don’t be afraid to take the plunge and use a brake bleeder vacuum pump kit.
Your car (and your safety) will thank you for it!”
FAQs
What is a brake bleeder vacuum pump kit and how does it work?
A brake bleeder vacuum pump kit is a tool used to bleed air out of a vehicle’s brake system. It works by creating a vacuum in the brake lines, which draws out any air bubbles and replaces them with brake fluid.
Can a brake bleeder vacuum pump kit be used alone or does it require additional tools?
A brake bleeder vacuum pump kit can be used on its own, but it may also require additional tools such as a wrench or pliers to open and close the brake bleeder valve.
What types of brake systems can a brake bleeder vacuum pump kit be used on?
A brake bleeder vacuum pump kit can be used on most types of brake systems, including disc brakes, drum brakes, and ABS systems.
Is it necessary to use a brake bleeder vacuum pump kit to bleed brakes or can it be done manually?
It is possible to bleed brakes manually, but using a brake bleeder vacuum pump kit is faster and more efficient. It also ensures that all air bubbles are removed from the brake system.
How often should brakes be bled using a brake bleeder vacuum pump kit?
Brakes should be bled using a brake bleeder vacuum pump kit whenever the brake fluid is changed or if there is air in the brake lines. It is recommended to bleed the brakes every two years as part of a regular maintenance schedule.
Can a brake bleeder vacuum pump kit be used on a car without lifting it off the ground?
Yes, a brake bleeder vacuum pump kit can be used on a car without lifting it off the ground. However, it may be easier to access the brake bleeder valves if the car is lifted or placed on jack stands.
Are there any safety precautions that should be taken when using a brake bleeder vacuum pump kit?
Yes, it is important to wear safety glasses and gloves when working with brake fluid. It is also important to follow the manufacturer’s instructions and make sure the brake fluid reservoir is kept topped up during the bleeding process to avoid introducing air back into the brake system.
