Are you one of those people who only check their tire pressure when the warning light on the dashboard comes on? Do you find it confusing and time-consuming to use a tire pressure gauge? Don’t worry, you’re not alone. Using a tire pressure gauge can seem daunting, but it’s essential to ensure your vehicle’s safety and fuel efficiency. In this blog, we’ll teach you how to use a tire pressure gauge quickly and efficiently.
It’s easy if you know what you’re doing! Think of it as learning how to ride a bike – once you’ve got it down, it’ll become part of your routine. So, let’s get started!
Step 1: Choose the Right Gauge
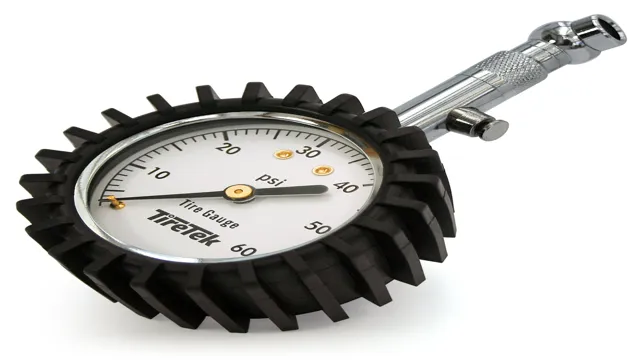
If you’re wondering how to use a tire pressure gauge, the first step is to choose the right gauge for the job. Gauge accuracy is measured by how many pounds per square inch (PSI) it can measure, so make sure you get one that can handle the pressure range of your tires. A common range is 0-60 PSI, but some gauges can go higher.
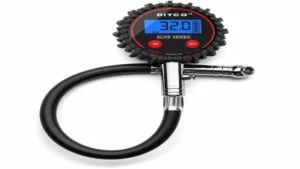
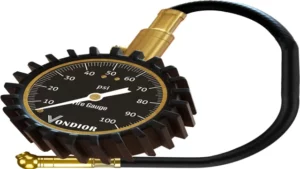
It’s also important to consider the type of gauge you prefer. Digital gauges are easier to read, while analog gauges may be more durable. Whichever type you choose, make sure you practice using it a few times before checking your tire pressure for the first time.
Once you’ve selected the right gauge and know how to use it, you can ensure the safety and longevity of your tires and vehicle.
Examples of Types of Tire Pressure Gauges
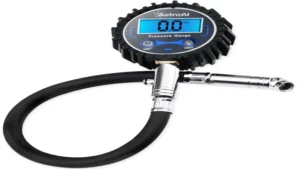
If you are planning to check tire pressure at home or on the road, choosing the right tire pressure gauge is essential. There are several types of tire pressure gauges available in the market, each designed to suit different needs and preferences. Digital gauges are becoming popular these days as they are easy to read and accurate.
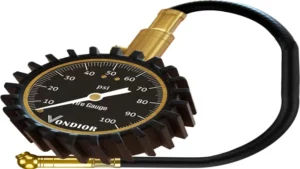
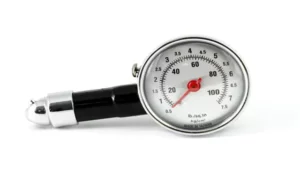
Analog or stick gauges, on the other hand, are more affordable and durable. Another option is the dial or analog gauge, which is a hybrid of digital and stick gauges. It has an analog dial with a digital display.
Tire pressure gauges also come in different shapes and sizes. Some gauges are small and portable, while others are larger and more comfortable to hold. Ultimately, the type of tire pressure gauge you choose will depend on your preferences, frequency of use, and budget.
Whatever type of gauge you choose, make sure it is accurate and easy to use to ensure the safety of your vehicle and passengers.
Step 2: Locate the Valve Stem on Your Tire
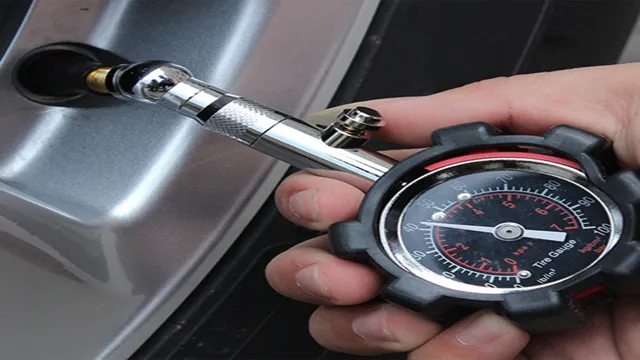
Once you’ve gathered your tire pressure gauge, the next step is to locate the valve stem on your tire. This is where you will attach the gauge in order to get an accurate reading of your tire’s pressure. The valve stem is usually located on the outer edge of the wheel and is typically covered by a small cap.
To access the valve stem, simply remove the cap by unscrewing it with your fingers. If your tires are dirty or covered in mud, it may be a bit harder to locate the valve stem, but don’t worry! Just feel around the rim until you feel a small protrusion – that’s your valve stem. Once you’ve found it, you’re ready to move on to the next step in the process of checking your tire pressure.
So, let’s keep going and ensure your tires are always at their best performance!
Where to Find the Valve Stem on Your Tire
When it comes to finding the valve stem on your tire, it may seem like a small detail, but it’s an important one. The valve stem is located on the rim of the wheel and is where you pump air into your tire. It looks like a small, metal tube and typically has a cap to keep dirt and debris out.
You can find the valve stem by looking for the small, circular hole on the rim of your wheel. It may be located near the edge of the wheel or closer to the center, but it’s always in the same general area. Once you locate the valve stem, make sure to remove the cap before inflating or deflating your tire.
By knowing where the valve stem is located, you can easily maintain the proper tire pressure and ensure a smooth and safe ride.
Step 3: Remove the Valve Cap on the Stem
When using a tire pressure gauge, the next step after locating the valve stem is to remove the valve cap. This small cap covers the stem and protects it from any potential damage or debris. To remove the cap, simply twist it counterclockwise with your fingers.
If it’s too tight to turn with your fingers, a small wrench or pliers can do the trick. Be mindful not to drop or lose the cap as you will need it to protect the stem after you’ve finished checking the pressure. Removing the valve cap is an important step in accurately checking your tire pressure and ensuring your vehicle is safe to drive.
Remember to take your time and be gentle when removing the cap to avoid any damage to the stem.
What to Do if Your Valve Cap is Difficult to Remove
If you’re struggling to remove the valve cap on your stem, don’t worry – there are steps you can take to make it much easier. The third step is to actually remove the valve cap itself. To do this, you’ll need to firmly grip the cap and turn it counterclockwise.
If the cap is still too tight, you can try using pliers or a wrench for extra leverage. Just be careful not to damage the valve stem or the cap itself. Remember, it’s important to remove the valve cap before adding air to your tire, as it allows the air to flow freely into the tire.
By following these steps, you should be able to remove even the most stubborn valve cap with ease.
Step 4: Press the Gauge Onto the Valve Stem
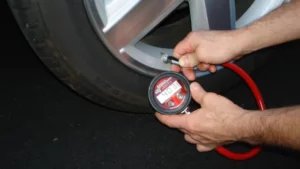
After finding the valve stem and removing the valve cap, it’s time to press the gauge onto the stem to determine the tire pressure. Make sure the gauge is straight and perpendicular to the stem, then press it firmly onto the stem. You should hear a slight hiss sound as the gauge takes the pressure reading.
Hold the gauge in place for a few seconds until the reading stabilizes, then remove it from the stem. Take note of the reading and repeat the process for each tire. Using a tire pressure gauge is a simple but essential task in maintaining safe and efficient driving.
Make sure you properly store the gauge and replace it as necessary to ensure accurate readings every time. With this guide on how to use a tire pressure gauge, you have the knowledge to keep your tires at their optimal pressure.
How to Properly Align the Gauge and the Valve Stem
As you press the gauge onto the valve stem, make sure to do so firmly and evenly. If not pressed evenly, the gauge will not provide an accurate reading. With one hand on the gauge and the other holding onto the valve stem, press the gauge straight onto the stem until you hear a hissing sound.
This sound indicates that air is flowing through the gauge into the tire, and you will begin seeing a reading on the gauge. It’s important to note that when pressing the gauge onto the valve stem, you should avoid tilting the gauge or putting any sideways pressure on it. Doing so can lead to a false reading and inaccuracies.
Instead, keep your hands steady and press the gauge directly onto the valve stem. Remember to observe the gauge closely as you press it onto the valve stem. As soon as you see a reading, check to ensure that it’s within the appropriate range for your tire’s recommended pressure.
If the reading falls outside of this range, it’s time to add or release air from the tire. By consistently following these steps, you’ll achieve proper alignment between the gauge and valve stem. This will ensure that you get an accurate reading each time you check the tire pressure, giving you greater confidence when on the road and helping you extend the life of your tires.
Step 5: Read the Pressure on the Gauge
Now that you have your tire pressure gauge in place, it’s time to read the pressure. Take a close look at the gauge and make sure you can clearly see the numbers. If the gauge is digital, the reading should be indicated on the display.
If it’s manual, you’ll have to look at the needle to see where it points. If you have multiple tires to check, be sure to record the pressure after each measurement so you can keep track of which tire needs air and how much. Don’t forget to check the recommended psi for your specific vehicle and adjust the pressure accordingly.
Maintaining proper tire pressure not only helps with fuel efficiency, but also ensures a safer ride, so don’t skimp on this step.
Understanding PSI and How to Interpret Readings
When it comes to using a pressure gauge, reading the pressure is the most vital step. As you look at the gauge, you will see a needle that has settled on a specific number. That number indicates the pressure reading, which is measured in pounds per square inch (PSI).
It is crucial to interpret the PSI correctly as it determines how much pressure there is in the system you are monitoring. In a general sense, the higher the PSI reading, the more compressed the system is. For instance, if you see a reading of 30 PSI on a tire gauge, it means that the tire is pressurized to 30 pounds per square inch.
Knowing the pressure reading can help identify whether the system is functioning correctly or if there is a problem that needs addressing. Therefore, it is essential to read the pressure on the gauge accurately.
Step 6: Adjust Tire Pressure as Needed
Now that you’ve successfully removed the valve cap and checked your tire pressure with a gauge, it’s important to adjust the tire pressure as needed. The proper tire pressure for your vehicle can be found in the owner’s manual or on the sticker located on the driver’s side door jamb. If the pressure is too high, simply press the gauge onto the valve stem until no more air is escaping.
On the other hand, if the pressure is too low, add air until the desired pressure is reached. Having the correct tire pressure not only ensures your safety on the road, but it can also improve fuel efficiency. So, grab a tire pressure gauge and make sure your tires are properly inflated.
How to Add or Remove Air to Achieve the Correct Pressure
“tire pressure” Once you’ve determined the recommended tire pressure for your vehicle, it’s time to check if the current tire pressure matches the recommended PSI. If the pressure is too low, your tires will wear out faster and negatively affect fuel economy. If the pressure is too high, your ride may be less comfortable and the tires may wear unevenly.
To make adjustments, you’ll need an air compressor. Begin by removing the cap on the valve stem and attaching the air compressor. Add air in short bursts and check the pressure frequently with a tire gauge.
If it’s too high, release some air by pressing down on the valve stem with the gauge. Repeat as necessary until the tire pressure matches the recommendation. Remember to replace the valve stem cap and give the tire a visual inspection before hitting the road.
Checking your tire pressure regularly can save you money on gas and extend the lifespan of your tires. So, take a few minutes to ensure your tires are properly inflated.
Conclusion: Maintaining Proper Tire Pressure is Key
In conclusion, using a tire pressure gauge is like giving your tires a breathalyzer test. Just like a breathalyzer determines the amount of alcohol in your system, a tire pressure gauge measures the amount of air in your tires. So, the next time you’re checking your tire pressure, think of it as a sobriety test for your tires and put them on the road to a safe journey!”
Benefits of Checking Tire Pressure Regularly
Checking your tire pressure regularly is an essential part of responsible car ownership, and adjusting it as needed is equally important. To ensure that your tires are in optimal condition, you should always follow the manufacturer’s recommended pressure levels and adjust them accordingly. Overinflated tires can create a harsher ride and are more prone to blowouts, while underinflated tires can reduce fuel efficiency, cause uneven tire wear, and increase stopping distance.
By taking the time to adjust your tire pressure, you can improve your overall driving experience, increase your fuel economy, and even extend the life of your tires. It only takes a few minutes to check your tire pressure and adjust it as needed, so why not make it a part of your regular vehicle maintenance routine?
FAQs
What is a tire pressure gauge?
A tire pressure gauge is a tool used to measure the air pressure in a vehicle’s tires.
How do I use a tire pressure gauge?
To use a tire pressure gauge, simply press the gauge onto the tire’s valve stem to get a reading of the air pressure.
Why is it important to check tire pressure regularly?
Checking tire pressure regularly is important because underinflated tires can lead to reduced fuel efficiency, poor handling, and shortened tire lifespan.
What is the optimal tire pressure for my vehicle?
The optimal tire pressure for your vehicle can be found in the owner’s manual or on a sticker located on the driver’s side door jamb.
Can a tire pressure gauge be inaccurate?
Yes, a tire pressure gauge can be inaccurate if it is not calibrated properly or if it is damaged.
How often should I check my tire pressure?
It is recommended to check your tire pressure at least once a month, or before long trips.
What are the different types of tire pressure gauges?
There are several types of tire pressure gauges, including digital gauges, analog gauges, and dial gauges.
