Have you ever noticed that your brakes feel spongy or have a decreased level of responsiveness? This is a common issue with a simple solution – bleeding your brakes. However, sometimes when bleeding brakes, you may find that one of the brake bleeder screws won’t seal properly, causing air to enter the system and hindering brake performance. Fear not! In this guide, we’ll walk you through how to seal a brake bleeder screw to ensure your brakes work as they should.
So, grab your tools and let’s get started!
What is a Brake Bleeder Screw?
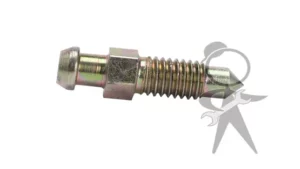
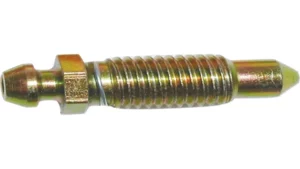
A brake bleeder screw is a key component of a car’s braking system that allows air and excess fluid to exit the brakes when they are being serviced. Over time, these screws can become worn or damaged, making it difficult to seal them properly. If you are having issues with your brake bleeder screw, there are several steps you can take to seal it properly.
First, ensure that the screw is clean and free from debris. Next, apply an appropriate amount of thread tape or a sealer to the threads of the screw to prevent any air from entering. Finally, be sure to tighten the screw firmly to ensure a good seal.
By taking these simple steps, you can maintain the integrity of your car’s braking system and ensure that it performs as it should when you need it most.
Explanation of Brake Bleeder Screw
A brake bleeder screw is an important component found in the braking system of most vehicles. It is designed to remove air from the brake lines and ensure proper hydraulic pressure is applied when the brakes are pressed. Without a functioning bleeder screw, braking performance can be severely compromised.
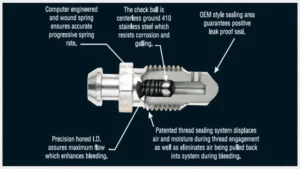
The bleeder screw functions as an escape route for any air bubbles or trapped air that may have entered the brake system during repairs or maintenance. It is typically located near the caliper or wheel cylinder and can be opened using a specialized tool to allow air to escape. Once all the air has been removed and only clean brake fluid remains, the bleeder screw is tightened back up to prevent any further air from entering the system.
Regular checking and maintenance of the brake bleeder screw is essential to ensure a safe and properly functioning braking system for your vehicle.
Signs of a Loose or Leaking Bleeder Screw
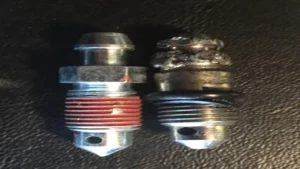
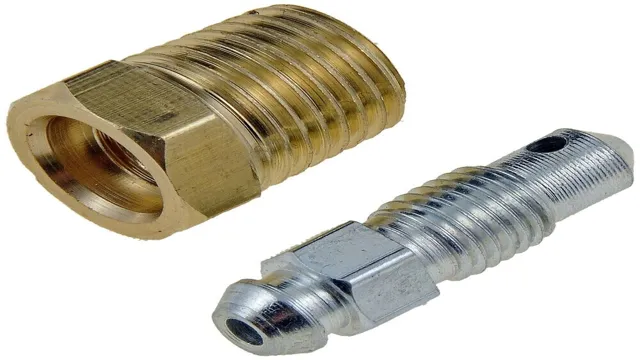
If you’re experiencing a drop in brake pedal resistance or noticing a decline in your vehicle’s stopping power, it may be a sign that you have a loose or leaking brake bleeder screw. A loose bleeder screw can allow air to enter the brake lines, disrupting the hydraulic pressure necessary to effectively stop your vehicle. Leaks can cause a loss of brake fluid, which can also affect your vehicle’s braking ability.
To seal a brake bleeder screw, you can try tightening it with a wrench or replacing the washer. However, if your bleeder screw is severely damaged, it may need to be replaced entirely. Checking and maintaining the tightness of your brake bleeder screw on a regular basis can help prevent potential safety hazards and ensure proper braking performance.
Don’t neglect the importance of this small yet vital component, as it can make all the difference in an emergency situation.
Spongy Brake Pedal
If you’re experiencing a spongy brake pedal, it could be a sign of a loose or leaking bleeder screw. This can lead to air getting into your brake lines, which causes the spongy feeling when you press down on the pedal. One way to check for a loose or leaking bleeder screw is to try and tighten it with a wrench.
If it continues to turn without getting tighter, it’s likely there’s a leak. Another way to check is to inspect the area around the bleeder screw for any signs of brake fluid leaks. It’s important to get this issue fixed as soon as possible, as it can lead to dangerous driving situations.
Don’t hesitate to take your vehicle to a trusted mechanic to have the issue resolved.
Low Brake Fluid
One of the common causes of low brake fluid is a loose or leaking bleeder screw. If you notice that your car’s brake pedal is softer than usual, or it takes longer for the brake pedal to respond, it could mean that there’s something wrong with your brake system. The bleeder screw helps to release any air trapped in the brake system, ensuring that the brake fluid can flow freely and provide the necessary pressure to stop the car.
A loose or leaking bleeder screw can cause air to get into the brake system, affecting its performance. It’s important to check the bleeder screw regularly and tighten it if necessary. If you notice any signs of a loose or leaking bleeder screw, you should get it fixed as soon as possible to avoid any accidents on the road.
Remember, keeping your brake system in good condition is essential for your safety and the safety of others on the road.
Visible Leaking
If you notice visible leaking coming from under your car, it may be a sign of a loose or leaking bleeder screw. This can be a major problem that requires immediate attention from a professional mechanic. You may also notice low brake fluid levels or a soft brake pedal, which are other signs of a potential issue with the bleeder screw.
Not addressing this issue can lead to decreased brake performance, putting you and your passengers at risk. The bleeder screw plays a crucial role in releasing air and allowing brake fluid to flow properly through your system. If it’s not functioning properly, it can cause air to get trapped in the brake lines, which can pose a serious safety hazard.
So, if you’re experiencing any of the aforementioned signs, be sure to schedule an appointment with a qualified brake specialist to have the issue diagnosed and repaired promptly. Your safety and the safety of others on the road depend on it.
Steps for Sealing Brake Bleeder Screw
If you’ve noticed air bubbles coming out of your brake lines when bleeding them, chances are your brake bleeder screw needs to be sealed. To start, make sure the screw is tightened properly and check if there are any visible cracks or breaks in the screw itself. Next, apply a small amount of Teflon tape to the threads of the bleeder screw before tightening it again.
This creates a tight seal and prevents any air from leaking in or out. Another option is to apply a small amount of thread sealant or Loctite to the threads of the screw before tightening it. It’s important to remember not to over-tighten the screw, as this can damage the threads and lead to further issues.
Taking these steps to seal your brake bleeder screw can help ensure your brakes are functioning properly and keep you safe on the road.
Step 1: Gather the Necessary Materials
When it comes to sealing brake bleeder screws, the first step is gathering all the necessary materials. You’ll need a few things to get started, including a wrench or socket that fits the bleeder screw, a clean rag or towel, brake fluid, and a sealant. Make sure to choose the right sealant for your specific screw and brake system.
Some options include Teflon tape, thread sealant, or a copper washer. Once you have all of your materials ready, you can move on to the next steps in the process. By taking the time to gather everything you need before starting the job, you can ensure a smooth and successful experience sealing your brake bleeder screws.
Step 2: Loosen the Bleeder Screw
When it comes to sealing the brake bleeder screw, there are a few key steps you need to follow. The second step of the process is to loosen the bleeder screw. This is a crucial step because it allows air to escape from the brake line.
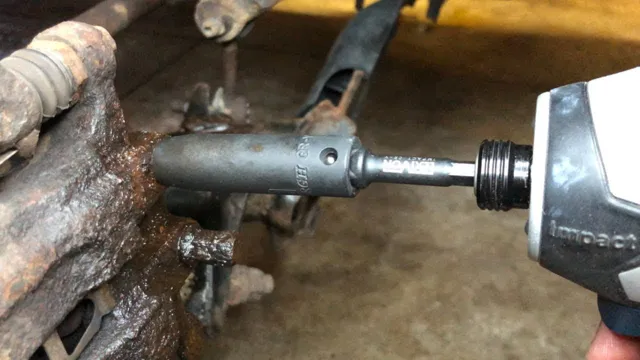
To loosen the screw, you’ll need a wrench that fits the bleeder screw. Place the wrench over the bleeder screw and turn it counterclockwise. You don’t need to fully remove the screw at this point, just loosen it enough so that air can escape.
It’s important to hold a rag or paper towel over the bleeder screw while you’re loosening it to catch any brake fluid that may leak out. Once the screw is loosened, you’re ready to move on to the next step of the process. By following these steps, you’ll be able to seal the brake bleeder screw and get your brakes back in working order quickly and easily.
Step 3: Apply the Sealant
Sealing brake bleeder screw Applying sealant to the brake bleeder screw is the third and final step in sealing it tight. To begin, make sure that the surface of the screw is dry, clean, and free from any grime or dirt. This will ensure that the sealant adheres properly to the surface.
Next, apply a thin layer of sealant to the threads of the bleeder screw and screw it back onto the caliper or wheel cylinder. It’s important not to over-tighten the screw as this can cause damage to the threads and make it difficult to remove the screw in the future. Once the bleeder screw is installed, wipe away any excess sealant and leave it to dry according to the manufacturer’s instructions.
Once the sealant has dried, the brake bleeder screw should be secure and leak-free, giving you peace of mind when it comes to your braking system. So go ahead, apply that sealant, and enjoy the confidence that comes with a secure brake bleeder screw.
Step 4: Tighten the Bleeder Screw
Once you have properly bled your brakes and replaced any damaged parts, it’s time to tighten the bleeder screw. This may seem like a simple task, but it’s important to do it correctly to ensure a proper seal. Start by locating the bleeder screw, which is typically located near the bottom of the brake caliper.
Use a wrench to tighten the screw to the recommended torque specifications, which can be found in your vehicle’s owner’s manual. Be careful not to over-tighten the screw, as this can cause damage to the brake caliper and result in costly repairs. Once the screw is tightened, wipe away any excess brake fluid with a clean rag to prevent any leaks.
By following these steps, you can ensure that your brake system is sealed properly and operates safely on the road.
Step 5: Test the Brake Pedal
Sealing brake bleeder screw Once you have finished bleeding your brakes, it is important to properly seal the brake bleeder screw to prevent any air or moisture from entering the brake system. The first step in sealing the bleeder screw is to remove any excess brake fluid from the area using a clean rag. Next, apply a small amount of thread sealer to the threads of the bleeder screw.
This will help create a tight seal and prevent any air from entering the brake system. Once the thread sealer has been applied, reattach the bleeder screw and tighten it with a wrench until it is snug. Be careful not to overtighten the screw, as this may cause damage to the bleeder valve.
Finally, wipe down the area once more to ensure there are no leaks. Following these steps will ensure that your brake system remains free of air and moisture, helping to prevent any potential brake failure.
Conclusion
Sealing a brake bleeder screw is as easy as ABC – Always Be Careful! With the proper equipment, a steady hand, and a little common sense, you’ll have those pesky air bubbles banished and your brakes ready to hit the road. So remember, use thread sealant and torque to spec, and you’ll be stopping on a dime in no time!”
FAQs
What is a brake bleeder screw?
A brake bleeder screw is a small valve located on the brake caliper or wheel cylinder that releases air from the brake system.
Why do brake bleeder screws need to be sealed?
Brake bleeder screws need to be sealed to prevent air or moisture from entering the brake system, which can affect brake performance and safety.
How do I know if my brake bleeder screw is leaking?
If you notice a decrease in brake performance or see fluid leaking around the brake bleeder screw, it may be leaking and in need of sealing.
What are the common methods for sealing brake bleeder screws?
Common methods for sealing brake bleeder screws include using Teflon tape, thread sealant, or a copper crush washer.
Can a leaking brake bleeder screw be fixed on my own or should I seek professional help?
Attempting to fix a leaking brake bleeder screw on your own can be dangerous and compromise brake performance. It is recommended to seek professional help from a qualified mechanic.
How often do brake bleeder screws need to be sealed?
Brake bleeder screws should be sealed every time they are flushed or replaced, or if a leak is detected.
What are the consequences of driving with a leaking brake bleeder screw?
Driving with a leaking brake bleeder screw can result in decreased brake performance, longer stopping distances, and potential safety hazards. It should be addressed as soon as possible.
