How to Replace Dewalt Cordless Drill Chuck: A Step-by-Step Guide for Easy Replacement
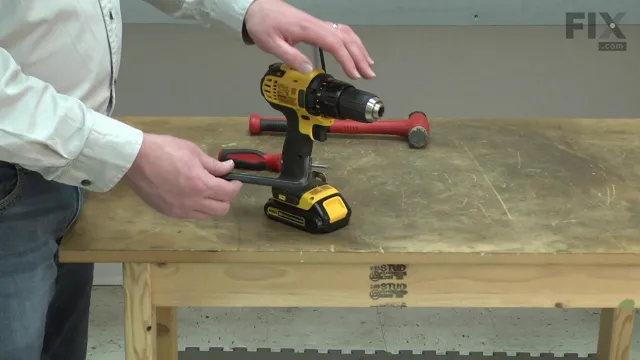
Does your DeWalt cordless drill have a worn-out or damaged chuck? Not to worry! Replacing the chuck on your drill is simpler than you might think. A drill chuck is the part that holds your bit securely in place and allows for easy bit changes. Over time, wear and tear on the chuck can cause it to become loose or difficult to adjust.
In this blog post, we will guide you through the simple steps to replace the chuck on your DeWalt cordless drill, so you can get back to your DIY projects in no time. With just a few basic tools and some know-how, you can have your drill working like new again. So, let’s get started!
Gather the Necessary Tools
Replacing a Dewalt cordless drill chuck may seem like a daunting task, but with the right tools and a bit of know-how, it can actually be quite straightforward. To get started, make sure you have a few key items on hand: a chuck removal tool, a set of Allen wrenches, a rubber mallet, and a replacement chuck. Depending on the model of your drill, you may also need a screwdriver or pliers.
It’s important to use the correct size tools for your particular drill, as this will ensure a smooth and easy process. Once you’ve gathered your tools, take a few deep breaths and get ready to tackle the job.
List of Tools
Assembling a list of tools is an essential step to begin any project. Before you get started, you should gather all the necessary tools to avoid any delays in your work. Each project may require specific equipment, so it’s important to make a list based on the scope of the work required.
For instance, some projects may require hand tools like hammers, saws, or screwdrivers, while others may need power tools such as drills, circular saws, or a nail gun. It’s crucial to also include safety gear such as gloves, goggles, and ear protection to avoid any accidents or injuries. By gathering all the necessary tools, you’ll be well prepared and ready to tackle any project that comes your way.
Removing the Old Chuck
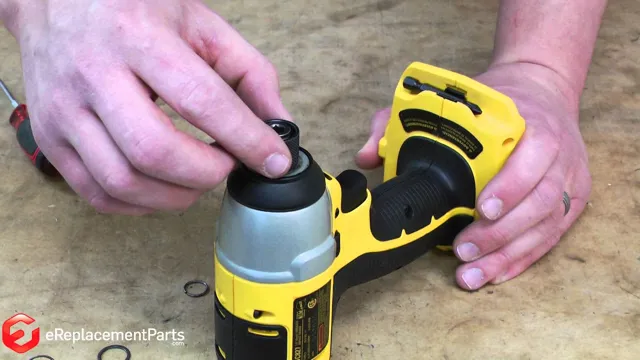
Replacing a cordless drill chuck can be a daunting task, but luckily it’s an easy process that anyone can accomplish. The first step in this process is removing the old chuck. Begin by locating the screw located at the base of the chuck.
With the appropriate sized screwdriver, loosen and remove the screw. Then, take a hex wrench and insert it into the chuck, turning it counterclockwise to release the grip on the drill bit. If the chuck doesn’t come off easily, use a hammer to gently tap it in a counterclockwise direction until it loosens.
With the old chuck finally removed, the next step is to install the new one, allowing you to complete your home improvement projects with ease.
Step 1: Release the Tension on the Chuck
To remove an old chuck from your power tool, the first step is to release the tension on the chuck. This is important because attempting to remove a chuck without releasing the tension can be dangerous. To release the tension, you need to turn off the power tool and unplug it from the power source.
Next, open the jaws of the chuck as wide as possible. This will relieve any pressure on the chuck and allow you to loosen it. Depending on your power tool, you may need to use a special wrench or key to turn the chuck counterclockwise and loosen it.
Once the chuck is loosened, you can remove it from the power tool and replace it with a new one. Always be sure to follow the manufacturer’s instructions and precautions when replacing a chuck to ensure your safety and the proper functioning of your power tool.
Step 2: Remove the Screw From the Center of the Chuck
Removing the old chuck is a necessary step in replacing or upgrading your drill. To start the process, the next step is to remove the screw from the center of the chuck. This screw is typically located inside the chuck, and it holds the chuck in place on the spindle.
To access the screw, use a Phillips head screwdriver or an Allen wrench depending on the type of screw holding your chuck in place. Insert the screwdriver or wrench into the chuck and turn counterclockwise to loosen the screw. Once the screw is loose enough, you should be able to remove it easily.
Be sure to hold onto the chuck as you remove the screw to prevent it from falling off the spindle and potentially causing damage. With the screw removed, the old chuck should come off with ease. By removing the screw from the center of the chuck, you open the door for easy removal of the old chuck and replacement with a new one.
You May Also Love:
It may seem simple, but this step is essential in the process. With the right tools and a steady hand, you can remove the old chuck without difficulty. Remember to take your time and be careful when handling the drill and chuck to prevent any accidents.
Now that you have removed the screw from the center of the chuck, you are ready to move on to the next step in the process of replacing your chuck.
Step 3: Insert the Allen Wrench Into the Chuck
When it comes to removing an old chuck from your drill, it can seem like a daunting task. However, with the right tools and a little bit of know-how, it’s a relatively straightforward process. To start, you’ll want to insert the Allen wrench into the chuck to loosen the retaining screw.
Once the screw is loosened, you can use a pair of pliers to remove the chuck from the shaft. It’s important to take your time and make sure everything is lined up correctly to avoid damaging your drill. With a little patience and attention to detail, you’ll have your old chuck removed in no time.
Remember to always prioritize safety and read the manufacturer’s instructions before attempting any repairs.
Step 4: Tap the Allen Wrench With a Hammer
The next step in removing your old chuck is to tap the Allen wrench with a hammer. To start, make sure the Allen wrench is securely inserted into the chuck. Then, use a hammer to hit the Allen wrench.
The shock from the hammer will cause the chuck to loosen. You may need to hit the wrench a few times before the chuck comes loose. Once it does, you can remove the chuck from the drill.
Keep in mind that some chucks are threaded and may need to be rotated counterclockwise to fully remove from the drill. This step may seem a little aggressive, but it’s necessary to free the chuck from the drill. Just be sure to tap the wrench lightly, as you don’t want to damage the drill or the chuck.
With this step complete, you’re one step closer to replacing your old chuck with a new one and getting back to your DIY projects.
Step 5: Unscrew the Chuck
Removing the old chuck from your power drill might sound like a daunting task, but with a few simple steps, it can be done with minimal hassle. Once you have loosened the chuck, the next step is to unscrew it so that you can replace it with a new one. To start, locate the screw that is holding the chuck in place and use your screwdriver to remove it.
Make sure to hold onto the chuck as you do this, as it may come loose quickly and fall off. Once the screw is removed, you should be able to simply twist the chuck counterclockwise to free it from the drill. If it is particularly stubborn, you may need to use a specialized tool such as a chuck removal key.
Once the old chuck is removed, you can simply slide the new one into the drill and tighten it in place. By following these simple steps, you can quickly and easily replace a worn or damaged chuck and get back to your DIY projects in no time.
Installing the New Chuck
If you’re looking to replace your Dewalt cordless drill chuck, don’t worry – it’s a really straightforward process! First, you’ll want to loosen the screw that holds the chuck in place. You may need to use a pair of pliers to hold the chuck in place while you do this. Once the screw is loosened, you should be able to remove the old chuck by pulling it straight out.
Before you install the new chuck, make sure it’s the appropriate size for your drill. Then, simply slide the new chuck into place and tighten the screw using your pliers. Once it’s securely in place, you’re ready to get back to work.
With just a few simple steps, you can have your drill up and running again in no time!
Step 1: Clean the Thread of the Drill’s Spindle
When it comes to installing a new chuck on your drill, the first step is to clean the thread of the drill’s spindle. This is essential because any debris or dirt on the spindle can cause the chuck to fit improperly, leading to a wobbly or unstable drill. To clean the spindle, start by wiping it down with a clean cloth to remove any dirt or debris.
Then, using a small brush, such as a toothbrush, gently scrub the threads of the spindle to remove any stubborn dirt or debris. Once the spindle is clean, you can proceed with installing the new chuck. This simple step ensures that your new chuck fits securely and functions properly, allowing you to tackle any drilling job with confidence.
Step 2: Insert the New Chuck
After successfully removing the old chuck, it’s time to install the new one. First, check your new chuck to ensure that it has all the necessary parts and fits the specifications of your tool. Next, insert the chuck into the spindle by aligning the keyhole on the chuck and spindle and sliding the chuck onto the spindle until it clicks into place.
Then, insert the chuck key into the hole and tighten the jaws by turning the key clockwise. Make sure the jaws are tight enough that they won’t slip during use, but not so tight that they can’t be opened or damaged. Lastly, test the chuck by inserting a drill bit and turning on the tool to ensure that it’s securely and evenly holding the bit.
With these simple steps, you can easily install your new chuck and get back to your projects with confidence.
Step 3: Tighten the New Chuck
Once you’ve successfully removed the old chuck from your drill, it’s time to install the new one. Ensuring that the chuck is tightly secured is crucial to ensure optimal performance and safety. Begin by inserting the new chuck into the drill’s spindle, making sure it is properly aligned.
Next, use the chuck key to tighten the jaws of the new chuck onto the spindle. It’s important to use the correct size of chuck key and ensure that it is fully engaged with the chuck. Use firm and steady pressure to tighten the chuck as much as possible without over-tightening it.
Test the new chuck by inserting a drill bit and rotating it. If there is any wobbling or movement, re-check the alignment and tighten the chuck a bit more. Once you are satisfied that the chuck is tightly secured, your drill is ready to use with its new chuck! Remember, a securely installed chuck can improve the accuracy and quality of your drilling tasks.
Testing the New Chuck
If you’re looking to replace the chuck on your DeWalt cordless drill, don’t fret – it’s a relatively simple process. Before you get started, make sure you have the right replacement chuck for your specific model. Once you have that sorted, use a hex key to loosen the screw inside the chuck, then insert the key into the chuck and tighten it to keep the drill bit from turning.
Use a wrench to twist the old chuck counterclockwise to remove it from the drill and then place the new chuck onto the spindle. Tighten the chuck by hand before using the hex key to secure it in place. Voila! Your DeWalt cordless drill is ready to use with its brand new chuck.
Step 1: Tighten the Chuck Using the Drill’s Clutch Settings
When it comes to testing a new drill chuck, the first step is to tighten it properly. This can be done by using the drill’s clutch settings to ensure that the chuck is securely fastened in place. It’s important to tighten the chuck enough so that the bit won’t slip, but not so much that it becomes difficult to loosen later on.
Once the chuck is tightened, it’s time to test it out. One way to do this is to use a small drill bit to make a hole in a piece of scrap wood. This will help you see if the chuck is holding the bit securely and if it’s able to drill straight holes without wobbling.
You can also test the chuck by using it to screw in a few screws to make sure that it’s able to hold the driver bit securely as well. By taking the time to properly test your new drill chuck, you’ll be able to ensure that it’s working as it should and that you’ll be able to rely on it for your future projects.
Step 2: Test the Chuck With a Drill Bit
After installing a new chuck on your drill, it’s essential to test it to ensure everything is properly aligned and tightened before starting any important projects. The best way to test your new chuck is to insert a drill bit and see if it fits comfortably and operates smoothly. To do so, loosen the chuck jaws, insert the drill bit into the center hole of the chuck, then tighten the jaws securely around the bit.
Once secured, turn on the drill and ensure the chuck rotates smoothly without any wobbling or shaking. If everything looks and feels steady, you’re ready to start using your new chuck with confidence. Remember, taking the time to test and check your tools ensures maximum efficiency and safety on the job.
Conclusion
In short, replacing the chuck on your Dewalt cordless drill is easier than you might think. Just remember to have the right tools, follow a few simple steps, and before you know it, you’ll be drilling holes like a seasoned pro. So don’t be intimidated by the process – give it a try and show that old chuck who’s boss!”
FAQs
What is a chuck on a cordless drill?
The chuck on a cordless drill is the part that holds the drill bit in place.
How do you remove a chuck from a Dewalt cordless drill?
To remove a chuck from a Dewalt cordless drill, use a chuck removal tool or pliers to turn the chuck counterclockwise. Then, insert a new chuck and turn it clockwise to secure it.
Can you replace the chuck on a Dewalt cordless drill?
Yes, you can replace the chuck on a Dewalt cordless drill. Simply purchase a compatible replacement chuck and follow the manufacturer’s instructions for installation.
What size chuck fits a Dewalt cordless drill?
The size of the chuck that fits a Dewalt cordless drill depends on the model of the drill. Most Dewalt cordless drills have a 3/8 inch or 1/2 inch chuck.
How do you loosen a stuck chuck on a Dewalt cordless drill?
To loosen a stuck chuck on a Dewalt cordless drill, use a rubber mallet to tap the chuck gently, or place the drill in a vice and use a wrench to turn the chuck counterclockwise.
What should you do if the chuck on your Dewalt cordless drill won’t tighten?
If the chuck on your Dewalt cordless drill won’t tighten, check that the drill bit is properly inserted and that the chuck is clean and free of debris. If the problem persists, contact the manufacturer for further assistance.
Can you use a keyless chuck on a Dewalt cordless drill?
Yes, you can use a keyless chuck on a Dewalt cordless drill. However, make sure the size and compatibility are appropriate for your specific model of drill.

