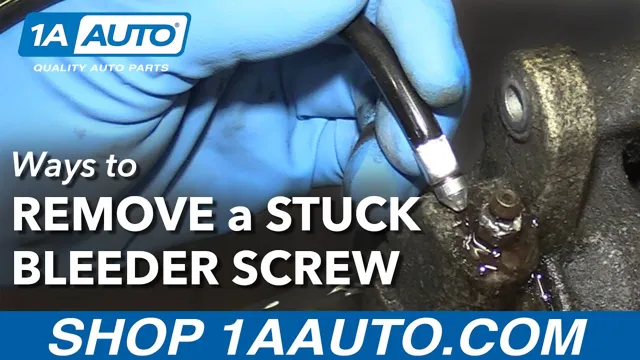
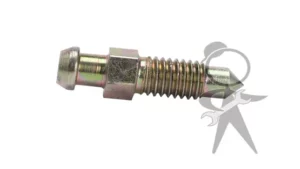
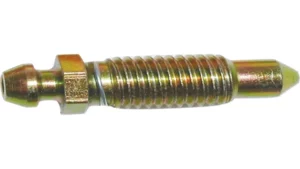
Have you ever run into the frustration of trying to remove a seized brake bleeder screw? It can be quite the headache, especially when you need to bleed your brakes. These small screws are important for the proper functioning of your braking system, but over time they can become rusted and stuck in place. So, what can you do to remove them? In this blog post, we will discuss some tips and tricks for removing seized brake bleeder screws.
Think of it as a battle between your wrench and the screw, and we’re here to provide you with the strategy to help you come out on top!
Introduction
When you find yourself in a situation where the brake bleeder screw is completely seized, it can feel overwhelming. But don’t worry, because with the right tools and techniques, it’s possible to remove it! One effective method is to use a penetrating oil like WD-40 or PB Blaster and let it sit for a few hours to allow it to work its way into the threads. Then, use a pair of locking pliers or vice grips to grip the screw and gently twist back and forth until it starts to loosen.
Another technique is to apply heat using a torch or heat gun to the surrounding area of the brake caliper to expand the metal and loosen the screw. If all else fails, you may need to drill out the screw and replace it with a new one. Remember to always take caution when dealing with brake components and consult a professional if you’re unsure of how to proceed.
By following these steps, you’ll be well on your way to removing a seized brake bleeder screw and getting your brakes back in working order.
Understanding Brake Bleeder Screws
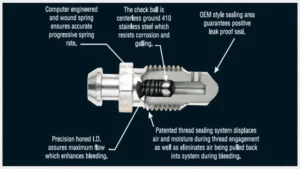
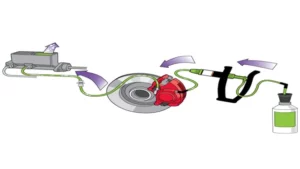
Brake Bleeder Screws Welcome to my blog, where we’ll be discussing brake bleeder screws. These little screws play an important role in maintaining the life of your vehicle’s brake system. A brake bleeder screw is designed to allow air and old brake fluid to be removed from the brake line, making space for fresh, new brake fluid.
They are usually located on the brake caliper or wheel cylinder and are essential for bleeding the brake system. A properly functioning brake system is vital for the safety of both you and your vehicle. That’s why understanding brake bleeder screws is so important.
So, let’s dive into the nitty-gritty of these screws and why they’re so crucial to your braking system’s well-being.
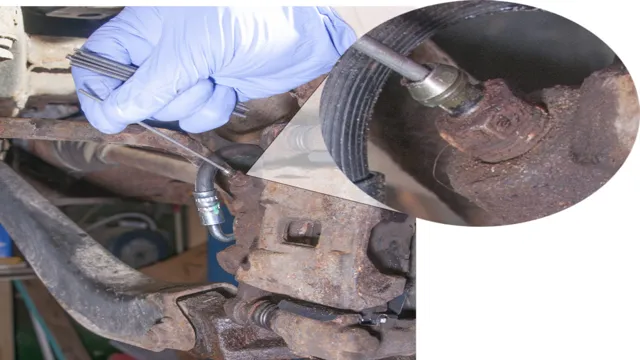
Signs of a Seized Brake Bleeder Screw
Brake Bleeder Screw Introduction: If you have ever had to deal with a seized brake bleeder screw, then you know what a frustrating experience it can be. A brake bleeder screw is an essential component of the braking system, and it allows you to remove air from the brake lines. When a brake bleeder screw is seized, it can be extremely difficult to remove, and it can even lead to brake failure if not addressed promptly.
In this article, we will discuss the signs of a seized brake bleeder screw, and what you can do to fix the issue before it becomes a safety hazard. So, let’s get started.
Tools Required
Removing a seized brake bleeder screw can be a daunting task, but with the right tools, it can be done easily. Before getting started, it’s important to have all the necessary tools. Firstly, a penetrating oil can help loosen up the rust and corrosion that may have caused the bleeder screw to seize.
A pair of pliers or vice grips can be used to grip the bleeder screw, providing extra leverage and force to remove it. A socket set or wrench should be used to turn the screw and loosen it from the caliper or drum. A tapered pipe thread reamer can be used to clean up the threads on the caliper if they become damaged during the removal process.
Lastly, a replacement bleeder screw should be on hand to replace the old, seized one. With the right tools in hand, removing a seized brake bleeder screw becomes a manageable task.
List of Tools
When it comes to working with tools, you need to have the right ones on hand for the job at hand. There are various types of tools required depending on the task in question. For instance, if you need to cut wood or metal, you would need a saw or a blade.
If you need to turn screws or bolts, you need a screwdriver or wrench. If you need to measure distances or angles, you require measuring tools such as rulers or protractors. Additionally, there are safety tools like goggles or gloves that you will need to protect yourself while working with various tools.
Having the right tools is crucial, and it can make a vast difference in the success of your project. Hence, before you start any project, ensure you have the right tools for the job and always use them with caution.
Steps to Remove Seized Brake Bleeder Screw
If you are having trouble removing a seized brake bleeder screw, there are a few steps you can take to make the process easier. First, try applying heat to the area around the screw using a propane torch. This can help loosen any rust or corrosion that may be causing the screw to stick.
If that doesn’t work, try using a penetrating oil, such as WD-40, to help lubricate the area around the screw. If the screw still won’t budge, you may need to use a screw extractor tool to help remove it. These tools can be found at most auto shops and hardware stores and can make getting out a stubborn screw much easier.
Be sure to apply steady, even pressure when using the tool to avoid damaging the surrounding area. With a little persistence and the right tools, you can remove a seized brake bleeder screw and get your vehicle back on the road in no time.
Step 1: Applying Penetrating Oil
If you are facing the predicament of a seized brake bleeder screw, the first step you should take is to apply penetrating oil. This oil will help soak the screw and help loosen it up, saving you time and effort in the long run. Simply soak the screw and let the oil sit overnight.
This should give the oil enough time to penetrate the rust and grime and provide a smoother surface for the screw to turn. Once you have given the penetrating oil sufficient time to work its magic, try turning the screw with a wrench. If it still won’t budge, don’t force it! You don’t want to strip the screw or break it entirely.
Instead, try applying more oil and letting it sit for a little longer. With persistence and some patience, you should be able to remove the seized brake bleeder screw in no time. Remember, applying the right kind of penetrating oil is crucial for this process to work effectively.
So make sure you use a high-quality product that is appropriate for your specific vehicle.
Step 2: Heating the screw
To remove a seized brake bleeder screw, you must first heat it up. This may sound daunting, but it can be done quickly and easily with the right tools. Start by using a propane torch to heat up the screw.
Be careful not to overheat the surrounding area as this can damage other parts on your vehicle. Once the screw is heated up, use a pair of pliers to try and loosen it. If it still won’t budge, wait for it to cool down, and then heat it up again.
Repeat this process a few times until the screw loosens. If you’re having trouble getting it to loosen, consider using a penetrating oil to help loosen it up further. With a little bit of patience and effort, you can remove even the most stubborn seized brake bleeder screw.
Step 3: Using a Wrench or Pliers
Once you have tried all the other methods of removing a seized brake bleeder screw, it’s time to bring out the wrench or pliers. A good wrench or a pair of pliers is essential when it comes to removing the seized screw. Start by placing a wrench or pliers on the bleeder screw and applying gentle pressure.
Turn the tool counter-clockwise to try and loosen the screw. If the screw doesn’t budge, try tapping it lightly with a hammer to try and get it unstuck. Be careful not to hit it too hard as it could damage the surrounding components.
You may also try applying some penetrating oil to help loosen the screw. Keep applying pressure and turning the tool until the screw finally comes off. Remember to work slowly and carefully, as brute force can cause irreversible damage that will make things worse.
Finally, use a wire brush to clean the threads, and replace the bleeder screw with a new one. With patience and some elbow grease, you can remove a seized brake bleeder screw in no time.
Step 4: Applying more Penetrating Oil
If the penetrating oil you applied in step three still hasn’t done the trick, it’s time to try again. Apply some more oil to the bleeder screw and let it soak for a few more minutes. This time, try using a heat gun or a hair dryer to warm up the area around the screw.
The heat will help the oil penetrate deeper into the threads and loosen up any rust or corrosion that may be causing the screw to stick. If you don’t have a heat gun or hair dryer, you can also try wrapping a hot towel or hot water bottle around the area. Once the area is heated up, use your wrench to try loosening the screw again.
If it still won’t budge, repeat steps two through four until you’re able to remove the screw. Remember to be patient and take your time, rushing the process can cause more damage and further complicate the situation.
Step 5: Using a Bolt Extractor (if necessary)
Removing a seized brake bleeder screw can be a challenging task, but by following these simple steps, it can be done without any hassle. In case the screw is tightly stuck and unyielding, you can use a bolt extractor to remove it. The first step in using a bolt extractor is to drill a small hole in the center of the screw by using a drill bit that’s slightly smaller than the screw’s diameter.
Next, you’ll attach the extractor to the drill and insert it into the hole. Turn it counter-clockwise and apply gentle pressure to unscrew the bleeder screw. If you don’t have a bolt extractor available, you can also try tapping the screw lightly with a hammer to loosen it.
However, caution needs to be exercised when doing so that you don’t damage it further. In conclusion, a bolt extractor can be an effective tool in removing a seized brake bleeder screw, but the key to success is to apply gradual pressure and to take your time.
Preventive Measures to Avoid Seized Brake Bleeder Screws
If you’re looking to remove seized brake bleeder screws, it’s important to also consider how to prevent them from seizing in the first place. One effective preventive measure is to use an anti-seize compound on the threads of the bleeder screw before reinstalling it. This compound will help to lubricate the threads and stop them from corroding, preventing the screw from seizing.
Another key preventive measure is to make sure that the bleeder screw is torqued correctly during installation. Over-tightening or under-tightening the screw can cause it to become misaligned and potentially seize. Additionally, it’s important to regularly inspect the bleeder screws for signs of corrosion or wear, and replace them if necessary.
By taking these proactive steps, you can minimize the risk of a seized brake bleeder screw and avoid the frustration and potential damage that can result.
Lubricate the screws before installation
One of the most frustrating experiences when doing brake maintenance is dealing with seized brake bleeder screws. However, by taking some preventive measures, you can avoid this headache altogether. One easy step to prevent seized screws is to lubricate them before installation.
Applying a small amount of lubrication, such as anti-seize, to the screw threads can help reduce friction and corrosion, making it easier to loosen them when needed. This is especially important if you live in an area with high humidity or salt exposure. By taking this simple step, you can save yourself time, money and headaches when working on your brakes.
So next time you’re replacing your brakes, remember to lubricate the screws before installation, and you’ll have an easier time down the road.
Use a torque wrench to avoid over-tightening
Preventive Measures to Avoid Seized Brake Bleeder Screws Are you tired of dealing with seized brake bleeder screws? One of the easiest ways to prevent them from getting stuck is to use a torque wrench. This tool allows you to tighten the screw to the manufacturer’s recommended torque level, minimizing the risk of over-tightening. Over-tightening can cause the screw to be stuck in place, making it difficult to remove in the future.
It’s essential to remember that you need to loosen the screw before tightening it to avoid stripping it off its threads. Another way to avoid seized brake bleeder screws is to lubricate them when installing them. Applying an anti-seize compound can help to prevent corrosion, which is one of the primary causes of seized screws.
So, use preventive measures like a torque wrench and lubrication to avoid any future headaches trying to deal with stuck brake bleeder screws.
Conclusion
In conclusion, removing a seized brake bleeder screw may seem like a daunting task, but with the right tools and techniques, it’s a problem that can be easily solved. First, be patient and take your time to avoid damaging the surrounding parts. Apply some penetrating oil to loosen the screw, and use proper tools like a breaker bar or impact wrench to increase torque.
If all else fails, remember the wise words of Bruce Lee, ‘Be like water,’ and apply some heat to expand the metal and break the rust seal. With these tips and tricks in mind, you’ll be able to loosen any seized brake bleeder screw in a swift and efficient manner.”
FAQs
What causes a brake bleeder screw to seize?
Rust and corrosion, overtightening of the screw, and exposure to extreme temperatures can cause a brake bleeder screw to seize.
How do I loosen a seized brake bleeder screw?
First, use penetrating oil to loosen the screw. If that doesn’t work, apply heat to the area with a torch or heat gun. If all else fails, you may need to replace the entire brake caliper.
Can I drive with a seized brake bleeder screw?
It is not recommended to drive with a seized brake bleeder screw as it can affect your braking system and put you and other drivers on the road at risk.
Can brake bleeder screws be reused after being seized?
It is not recommended to reuse a seized brake bleeder screw as it may not seal properly and can cause further issues.
How often should brake bleeder screws be checked for seizing?
Brake bleeder screws should be checked during regular brake maintenance, which is typically every 10,000-15,000 miles.
Is it possible to prevent a brake bleeder screw from seizing?
Yes, regular maintenance, including cleaning and lubricating the brake system, can help prevent a brake bleeder screw from seizing.
Can a mechanic help with a seized brake bleeder screw?
Yes, a mechanic can help with a seized brake bleeder screw by using specialized tools and techniques to safely and effectively remove the screw.
