Have you ever found a dent on your car that just ruins the entire look of it? It’s frustrating to see something that affects the overall aesthetic of your car. However, removing dents has never been easier with the help of a dent puller. In this blog, we will explore how to remove dents with a dent puller, a tool that can help restore your car back to its original condition.
A dent puller is a device used to extract dents from car sheets by pulling out the dent without the need for any filling or repainting. This tool uses a combination of suction and pressure that works together to reshape the surface of your car. It’s a cost-effective and simple solution to remove minor dents from your car.
One of the benefits of using a dent puller is that it’s easy to use and does not require professional help. You can buy a dent puller from any auto shop and do it yourself. It saves both your money and time.
However, it’s important to note that dent pullers work well on minor dents. Larger or more complex dents may need professional help. In conclusion, using a dent puller can be an excellent way to remove unsightly dents from your car.
These devices are easy to use, cost-effective, and can quickly restore your car back to its former condition. However, it’s essential to carefully assess the damage to your vehicle and choose the appropriate tool for the job, so you don’t cause any further harm. With a little bit of patience and practice, you’ll be able to remove dents like a pro.
Understanding Dent Pullers
Removing dents from your car can seem like a daunting task, but using a dent puller can make the process much easier. A dent puller works by using suction to pull the dent out of the metal. There are two main types of dent pullers: manual and electric.
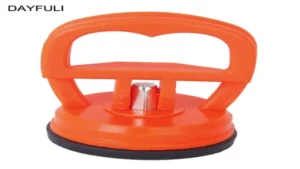
Manual dent pullers use a suction cup attached to a handle, whereas electric dent pullers use a motor to create suction. Before using a dent puller, it is important to clean the area thoroughly and make sure there are no cracks in the metal. Position the suction cup over the dent and apply pressure until it creates a seal.
Then, slowly pull the handle or activate the motor to begin pulling the dent out. With a little bit of patience and practice, using a dent puller can be a simple and effective way to remove dents from your car. So, next time you find yourself with an unsightly dent, don’t be afraid to try using a dent puller to fix it!
Types of Dent Pullers
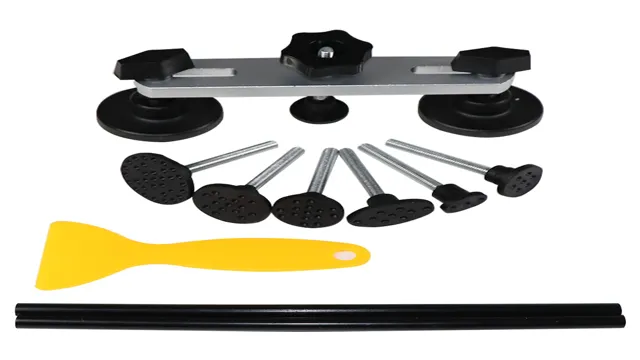
Dent pullers are a great tool to remove dents and dings from your vehicle. There are several types of dent pullers available in the market, each with its own set of features and benefits. The most common types of dent pullers include suction cup dent pullers, slide hammer dent pullers, and glue pull dent pullers.
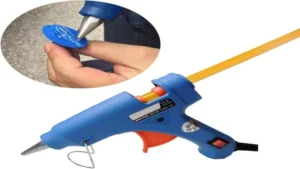
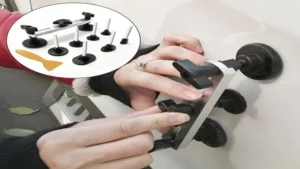
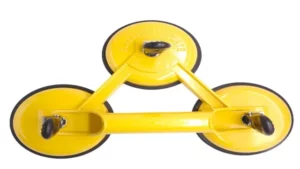
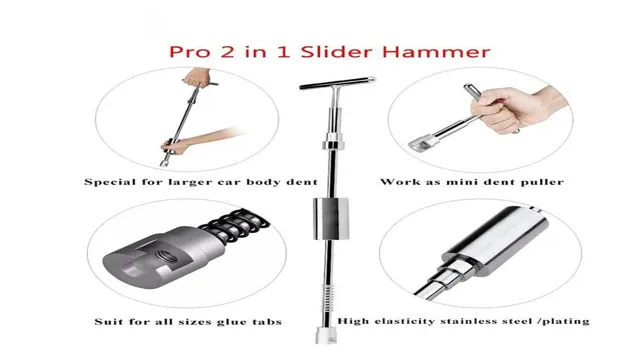
Suction cup dent pullers work by creating a vacuum seal between the dent and the cup, allowing the dent to pop out once the cup is pulled. On the other hand, slide hammer dent pullers use a different mechanism, where a metal rod is attached to the dent and pulled using a slide hammer until the dent pops out. Lastly, glue pull dent pullers work by using hot glue to attach dent pulling tabs to the dent, and then pulling the tabs with a special tool until the dent pops out.
Whichever type of dent puller you decide to use, make sure to follow the instructions carefully and take your time to avoid causing more damage to your vehicle. With the right technique and a bit of practice, you can easily remove small to medium-sized dents from your car without the need for a professional.
Preparing for the Repair
If you’re looking to remove dents from your car, using a dent puller can be a cost-effective and easy solution. However, before you get started with the repair, there are a few steps you need to take in order to properly prepare. First, examine the dent closely and determine the size and depth of the damage.
This will help you determine if a dent puller will be effective for the repair. Next, clean the area around the dent thoroughly and dry it off completely. This will ensure that there is no dirt or debris that could interfere with the repair process.
Finally, read the instructions that come with the dent puller carefully and make sure to follow them closely. By taking these steps, you’ll be well-prepared to successfully remove dents with a dent puller and restore your car’s appearance.
Cleaning the Surface
Cleaning the surface is an important step in preparing for a repair. Whether you’re dealing with a scratch, dent, or crack, the first thing you need to do is clean the affected area. This will ensure that the repair surface is free of dirt, debris, and other particles that can interfere with the repair process.
Use a soft microfiber cloth or a soft-bristled brush to gently remove any dirt or grime from the surface. Be careful not to scratch the surface further, as this can make the repair more difficult. Once the surface is clean, you can apply a cleaning solution to further remove any remaining residue.
Make sure to choose a cleaning solution that is safe for the material you’re working with, as some solutions can cause damage. By taking the time to clean the surface properly, you’ll ensure that the repair will be strong and long-lasting.
Assessing the Damage
When it comes to repairing damaged property, the first step is always assessing the damage in order to prepare for the repair process. This requires a thorough inspection of the affected area and a detailed analysis of the extent of the damage. From there, you can determine what materials and tools will be needed to fix the damage and create a plan of action.
It’s important to take the time to properly prepare for the repair, as rushing into the process without a clear understanding of the extent of the damage can lead to further complications in the future. Whether it’s water damage to drywall or a broken window, taking the time to properly assess the damage can save you time and money in the long run. So, when it comes to preparing for a repair, remember to take a deep breath, assess the situation, and create a clear plan of action.
Using the Dent Puller
If you have a dent in your car or truck, don’t worry! You can easily remove it yourself with a dent puller. First, make sure the area around the dent is clean and dry. Then, attach the suction cup of the dent puller to the center of the dent.
Pull firmly and steadily until the dent pops out. If the dent is larger or deeper, you may need to repeat this process several times or use different sized suction cups. With a little patience and determination, you’ll have your vehicle looking like new in no time.
So, if you’re wondering “how to remove dents with a dent puller,” it’s simple! Just follow these steps and you’ll be ready to hit the road with a flawless finish.
Attaching the Puller
When it comes to using a dent puller, attaching it properly is crucial for successful results. To begin, make sure the surface of the dent is clean and dry before proceeding. Then, select the appropriate size adapter and screw it securely onto the puller’s threaded rod.
Next, place the suction cup over the center of the dent, making sure there are no air leaks around the edges. If air is leaking, the suction won’t hold, and the puller won’t work correctly. Once the suction is secure, engage the locking mechanism and use the puller’s handles to create a vacuum, pulling the dent outward.
Remember to work slowly and apply even pressure to avoid causing additional damage. With these steps, you can confidently use the dent puller to remove unsightly dents and restore your vehicle’s appearance.
Applying Tension to the Puller
When it comes to using a dent puller, applying tension is a crucial step. The tension is what allows the puller to do its job, as it essentially “grabs” onto the dent and slowly pulls it back into place. To apply tension, you’ll need to use the pulling tabs or hooks that are attached to the puller.
These tabs are designed to be placed around the edges of the dent, and then pulled in the opposite direction of the damage. Doing this will create the necessary tension to gradually pull the dent back out. It’s important to be patient and gentle when applying tension, as you don’t want to accidentally damage the surrounding area of the car.
With some practice and careful attention, however, you can successfully use a dent puller to fix minor dents and dings on your own.
Releasing the Dent
If you’re dealing with a dent on your car, the easiest way to fix it is by using a dent puller. A dent puller is a simple tool that can help you remove the dent by pulling it outwards. Before using the dent puller, make sure to clean the surface of the dent and the surrounding area.
This will ensure that the puller gets a good grip on the surface. Once the surface is clean, place the dent puller on the dent and pull it gently towards yourself. You may hear a popping sound when the dent is released.
In some cases, you may need to repeat this process a few times to fully remove the dent. Using a dent puller is a quick and easy way to remove dents without damaging the paint or requiring expensive repairs. So, if you’re dealing with a dent, give the dent puller a try and see the results for yourself.
Finishing the Repair
If you’re wondering how to remove dents with a dent puller, the final step is to finish the repair process. After you’ve successfully pulled out the dent, you’ll need to smooth out the affected area to ensure a seamless finish. You can start by using a sandpaper or sanding block to remove any rough patches or scratches.
Then, you can apply a filler material to fill in any remaining gaps or dents. Once the filler has dried, you can sand it down until it is level with the surrounding surface. Lastly, apply some paint or touch-up to the repaired area, and your car will look as good as new.
Remember that this process requires patience and attention to detail, but the result is a dent-free car that looks like it just rolled out of the showroom.
Removing Residual Adhesive or Suction Marks
After completing a repair, you may find yourself with residual adhesive or suction marks that need to be removed. This is a crucial step in finishing the repair process. To start, you can try gently scraping the area with a plastic or credit card to remove any excess adhesive.
If there are still marks left behind, use rubbing alcohol on a soft cloth to gently rub the area until the marks disappear. Be cautious not to press too hard and cause any damage to the surface. If the rubbing alcohol doesn’t seem to work, you can try using a mixture of water and vinegar.
Mix 1 part vinegar with 3 parts water and use a soft cloth to apply the mixture to the affected area. Allow it to sit for a few minutes, then gently rub the area until the marks disappear. Remember, slow and steady wins the race when it comes to removing residual adhesive and suction marks.
With a little patience and gentle handling, you will have a finished repair that looks as good as new!
Polishing or Buffing the Surface
Polishing or buffing the surface is the final step in repairing a damaged area of your car’s body. This is when you will smooth out any rough spots and bring back the shine to your paint job. You’ll need to use a polishing compound and a buffing wheel to do this.
The polishing compound will remove any imperfections in the surface, while the buffing wheel will help distribute the compound evenly. It’s important to be careful during this step as you don’t want to apply too much pressure and damage the paint job. Once you’re finished, you’ll have a smooth, shiny surface that looks like new! Remember that regular polishing and waxing can help prevent damage and keep your car looking great for years to come.
Admiring Your Handiwork
After putting in the hard work to repair a damaged object, it’s always satisfying to step back and admire your handiwork. But before you do that, make sure you’ve finished the repair properly. Double-check any connections, screws or bolts to ensure that everything is in place and secure.
Test the function of the object to see if it’s working as intended. If you had to apply a new coat of paint or finish, ensure that it’s applied evenly and that there aren’t any drips or bubbles. Finally, take a good look at the repaired object from all angles to make sure that there are no noticeable signs of the repair work.
If everything checks out, then you can proudly admire the fruits of your labor and feel accomplished knowing that you’ve saved something from being thrown away.
Conclusion
In conclusion, using a dent puller is an efficient and effective way to remove dents from your vehicle. It’s a relatively simple process that requires some elbow grease and patience, but with a little determination, you’ll have your car looking like new in no time. Just remember to always follow the instructions carefully, take your time, and resist the temptation to rush the process.
As they say, Rome wasn’t built in a day, and neither was your car. So, grab your dent puller and get ready to say goodbye to those unsightly dents. Your car (and your wallet) will thank you!”
FAQs
What is a dent puller?
A dent puller is a tool used to remove dents from vehicles without damaging the paint.
How does a dent puller work?
A dent puller works by creating a vacuum or suction around the dent, allowing it to be pulled out from the inside.
Can I use a dent puller on any type of dent?
Dent pullers are typically best used on shallow dents with no creases or sharp angles. They may not be effective on larger dents or those with more complex shapes.
What are the benefits of using a dent puller?
Using a dent puller can be a cost-effective and efficient way to remove minor dents without the need for professional repairs or repainting.
Are there different types of dent pullers?
Yes, there are different types of dent pullers, including manual, pneumatic, and electric versions.
How do I choose the right dent puller for my needs?
The right dent puller will depend on the type and severity of the dent, as well as your level of experience. It is important to follow the manufacturer’s instructions carefully and exercise caution when using any type of dent puller.
Can I use a dent puller on other surfaces besides vehicle panels?
Dent pullers are typically designed for use on metal surfaces, but some may be suitable for use on other materials such as plastic or fiberglass. It is important to check the manufacturer’s specifications before using a dent puller on any surface.
