If you’re a car owner, you know the importance of keeping your vehicle in good condition. Regular maintenance checks are key to ensuring your car runs smoothly and efficiently. One essential tool for checking the health of your car’s engine is a compression tester.
But if you’ve never used one before, reading the results can be intimidating. How do you interpret the numbers? What is a good compression reading? In this blog post, we’ll guide you through the process of reading a compression tester, so you can better understand the state of your car’s engine and ensure a safe and reliable ride.
Understanding the gauge
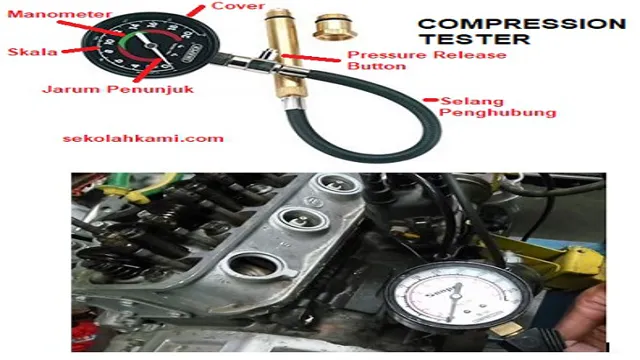
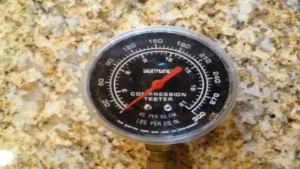
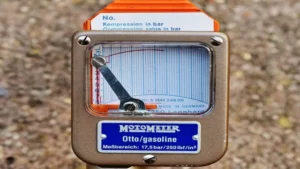
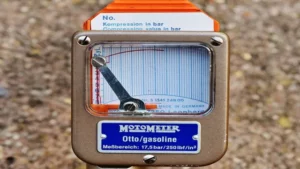
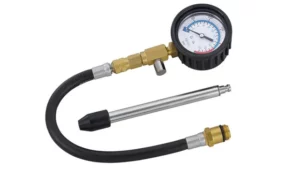
If you’re planning to diagnose the health of your engine, you’ll need to learn how to read a compression tester gauge to get accurate results. The gauge on the compression tester measures the pressure within each cylinder of the engine during the compression stroke. To start, you’ll need to remove the spark plug from the cylinder you’re testing, then screw in the compression tester.
To get an accurate reading, make sure that you have deactivated the fuel system, and that the battery is fully charged. Once you have the tester in place, turn the engine over a few times, and note the pressure reading on the gauge. A healthy engine cylinder should have a pressure reading of between 120 and 180 psi.
If the reading is lower than 120 psi, it might indicate a problem like a blown head gasket or worn piston rings. A reading that is abnormally high could indicate engine deposits or carbon buildup. With proper use of a compression tester gauge, you can quickly diagnose a range of engine problems and take the correct corrective action.
What the numbers mean
When it comes to reading gauges, it’s essential to understand what the numbers mean to get an accurate reading. Each gauge has specific numbers, which represent different measurements. For instance, if you’re reading a gas gauge, the numbers on the gauge display show the amount of gas in the fuel tank.
Similarly, if you’re reading a pressure gauge, the numbers represent the pressure of the fluid or gas being measured. Additionally, each gauge has a specific range of numbers, which provides insight into the current state of the system being measured. For example, with a temperature gauge, the range of numbers will show the safe operating range for the system.
As a result, understanding the gauge and its associated numbers is crucial to maintaining optimal operating conditions. Another important factor to consider is the units used in the gauge. Many gauges will display both imperial and metric units, providing flexibility based on the user’s preference.
If you’re not familiar with the units being used, it’s essential to familiarize yourself with them before taking any readings. In summary, understanding the gauge and what the numbers represent is essential to take accurate readings. Paying attention to both the number range and unit of measurement will also help you maintain optimal conditions and avoid any mishaps.
So, next time you’re reading a gauge, take a moment to understand the numbers and their meaning to ensure everything is running smoothly.

Taking a reading
Taking a reading from your gauge may seem like a simple task, but it’s important to understand the gauge you’re working with to get an accurate reading. The gauge typically displays measurements in pounds per square inch (PSI) and can sometimes show measurements in bars or kilopascals (kPa). Before taking a reading, it’s important to ensure the gauge is calibrated properly, as an inaccurate gauge can result in incorrect readings.
To take a reading, make sure the gauge is connected securely to the object you wish to measure and allow time for the gauge to stabilize. Once stabilized, slowly release any pressure and watch the gauge closely to determine the reading. Remember to write down any readings for future reference.
By understanding the gauge and following proper procedure, you can ensure accurate measurements every time.
Interpreting the results
If you’re wondering how to read a compression tester, it’s easier than you might think. Once you’ve followed the instructions for using the tester, you’ll get a reading that indicates the pressure of the compression in the engine’s cylinders. A healthy engine should have readings that are relatively consistent across all cylinders, falling within a particular range based on the specific make and model of the vehicle.
If you notice that there is a significant difference in compression between cylinders, then that could indicate a problem with the engine, such as worn piston rings, broken valves, or other issues. When interpreting the results, it’s important to keep in mind that a low reading might not necessarily mean that the engine is completely shot, and there could be a relatively simple fix. Conversely, a high reading doesn’t necessarily mean there are no problems, as there are other issues that compression testing can’t diagnose.
Overall, compression testing can be a valuable tool in diagnosing engine issues and helping to determine the best course of action for maintaining your vehicle.
Normal vs. abnormal readings
When it comes to interpreting results from medical tests, it’s important to understand what normal and abnormal readings mean. Normal readings indicate that the test results are within the expected range for a healthy person. On the other hand, abnormal readings suggest that there may be an underlying health issue or condition.
It’s important to note, however, that abnormal readings don’t necessarily mean that there is something seriously wrong. It could be something as simple as a fluctuation in hormone levels or a minor infection. It’s always advisable to discuss any abnormal readings with a healthcare professional who can provide further guidance and investigation if necessary.
Remember, medical tests are just one piece of the puzzle when it comes to maintaining good health, and it’s important to make lifestyle choices that promote overall wellness.
Diagnosing engine problems
When faced with engine problems, it can be challenging to interpret the results of the diagnosis. It’s crucial to understand the terminology used by your mechanic, so you aren’t left scratching your head about what’s wrong with your vehicle. Don’t be afraid to ask questions to gain insight into the diagnosis’s specific details and what they mean for your car.
Understanding these details can help you determine the severity of the issue and what steps you should take to correct it. Remember, even if the diagnosis isn’t what you were hoping to hear, it’s essential to address the issue quickly. Ignoring the problem can lead to more costly and dangerous issues down the line.
So, take the time to understand the diagnosis and make informed decisions about your vehicle’s repairs.
What to do next
When interpreting the results of a study, it’s important to take a few key factors into consideration. First, make sure you fully understand the data you’re working with, including its source, methodology, and any limitations or bias. Next, look for patterns and trends within the data, whether that’s a correlation between variables or changes over time.
Keep in mind that even if a relationship is statistically significant, it may not be meaningful in practice. Finally, think about the implications of your findings and how they might be applied in the real world. It’s also important to communicate your results clearly and effectively, whether that’s through a written report or a presentation.
By taking these steps, you can ensure that your study is not only rigorous and accurate, but also useful and impactful.
Tips for accurate readings
If you want to get accurate readings when using a compression tester, there are a few key tips to keep in mind. First, make sure that your engine is warmed up before testing. This will help ensure that the reading is consistent and accurate.
Next, remove all of the spark plugs from the engine and ensure that the throttle is fully open. Then, insert the compression tester into the first spark plug hole and crank the engine over a few times to get a reading. Repeat this process for each cylinder in the engine, taking note of the readings for each one.
Finally, compare your readings to the manufacturer’s specifications to determine the health of your engine. With these tips in mind, you can confidently read a compression tester and get accurate results every time.
Preparing the engine
When it comes to preparing your engine, accuracy is key. If you want to ensure that you’re getting the most accurate readings possible, there are a few tips you should keep in mind. One of the most important things to do is to make sure that your engine is completely warmed up before you start taking readings.
This will help to ensure that everything is at the proper temperature and that you’re getting accurate readings. Additionally, you should always use high-quality fuel and make sure that your spark plugs are in good condition. When taking readings, it’s important to do so under consistent conditions, so try to use the same equipment, location, and method each time.
Finally, be patient and take your time – rushing through the readings can lead to inaccuracies. By following these tips, you can ensure that you’re getting the most accurate readings possible from your engine, which will help you keep it running smoothly and efficiently!
Using the right adapter
When it comes to using sensors and scientific equipment, it’s essential to have the proper adapter. While it may seem like a small detail, using the wrong adapter can lead to inaccurate readings and potentially ruin experiments. One important tip for accurate readings is to ensure that the adapter is compatible with both the equipment and the power source.
It’s also crucial to double-check that the adapter’s voltage and current ratings match the device being used. Using an adapter with too high or low of a rating can damage the equipment, which will lead to inaccurate readings. Overall, taking the time to research and invest in the right adapter will save time, money, and prevent frustrating inaccuracies in data collection.
Conclusion
In conclusion, reading a compression tester is more than just checking the numbers. It’s about understanding the language of your engine and deciphering its inner workings. It requires patience, skill, and attention to detail, much like solving a complex puzzle.
But with practice and experience, you’ll soon become fluent in the art of compression testing. So don’t be intimidated, dive in headfirst, and become the Sherlock Holmes of your engine’s health!”
FAQs
What is a compression tester used for?
A compression tester is used to measure the compression levels of an engine cylinder.
Can any compression tester be used for any type of engine?
No, it is important to use a compression tester that is specific to the type of engine you are working on.
How do I connect the compression tester to my engine?
The compression tester will typically connect to the spark plug hole or the diesel injector port.
What is a good compression reading for an engine?
This can vary depending on the make and model of the engine, but typically a good compression reading is around 100 – 150 PSI.
What are some common causes for low compression readings?
Low compression readings can be caused by worn piston rings, leaking valves, or a damaged head gasket.
How often should I perform a compression test on my engine?
It is recommended to perform a compression test every 30,000 miles or during a tune-up.
Can a compression tester be used to diagnose other engine problems?
Yes, a compression tester can be used to diagnose other engine problems such as a cracked cylinder head or a blown head gasket.
