“Have you ever wondered if your bike tires are properly inflated? It’s a critical factor in your cycling experience, affecting everything from handling to overall performance. But without knowing how to read a bike tire pressure gauge, it can be a daunting task. Fear not, we’ve got you covered! In this blog post, we’ll explain everything you need to know about bike tire pressure gauges and how to use them.
Think of it as your own personal pump of knowledge, ready to inflate your understanding of this crucial aspect of cycling. So, let’s get rolling!”
Why You Need to Check Your Tire Pressure
One important aspect of maintaining your bike’s performance and safety is checking your tire pressure regularly. Knowing how to read a bike tire pressure gauge is crucial to ensure the optimum level of air pressure in your tires. A tire pressure gauge usually reads in pounds per square inch (PSI), and the recommended pressure for your bike tires is usually listed on the sidewall of your tires.
Properly inflated tires not only improve your bike’s handling and grip, but they also help to avoid tire punctures and extend the life of your tires. Checking your bike’s tire pressure is a simple but essential task that you should do before every ride. By investing in a quality tire pressure gauge and taking a few minutes to check your tire pressure regularly, you can enjoy a safer and more comfortable ride, and save money by avoiding costly tire replacements.
Improves Bike Performance and Safety
As a bike enthusiast, you should know that checking your tire pressure is vital for improving your bike’s performance and safety. Why is that so important? Well, the right tire pressure can make a world of difference. If your tire pressure is too low, it can lead to sluggish handling, increased wear and tear on your tires, and a higher risk of flats.
On the other hand, if your tire pressure is too high, you sacrifice comfort, and your bike can bounce around on uneven terrain. Having incorrect tire pressure can also decrease your bike’s stability, leading to a potentially dangerous situation. So, it is important to regularly check your tire pressure and add or release air as necessary to keep it in the best possible condition.
By doing so, you can ensure that your bike remains a joy to ride and is as safe as possible while doing so.
Prevents Tire Damage and Wear
Tire pressure might seem like a mundane aspect to check on your car regularly, but it could save you a lot of money in the long run. Keeping your tire pressure at the recommended level ensures that your tires are not damaged or worn quickly by uneven wear or tear. Low tire pressure can also lead to poor fuel mileage, and thus costing you more money on gas.
Make it a habit to check your tire pressure every month, especially before long trips, to avoid potential hazards and ensure a smooth ride. Think of it this way, just like how athletes need to take care of their gear, a car owner needs to take care of their tires to ensure a safe and efficient drive. Remember, it only takes a few minutes to check tire pressure and save a lot in the long run.
Understanding Tire Pressure Gauge Types
When it comes to bike maintenance, one of the most important things to keep in mind is ensuring that your tires are properly inflated. This not only helps ensure a more comfortable ride but also helps prevent flats and other issues on the road. To properly check your tire pressure, you’ll need a tire pressure gauge.
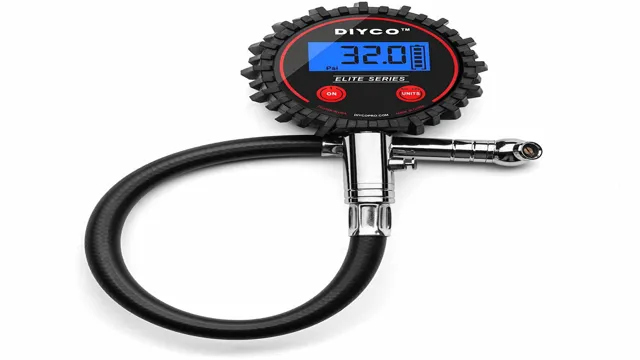
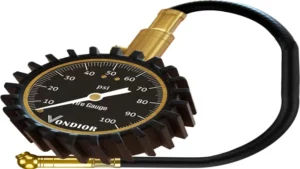
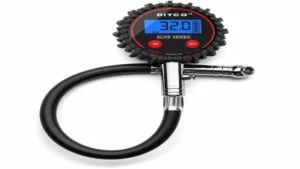
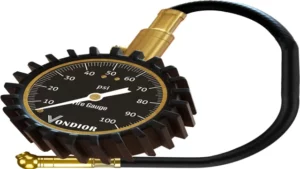
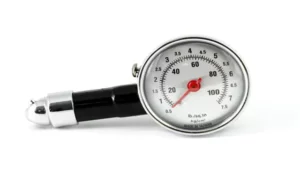
There are a few different types of gauges to choose from, each with its own pros and cons. One of the most common types is the dial gauge, which features a round display that shows the tire pressure in PSI (pounds per square inch). Another popular option is the digital gauge, which offers a more precise reading and often comes with a backlight that makes it easier to read in low light conditions.
Regardless of the type of gauge you choose, it’s important to ensure that it’s accurate and easy to use, so you can make sure your tires are properly inflated and ready for your next ride.
Analog vs. Digital Tire Pressure Gauges
Tire Pressure Gauge Types When it comes to checking your tire pressure, you have two options: analog or digital tire pressure gauges. Analog gauges rely on a mechanical system to measure pressure and display the reading on a dial. On the other hand, digital gauges use electronics to measure and display the pressure reading on an LCD screen.
While both types of gauges will give you an accurate reading, they do have some differences. Analog gauges tend to be more durable and reliable in extreme temperatures, and they often have a longer battery life. Digital gauges, on the other hand, are easier to read and often have additional features like backlit screens and the ability to save multiple readings.
Ultimately, it comes down to personal preference and what features are most important to you.
Pen vs. Dial Tire Pressure Gauges
When it comes to checking your tire pressure, there are two types of gauges to choose from: the traditional pen gauge and the newer digital dial gauge. The pen gauge is simple and inexpensive, but it requires a bit of skill to get an accurate reading. The dial gauge, on the other hand, is more expensive but provides more accurate readings.
It features a digital display that shows the exact pressure, and it’s easy to use thanks to its push-button operation. Both gauges have their benefits and drawbacks, but it’s important to get in the habit of checking your tire pressure regularly to ensure optimal safety and performance. Remember that proper inflation helps to extend the life of your tires, increase fuel efficiency, and prevent blowouts on the road.
So whether you opt for a pen or dial gauge, make sure you’re using it correctly and consistently.
Choosing the Right Gauge for Your Needs
When it comes to choosing the right tire pressure gauge, it’s important to understand the different types available on the market. One type is the digital gauge, which provides accurate readings and is easy to read. Another type is the dial gauge, which is similar to the bike pump gauge and requires a little bit of skill to operate.
Finally, there is the stick gauge, which is the most basic and affordable option. These gauges require a bit more effort to use, but the results can be just as accurate. Ultimately, the choice depends on your personal preferences and budget.
However, it’s important to remember that maintaining the correct tire pressure is crucial for optimal performance and safety while driving.
Steps to Reading Your Bike Tire Pressure Gauge
If you want to make sure that your bike rides smoothly and safely, one crucial thing to keep in mind is maintaining the correct tire pressure. And if you’ve got a bike tire pressure gauge, you might be wondering how to decipher its readings. Fortunately, learning how to read a bike tire pressure gauge is pretty simple.
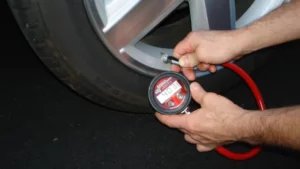
First off, make sure that you’ve removed the valve cap from your tire. Then, attach your gauge to the valve stem and press it in firmly. This should cause the gauge’s needle or digital display to move and show you the tire pressure.
Keep in mind that most bike tires should have a pressure of between 30-50 psi, but the exact number will depend on the make and model of your bike. If your tire pressure is too high or too low, you can use a bike pump to adjust it. By regularly checking and adjusting your tire pressure, you can ensure a smoother and safer ride, and your bike will thank you for it!
Step 1: Remove the Cap from the Valve Stem
Checking your bike tire pressure is crucial for maintaining optimal performance and safety while riding. To accurately read your bike tire pressure gauge, you need to follow a few simple steps. The first step is to remove the cap from the valve stem, which is usually located on the inner side of the wheel rim.
This can be done easily by using your fingers or a valve stem cap remover tool. Once the cap is removed, you’ll notice a small protruding metal pin, which is the valve core. This is where you’ll attach the tire pressure gauge to measure the pressure.
Make sure to keep the valve core clean and free of debris to ensure accurate readings. Remember to always check your bike tire pressure before each ride to maintain proper inflation levels and avoid any potential accidents or issues on the road.
Step 2: Press the Gauge Onto the Valve Stem
Once you have positioned your bike tire gauge onto the valve stem, the next step is to press it down firmly. Make sure to center the gauge onto the valve stem before applying any pressure. When you begin to press down, you should hear a hissing sound.
This is normal and indicates that air is being released from the tire to equalize the pressure with the gauge. Keep pressing until the hissing stops, which typically takes just a few seconds. Once it does, you’ll be able to easily read the current pressure level on the gauge.
Remember, measuring your tire pressure regularly is crucial to maintaining the safety, handling, and longevity of your bike tires. By following these simple steps, you’ll be able to easily read and understand your bike tire pressure gauge.
Step 3: Read the Gauge Measurement
After getting a reliable bike tire pressure gauge and checking the pressure level, it’s time to read the gauge measurement. The gauge measurement will indicate the amount of pressure in your bike tire, and it’s important to ensure that it matches the recommended pressure level for your specific type of bike tire. However, reading the tire pressure gauge can be confusing, especially for beginners.
The gauge measurement is usually indicated in psi (pounds per square inch), kPa (kilopascals), or bar units, depending on the type of gauge you have. To read the measurement, look for the small numbers on the gauge and locate the corresponding unit of measurement marked on the gauge. Ensure that you are looking at the correct unit of measurement before you take the reading.
Once you have located the unit of measurement, read the gauge measurement and ensure that it matches the recommended pressure level for your bike tire. If it’s lower than recommended, add more air, and if it’s higher, release some air until the pressure level is just right.
Step 4: Adjust Tire Pressure As Necessary
When it comes to maintaining your bike, keeping the tires inflated to the correct pressure is essential for a smooth and safe riding experience. To read your bike tire pressure gauge, start by removing the valve cap from the tire and attaching the gauge. Make sure the gauge is well-seated on the valve before taking a reading.
The gauge will give you a precise measurement of the pressure in the tire, which is usually listed in PSI (pounds per square inch). If your tire pressure is too low, use a pump to add air and increase the pressure to the recommended level listed on your bike or tire manufacturer’s instructions. On the other hand, if your tire pressure is too high, use the gauge’s release valve to let out some air until you reach the correct PSI.
Adjusting your tire pressure regularly not only improves your ride quality, but it also helps extend the life of your bike’s tires and prevent unnecessary wear and tear. So, make sure to check your tire pressure before every ride and keep your bike rolling smoothly down the road!
Tips for Accurate Tire Pressure Readings
Accurately reading the tire pressure on your bike can ensure a smoother ride and prevent potential accidents. To get an accurate reading, you need to know how to properly use a bike tire pressure gauge. First, make sure your tire is cool and has not been exposed to direct sunlight or heated surfaces.
Next, remove the cap from the valve stem and firmly press the gauge onto the valve until you hear a hiss sound. The gauge will give you a reading that shows the pounds per square inch (PSI) of your tire’s pressure. If the reading is below the recommended range, use a bike pump to add air until you reach the appropriate PSI.
Remember to check your tire pressure regularly, as changes in temperature and riding conditions can affect it. By regularly monitoring your tire pressure and using a gauge correctly, you’ll ensure a safer and smoother ride on your bike.
Check Tire Pressure When Tires are Cold
When it comes to checking tire pressure, it’s important to remember to do so when the tires are cold. This means that the tires haven’t been driven on for at least an hour and haven’t been exposed to the sun’s heat for an extended period. When tires are hot from driving, the air inside expands and can give an inaccurate reading.
To get an accurate reading, it’s best to wait until the tires have cooled down. Another important factor to consider when checking tire pressure is the type of gauge you use. A digital gauge may be more accurate than a stick gauge, but it’s important to make sure that the gauge is calibrated correctly.
A gauge that isn’t calibrated can give an inaccurate reading, causing you to over or underinflate your tires. It’s also essential to check your vehicle’s owner manual or the label inside the driver’s door for the manufacturer’s recommended tire pressure. The recommended pressure is usually listed in pounds per square inch (PSI) and varies depending on factors such as the type of vehicle and the size of the tires.
Finally, it’s crucial to check tire pressure regularly. Properly inflated tires not only contribute to better gas mileage, but they also help ensure your safety on the road. A tire that is over or underinflated can cause handling issues, increase the risk of a blowout, and decrease the lifespan of the tire.
So, remember to check your tire pressure when your tires are cold, use a calibrated gauge, and follow the manufacturer’s recommended pressure for optimal performance and safety.
Check Tire Pressure regularly
Tire pressure is a crucial aspect of maintaining your vehicle’s safety and performance. It’s essential to check tire pressure regularly to avoid any mishaps while driving. To ensure an accurate tire pressure reading, there are a few tips you should follow.
First, make sure that the car hasn’t been driven for at least 3 hours before checking the tire pressure. As the tires warm up while driving, it can affect the reading. Second, use a reliable tire pressure gauge.
Digital gauges are commonly used, as they are easy to read and provide precise readings. Third, check the pressure when the tires are cold, and don’t forget to check all four tires, including the spare. Fourth, consult your vehicle’s manual to determine the recommended PSI (pounds per square inch) for your car’s tires and adjust it accordingly.
It’s important to ensure that the pressure is balanced across all four tires for better handling and prolonging the life of your tires. By regularly checking your tire pressure and following these tips, you can guarantee a safe and smooth driving experience while improving your car’s fuel efficiency. So, don’t forget to check your tire pressure regularly and keep your wheels in excellent condition!
Invest in a Reliable Tire Pressure Gauge
Investing in a reliable tire pressure gauge is a must-have for every vehicle owner. Getting accurate tire pressure readings on-demand is important to ensure the safety, longevity, and performance of your wheels. While many people might overlook the importance of tire pressure, it is critical for the handling and fuel economy of your vehicle.
Having a top-quality tire pressure gauge can make sure that you always have the correct tire pressure and avoid any potential hazards on the road. Be sure to look for a gauge that’s easy to read, easy to use, and built to last. Whether you prefer a digital or manual gauge, investing in a reliable tire pressure gauge will save you big in the long run.
So, the next time you hit the road, be sure to double-check your tire pressure to keep yourself and your passengers safe.
Conclusion
So there you have it, folks! Reading a bike tire pressure gauge may seem like a daunting task, but with a little bit of practice and patience, you too can become a tire pressure guru. Remember to always check your tire pressure before each ride, use the appropriate gauge for your tire type, and adjust as necessary. Happy biking and may your tire pressure be ever in your favor!”
FAQs
What is a bike tire pressure gauge?
A bike tire pressure gauge is a tool used to measure the air pressure in a bike tire.
What is the importance of checking bike tire pressure?
Checking bike tire pressure is important as it ensures better grip, greater stability, and better handling while riding.
How often should you check your bike tire pressure?
You should check your bike tire pressure at least once a week to ensure proper inflation.
How do you use a bike tire pressure gauge?
To use a bike tire pressure gauge, attach it to the valve stem of the tire and read the pressure displayed on the gauge.
What is the recommended tire pressure for a bike?
The recommended tire pressure for a bike can vary based on the type of bike, the rider’s weight, and the riding conditions. In general, the recommended pressure can be found on the bike tire or in the owner’s manual.
What is the impact of underinflated bike tires?
Underinflated bike tires can lead to increased rolling resistance, reduced efficiency, and increased risk of flats.
What is the impact of overinflated bike tires?
Overinflated bike tires can lead to reduced traction, a harsher ride, and increased risk of blowouts.
