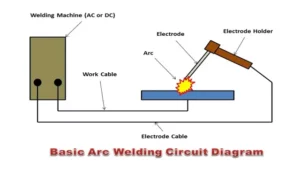
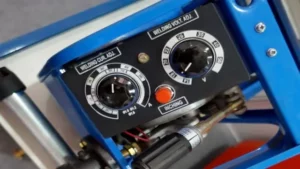
Welding can seem like a daunting task, but once you know how to operate a welding machine, you’ll find it to be a valuable skill. A welding machine is a tool that produces heat and electricity to join two or more metals together. With the right knowledge, you can achieve professional-looking welds that are strong and durable.
In this blog post, we’ll cover the basic steps for operating a welding machine, as well as some tips and tricks to help you get started. So grab your safety gear and let’s dive in!
Safety Precautions
If you’re new to welding, it’s essential to learn how to operate a welding machine safely. First and foremost, before using the welding machine, be sure to put on protective gear such as welding gloves, a welding helmet, and a welding jacket. Next, make sure that the welding machine you’re using is plugged into a grounded outlet.
Then, adjust the settings on the machine to the proper voltage and amperage according to the thickness of the metal you’ll be welding. When welding, always work in a well-ventilated area to avoid inhaling harmful fumes. Additionally, never touch the electrode or the welding wire with your bare hands while welding to avoid burns.
Lastly, always keep a fire extinguisher nearby, and never leave the welding machine unattended while it’s still on. By following these safety precautions, you’ll be able to safely operate a welding machine and complete your welding projects with confidence.
Wear protective gear, like gloves and eye protection
When it comes to protecting yourself while working with potentially harmful materials or equipment, wearing protective gear is essential. Gloves and eye protection are two important pieces of equipment to consider. Gloves help protect your hands from chemicals or sharp objects, while eye protection shields your eyes from potential splashes or debris.
These items may seem small, but they can make a huge difference in preventing injuries or harmful exposure. It’s important to choose the right type of gear for the specific task at hand, and to make sure they fit properly to provide optimal protection. Don’t take any shortcuts when it comes to safety, as it only takes one slip-up to cause a serious injury.
So, make sure to invest in quality gloves and eye protection, and wear them consistently every time you’re working in a potentially hazardous situation. Your health and well-being are worth it!
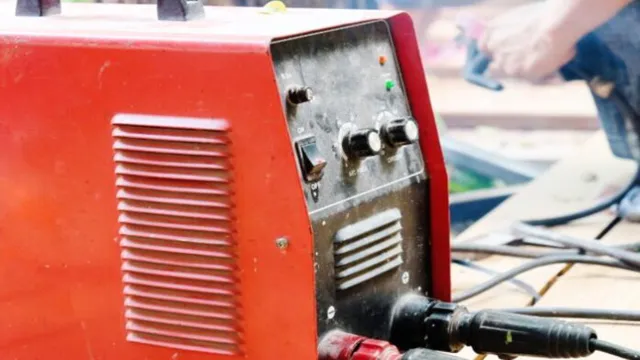
Ensure the work area is clean and free of flammable materials
When it comes to any type of work, safety should always be your top priority. This is especially true when working with materials that can easily catch fire. To ensure the work area is clean and free of flammable materials, you should first identify where potential hazards may be present.
Remove any loose debris, excess dust, oils, or other substances that can easily ignite. Then, make sure to keep the work area free of clutter and limit the number of materials present in the area. Store flammable materials properly in a separate location away from the work area to avoid accidents.
Maintaining a clean and organized workspace can help prevent dangerous situations and keep you and your team safe. Remember to always be aware of your surroundings and take the necessary precautions to avoid a fire in the first place. By following these safety measures, you can create a safer working environment for everyone.
Keyword: Safety Precautions
Inspect the welding machine before use
Inspecting the welding machine before use is extremely important to ensure safe and efficient welding. You don’t want to discover any faults or defects while using the machine, as this can lead to accidents, injuries, or even death. Therefore, it’s best to take the necessary precautions beforehand.
Firstly, ensure that the machine is in good condition and is free from any damages. Check all wires, cables, and parts for signs of wear and tear, and replace them if necessary. Observe the connections and make sure they are tight and secure.
Additionally, keep the welding area clear of any flammable objects and make sure that the machine is properly grounded. Lastly, ensure that you have read the manufacturer’s instructions and all necessary safety guides before using the welding machine. Remember, a few pre-checks can go a long way in ensuring your safety whilst welding.
Preparing the Machine
Operating a welding machine can be challenging if you don’t know how to prepare the machine. First, ensure that you have a well-ventilated workspace to avoid inhaling gases produced during the welding process. After that, check the power supply and ensure that the machine is appropriately grounded.
It’s crucial to wear protective gear such as gloves, safety glasses, and a welding helmet to protect yourself from heat and radiation. Additionally, check the settings on the welding machine to ensure they are suitable for the job at hand. Input the required settings, and you’re good to go.
With proper preparation, you can operate your welding machine with confidence and achieve a clean and durable weld.
Connect the power source and ground clamp
To get started with welding, it’s essential to prepare your welding machine. Once you’ve chosen the right machine for the job, the first step is to connect the power source and ground clamp. This is an important step that ensures the safety and efficiency of the welding process.
The power source provides the necessary electricity to run the machine, while the ground clamp serves the purpose of grounding the machine and stabilizing the electrical circuit. It’s important to make sure that all connections are securely fastened to avoid any sparks or electrical hazards. By preparing your machine correctly, you’ll be ensuring that you have a stable and safe working environment, which will enable you to focus on your welding and produce high-quality results.
Adjust the wire speed and voltage settings for the type of metal being welded
One of the first steps in preparing a welding machine is to adjust the wire speed and voltage settings for the type of metal being welded. Different metals require different levels of voltage and wire speed for optimal welding results. For instance, when welding thicker materials, a higher voltage and wire speed may be necessary to create a strong weld.
On the other hand, thinner materials may require lower voltage and wire speed to avoid burning through the metal. It is important to consult the manufacturer’s guidelines or a welding chart to determine the appropriate settings for the type of metal being welded. These adjustments will ensure that the machine operates at its maximum efficiency and provides a high-quality weld.
With the proper adjustments, the machine will be ready to tackle any welding job with confidence.
Load the electrode wire
To start welding with a MIG welder, one of the first steps is to load the electrode wire into the machine properly. It’s essential to choose the right type of wire that’s suitable for your welding job. Once you have the correct wire, you will need to locate the wire feeder compartment, where the wire spool will be installed.
Ensure that the wire is properly loaded onto the spool, then thread it through the wire feeder mechanism, making sure it is properly seated in the liner. You’ll need to adjust the wire tension to ensure it’s adequate for welding, but not so tight that it results in wire feed issues. Most welding machines will have a tension adjustment knob that can be tweaked to suit your needs.
Finally, make sure the wire electrode gun is adequately connected to the machine, so you’re ready to begin welding. Overall, taking the time to load the electrode wire correctly will help you produce high-quality welds that last.
Using the Welding Machine
Operating a welding machine may seem daunting at first, but with proper instruction, anyone can learn. Before starting, make sure you are wearing proper safety gear such as a welding helmet, gloves, and apron. Familiarize yourself with the different welding techniques such as stick welding, MIG welding, and TIG welding to determine the appropriate method for the material you are working with.
Next, prepare the welding machine to match the technique you will be using, including setting the voltage and wire speed for MIG welding or the current for stick welding. Once you have your machine properly set up, it’s time to begin welding. Position your material so that it is secure and positioned correctly, ensuring your safety and success.
As you weld, practice maintaining the correct arc distance and moving the electrode or wire at the appropriate speed. With practice, anyone can become proficient in operating a welding machine and create high-quality welds that will bond metal for years to come.
Hold the electrode gun at the correct angle and distance from the metal
When it comes to using a welding machine, holding the electrode gun at the correct angle and distance from the metal is crucial for ensuring a successful weld. The angle of the gun should be around 10 to 15 degrees, depending on the type of joint being welded. If the angle is too steep or too shallow, the weld won’t penetrate properly, leading to weak spots and potential failure.
It’s also important to maintain a consistent distance between the gun and the metal. If you get too close, the weld will be too hot and could burn through the metal, while being too far away could result in a weak, incomplete weld. Think of it like pouring hot glue from a glue gun – it needs to be at the right distance and angle to stick properly.
Taking the time to properly position the gun will ensure a strong and precise weld that will hold up over time. So, remember, keep the angle around 10 to 15 degrees and hold the gun at a consistent distance from the metal to achieve the best results.
Press the trigger to start the arc and begin welding
If you’re looking to start welding, one of the first things you’ll need to do is become familiar with the welding machine. These devices use electricity to fuse metal together, and they come in a variety of shapes and sizes. Regardless of the specific type you’re using, one thing is consistent: you need to press the trigger to start the arc and begin welding.
This takes some practice to get right, so don’t be discouraged if your first attempts aren’t perfect. The key is to understand the basics of how the machine works and keep at it until you achieve the results you’re looking for. When you press the trigger on a welding machine, you’ll notice an arc beginning to form between the electrode and the metal you’re working on.
This arc generates a tremendous amount of heat and light, and it’s what actually melts the metal so that it can be joined together. As you move the electrode along the workpiece, you’ll need to keep a steady hand and maintain the proper distance between the metal and electrode. It’s also essential to use the right type of electrode for the specific metal you’re working on, as different metals require different levels of heat to weld effectively.
Overall, using a welding machine is a skill that takes some time to develop, but with some practice and the right equipment, you’ll be able to achieve excellent results. So, go ahead and press that trigger to start the arc and begin welding! With the right attitude and approach, you’ll be able to create professional-looking welds that will last a lifetime.
Keep a steady hand and move the gun along the weld line at a consistent speed
When it comes to using a welding machine, it’s essential to keep a steady hand and move the gun along the weld line at a consistent speed to achieve the best results. It may seem like an easy task, but welding requires a lot of precision and skill. If you move too slowly, you risk burning the material or creating excess spatter, while moving too fast can result in a weak weld that’s prone to cracking.
It’s also important to maintain the correct distance between the gun and the workpiece and ensure that the electrode is always perpendicular to the surface. Remember, practice makes perfect, so if you’re a beginner, it’s crucial to start with small projects and gradually work your way up to more complex ones. By mastering the art of welding, you’ll be able to create durable and long-lasting joints that can withstand the test of time.
After Use
So, now that you’ve finished using your welding machine, it’s important to know how to properly shut it down and store it for future use. Firstly, make sure to turn off the power switch and unplug the machine from the outlet. This will prevent any potential electrical hazards or damage.
Next, clean the machine thoroughly to remove any stray welding wire, debris, or dust particles that may have accumulated during use. This will ensure that the machine stays in top-notch condition for the next time you need to use it. Additionally, replace any worn or damaged parts, such as the tip or nozzle, to ensure consistent and high-quality welds.
Finally, store the machine in a dry, cool place, away from any potential hazards or damage. By following these simple steps, you’ll be able to properly operate and maintain your welding machine, ultimately leading to safer and more effective welding results.
Clean the electrodes and gun tips with a wire brush
Cleaning the electrodes and gun tips of your welding equipment should be a top priority after use. Neglecting this task can lead to a myriad of problems such as arc instability, porosity, and other imperfections that could compromise the quality of your welds. To perform this task, you will need a wire brush specifically designed for cleaning welding equipment.
Gently scrape off any residue or build-up on the electrodes and gun tips, being careful not to damage the equipment. Regular cleaning of your welding equipment will not only improve the performance of your machine but also extend its lifespan. Remember to include this simple yet crucial task in your post-welding routine.
Your equipment will thank you, and so will the quality of your welds.
Turn off the welding machine and disconnect the power source
When you finish welding, it’s important to turn off the welding machine and disconnect the power source. This simple step can help prevent accidents and protect both yourself and the machine. You don’t want to leave the machine running and exposed to potential hazards.
Additionally, by disconnecting the power source, you eliminate the possibility of a sudden or accidental start-up. It’s always better to be safe than sorry, especially when it comes to machinery that poses a risk. Remember, taking the extra time to turn off the welding machine and disconnect the power source will save you from a headache in the long run.
So, always make sure to take care of your welding equipment and yourself by following this essential step after each use.
Store the machine and accessories in a dry, safe location
After a long day of sewing, it’s essential to store your machine and accessories properly. Keeping them in a dry, safe location will prevent any damages caused by moisture or dust. If you have a designated workspace, make sure to clean up any leftover threads or fabrics before storing your machine.
Cover your machine using a dust cover to keep it clean and prevent any unwanted scratches. It’s always a good idea to keep your machine’s manual, spare needles, and other accessories together in a container to avoid misplacing them. Finally, ensure that your storage location is secure by preventing any unauthorized use or movement.
Properly storing your machine and accessories will ensure that they are in good working condition for your next sewing project.
Conclusion
In conclusion, operating a welding machine is like conducting a symphony. First, choose your instrument – in this case, your electrode. Then, tune it up with the appropriate power settings.
When the moment is right, strike up a spark and glide it smoothly along your workpiece. Just like a fine piece of music, welding takes practice, precision, and passion. So grab your gear, take a deep breath, and let the sparks fly.
Happy welding!”
FAQs
What are the safety precautions that should be taken before operating a welding machine?
The operator should wear protective gear, the machine should be grounded properly, and the working area should be free of flammable materials.
How do I set up the welding machine for different thicknesses of metal?
Consult the manufacturer’s guide for the appropriate settings, adjust the voltage and wire speed, and test the weld before starting the actual work.
What maintenance is required for a welding machine?
Regular cleaning, lubrication of moving parts, and checking of electrical connections are necessary to ensure the machine functions properly.
What is the difference between MIG, TIG, and stick welding?
MIG welding uses a wire electrode and gas to shield the weld from air, TIG welding utilizes a tungsten electrode and gas, and stick welding uses a flux-coated electrode.
How do I troubleshoot common issues with the welding machine?
Check for loose connections, damaged parts, and consult the machine manual for troubleshooting tips.
Can a welding machine weld different types of metal?
Yes, but adjustments to voltage, wire speed, and gas may be necessary depending on the type of metal being welded.
What are some common welding techniques used with a welding machine?
Butt welding, lap welding, fillet welding, and spot welding are all commonly used techniques with a welding machine.
