Have you ever found yourself in a situation where your beloved car has a dent, and you don’t want to spend hundreds of dollars to get it fixed? Well, fortunately, you can make a dent puller at home with just a few supplies and a little bit of elbow grease. This DIY method is a cost-effective way to fix any minor dents on your vehicle and restore its appearance without breaking the bank. In this blog post, we’ll give you a step-by-step guide on how to make a dent puller at home, so you can get started on repairing your car in no time.
Whether you’re a DIY enthusiast or just want to save some money, this guide is perfect for anyone looking to fix minor dents on their car. So, roll up your sleeves, grab your tools, and let’s get started!
Understanding Dent Pullers
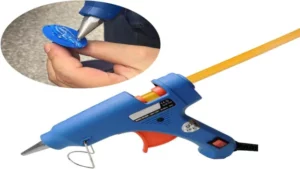
If you’re looking for a cost-effective solution for removing dents from your vehicle, making a dent puller at home might just be the way to go. First, you’ll need to gather a few materials: a small suction cup, a hot glue gun, and a piece of metal wire. Once you’ve got everything together, heat up the glue gun and apply a small amount of hot glue to the center of the suction cup.
Quickly press the metal wire onto the glue and hold it in place until it cools. With your new DIY dent puller complete, you can now place the suction cup directly over the dent and pull gently on the wire until the dent pops out. It’s important to note that this method works best on small, shallow dents and may not be effective on larger, more severe damage.
However, for minor repairs, this quick and easy solution can save you both time and money. So next time you’re faced with a pesky dent, grab your glue gun and give this DIY dent puller a try.
Types of Dent Pullers
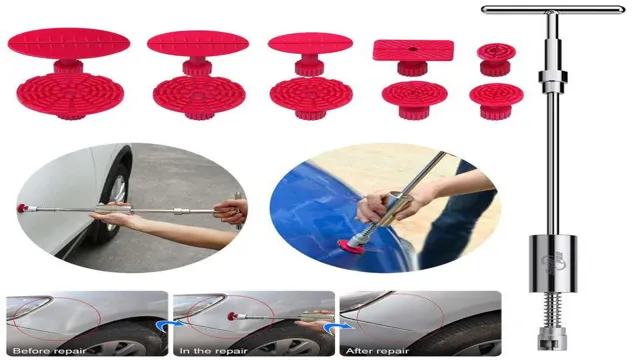
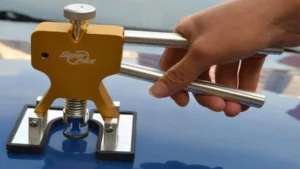
Dent pullers are an essential tool for repairing dents in your car. There are various types of dent pullers available in the market, each designed to suit different types of dents and vehicles. Understanding the types of dent pullers is key to selecting the right one for your specific needs.
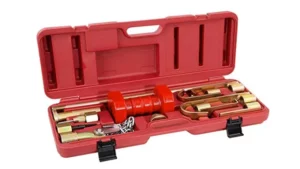
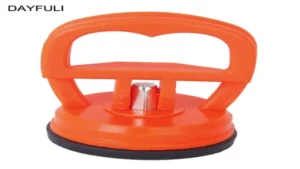
The first type is the suction cup dent puller, a popular choice for small to medium-sized dents. It works by creating a vacuum between the dent and the suction cup, pulling the dent outwards. The second type is the slide hammer dent puller, commonly used for more extensive dents that require more force.
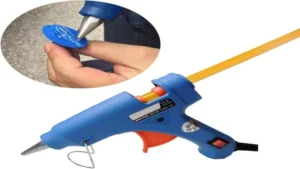
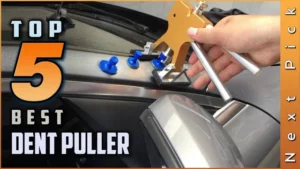
It works by attaching a metal rod to the dent and then hammering it from the other end to remove the dent. The third type is the glue gun dent puller, which uses hot glue to attach a plastic tab to the dent before pulling it outward. This type of dent puller is suitable for smaller dents and is relatively less expensive.
With these different types of dent pullers readily available, you can quickly get rid of the unsightly dents on your car and restore it to its former condition.

How Dent Pullers Work
Dent pullers can be a great tool for removing minor dents from your car without having to pay for expensive professional services. But how do they work? Essentially, a dent puller uses suction to create a vacuum between the tool and the surface of your car. By pulling on the tool, the vacuum helps to lift the dent out of the surface, slowly restoring it to its original shape.
However, it’s important to note that dent pullers are only effective on minor dents and may not work on more serious damage. Additionally, the tool itself can be a bit tricky to use and may require some practice and patience before you get the hang of it. Overall, a dent puller can be a cost-effective and convenient way to fix minor dents on your car.
Materials You Will Need
Are you tired of paying hundreds of dollars to fix small dents on your car? Well, you can easily make a dent puller at home with just a few materials. To get started, you will need a vacuum cleaner, a plunger, duct tape, and a piece of plywood or a flat wooden board. Begin by cutting a small hole in the center of the plywood and attach the vacuum hose to the hole with duct tape.
Then, place the plunger over the dent and make sure it’s covering it completely. Use duct tape to secure it in place. Turn on the vacuum cleaner and watch as it pulls the dent out of your car.
It’s that easy! With this DIY dent puller, you can save money and fix those pesky dents on your car in no time.
List of Required Tools
When it comes to woodworking, having the right tools is crucial. Without the proper tools, the entire project may be compromised, resulting in wasted time and money. The following is a list of materials you will need to get started.
First, you’ll need several different types of saws, including a circular saw, jigsaw, and handsaw. You’ll also need a drill, screwdriver set, and a hammer to handle any tasks that require fasteners. Additionally, you’ll require measuring and marking tools such as a tape measure, combination square, and pencil.
Sandpaper and wood glue are also essential for smoothing and joining your pieces together. Finally, a workbench or sturdy surface to work on, as well as safety gear such as safety goggles and a dust mask, are must-haves. With these tools at hand, you’ll be well equipped to begin your woodworking journey and create impressive pieces that will last a lifetime!
Types of Materials Needed
When it comes to DIY projects, having the right materials is key to success. Depending on the project you’re undertaking, you may need a variety of different materials. For example, if you’re working with wood, you’ll need saws, sandpaper, drills, and screws.
If you’re working with metal, you’ll need a welding machine or soldering iron, as well as metal cutting tools and appropriate safety gear. For crafts and artwork, you may need paints, brushes, canvases, and other specialized materials. Before starting your project, it’s important to identify the materials you’ll need and ensure they are all available.
This will prevent delays and setbacks during the project and ensure you achieve the best possible results.
Step-by-Step Guide
If you need to fix a dent on your car but don’t want to spend a fortune at the auto shop, you can make a dent puller at home using basic materials. The first thing you need is a plunger. Choose a plunger that has a smooth and flat surface and is big enough to cover the dent.
Then, you’ll need a piece of sturdy and flexible material, such as a metal or plastic strip. Affix the strip to the center of the plunger using a strong adhesive, such as epoxy. Once the glue is dry, place the plunger over the dent and press down firmly.
Then, slowly pull the plunger upwards, using the strip as a handle. As you pull, the suction created by the plunger will yank the dent out. Repeat this process several times until the dent has been completely removed.
With this simple DIY dent puller, you can save money and restore your car’s smooth exterior without leaving your home.
Preparing the Materials
To prepare the materials needed for a project, there are several steps you should follow to ensure everything is ready. First, gather all the necessary equipment and tools that you will need. This includes any measuring devices, markers, cutting tools, and adhesives.
Make sure these items are in working order and fully stocked before you begin. Next, review the project instructions to understand the materials you will need, such as fabric, paper, or wood. Purchase any required items and make sure they are the correct size and quantity.
If you are reusing materials, clean them thoroughly to remove any debris or residue. Once you have all the necessary items ready, organize them in a way that makes sense for the project. This could be by color, size, or type of material.
Keeping a clean and organized workspace will help you work more efficiently. By following these steps, you can prepare the materials needed for your project and ensure that everything is ready to go.
Building the Dent Puller
If you’re looking to make a dent puller for your car, you’ve come to the right place. Building your own dent puller is a simple process that requires a few tools and materials. Here’s a step-by-step guide to help you create your own dent puller.
First, gather all the necessary tools and materials. You will need a drill, screws, washers, a metal rod, a hammer, a clamp, and a glue gun. One of the most important parts of a successful dent puller is the glue gun.
A high-quality glue gun will ensure that your dent puller holds up under pressure. Next, install a screw into the metal rod. This will serve as the main anchor for your dent puller.
Be sure to tighten the screw so that it is secure. Next, attach a washer to the screw. This will help distribute the force of the pull evenly across the surface of the dent.
Attach the clamp to the metal rod, opposite the screw. This will be the point where you will be attaching the glue gun. Now, apply hot glue to the washer and attach the glue gun.
Allow the glue to dry completely. Finally, place the dent puller over the dent and use a hammer to tap it gently into place. Once the puller is secure, use the metal rod to pull the dent out, being careful not to apply too much pressure.
Using the Dent Puller
Using the dent puller is a convenient and cost-effective way to remove dents from your vehicle. If you’re new to this tool, don’t worry, it’s easy to use. Follow these simple steps to get started: First, clean the surface of your vehicle around the dent.
Then, place the suction cup of the dent puller over the center of the dent. Pull the handle of the dent puller towards you, ensuring a tight seal between the suction cup and the vehicle’s surface. Push the dent puller away from you with a quick and firm motion.
If the dent doesn’t pop out on the first try, repeat the process until the dent is completely removed. Using a dent puller doesn’t require any special skills, but it does take practice to get the hang of it. Remember to apply adequate pressure, but not too much, to avoid damaging your vehicle’s surface.
With patience and practice, you’ll be able to remove dents like a professional in no time. So, why not give dent pulling a try and save money on expensive repairs? Your wallet will thank you!
Safety Precautions
If you have a dent on your car, you might be tempted to take it to a professional for help. But did you know that you can actually make a dent puller at home? All you need is a few materials and some patience. However, before you start this kind of project, you need to take some safety precautions.
For example, make sure to use thick gloves to keep your hands protected. Additionally, be careful if you’re working with strong adhesives, as some can be toxic. Finally, if you don’t have experience with this kind of work, consider asking for help from someone who does.
By taking these steps, you can make sure that you’re safe while working on your car and can successfully remove the dent without any issues. So go ahead and try making a dent puller at home today!
Preventing Accidents
When it comes to preventing accidents, safety precautions are an absolute must. Whether you’re at home, on the road, or in the workplace, taking steps to protect yourself and those around you is essential for avoiding disasters. One of the most important safety precautions is staying alert and aware of your surroundings.
This means paying attention to potential hazards, like slippery floors or sharp objects, and taking steps to avoid them. Additionally, it’s crucial to use safety equipment when necessary, such as helmets, gloves, and safety glasses. By taking these simple steps, you can significantly reduce your risk of accidents and keep yourself and others safe.
Remember, safety should always be your top priority, no matter what you’re doing or where you are. Stay vigilant, take precautions, and stay safe!
Avoiding Damage to Vehicle
When it comes to driving, safety should always be your top priority. One way to ensure your safety on the road is by taking precautions to prevent damage to your vehicle. For starters, always follow the manufacturer’s recommended maintenance schedule.
Regular oil changes, tire rotations, and brake inspections can prevent mechanical failures that could put you and your vehicle in harm’s way. It’s also important to avoid overloading your vehicle with heavy cargo or passengers, as this can cause premature wear and tear on your suspension and brakes. Finally, always be mindful of your surroundings and avoid driving on rough or uneven terrain that could damage your undercarriage.
By taking these steps, you can help prevent costly repairs and keep your vehicle running smoothly for years to come. Remember, a little prevention goes a long way in ensuring your safety on the road!
Final Thoughts
In conclusion, if you’re looking for an inexpensive and easy solution to fix those annoying dents in your car, making your own dent puller at home can be a great option. With just a few items like a vacuum cleaner, a plunger, and some hot water, you can create a tool that can effectively suction out dents from your car’s body. Although it may not work for every type of dent, it’s worth giving it a try before taking your car to a body shop.
Overall, the process of creating a DIY dent puller is simple and can save you time and money in the long run. So, next time you notice a dent on your car, don’t hesitate to try this method out and see the results for yourself.
Conclusion
In conclusion, making your own dent puller at home is not only a cost-effective solution, but it also gives you the satisfaction of tackling a DIY project. Don’t let dents in your car bring you down – with a few simple materials and some creativity, you can fix them like a pro. So, next time you find yourself with a dent, grab a plunger, a vacuum cleaner, or some hot water and get to work.
Who needs a professional when you can be one yourself? Happy fixing!”
FAQs
What materials do I need to make a dent puller at home?
To make a dent puller at home, you will need a few materials such as a vacuum cleaner, plunger, hot glue gun, and glue sticks.
Is it worth making a dent puller at home instead of buying one?
Making a dent puller at home can be a cost-effective option. However, it requires some effort and skill. If you have the necessary tools and expertise, it is worth making one instead of buying an expensive dent puller.
How can I remove a dent using a homemade dent puller?
To remove a dent using a homemade dent puller, you need to attach the suction cup or plunger to the affected area and pull it outward. The vacuum will then create suction, pulling the dent outward.
Can a homemade dent puller cause damage to my car’s paint?
If you use the homemade dent puller gently and correctly, it should not cause damage to your car’s paint. However, if you apply too much force or pressure, it may damage the paint.
Can I use a homemade dent puller on any dent?
A homemade dent puller can work well on small to medium-sized dents. Large dents may require professional repair services.
How long does it take to make a homemade dent puller?
Making a homemade dent puller can take around 30 minutes to an hour depending on your skill level and the tools you have available.
Is it necessary to have prior experience or expertise in making a homemade dent puller?
Having prior experience or expertise in DIY projects is beneficial but not necessary. With the right tools and instructions, anyone can make a homemade dent puller.
