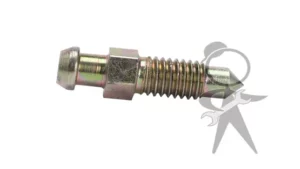
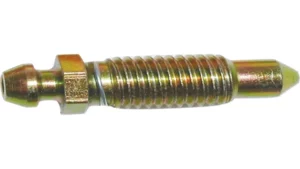
Have you ever struggled with bleeding your brakes? It’s an essential task for ensuring that your brake system operates efficiently, but it can be challenging to do correctly. If you’re tired of the traditional brake bleeding method, a reverse brake bleeder might be the solution you need. Essentially, a reverse brake bleeder is a tool that allows you to force brake fluid into the caliper or wheel cylinder from the bleeder valve, pushing any trapped air out.
This method is more effective than traditional brake bleeding because it ensures that all the air bubbles are removed from your brake system. Although a reverse brake bleeder is a nifty tool to have on hand, buying one can be quite costly. Fortunately, making your own reverse brake bleeder is a lot easier than you might think.
With a few simple tools and the right instructions, you can have your homemade reverse brake bleeder up and running in no time! Keep reading to learn how to create your own reverse brake bleeder, and say goodbye to the frustration and struggles of traditional brake bleeding for good.
Introduction
If you’re looking to bleed your brakes in reverse, you might be considering making your own reverse brake bleeder. While a commercial reverse brake bleeder can be expensive, making one yourself can be a cost-effective solution. A reverse brake bleeder is a tool that allows you to push brake fluid from the calipers or wheel cylinders up to the master cylinder, eliminating the need for a helper to pump the brake pedal.
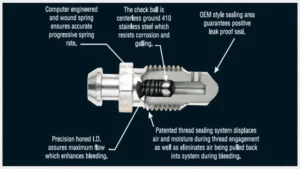
To make your own reverse brake bleeder, you’ll need to gather a few materials, including a jar with an airtight lid, a syringe, some tubing, and a check valve. With some basic assembly and a little bit of elbow grease, you can create a reverse brake bleeder that will save you both time and money in the long run.
What is a Reverse Brake Bleeder?
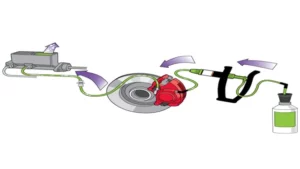
Reverse Brake Bleeder If you’re doing brake work on your vehicle and need to bleed the brakes, you may come across a tool called a reverse brake bleeder. This tool works differently than traditional brake bleeding methods, as it uses pressure to force fluid through the system from the wheel cylinders or calipers towards the master cylinder. The concept of a reverse brake bleeder is to remove air bubbles and replace old or contaminated brake fluid in the system for better brake performance.
It is an effective way to flush the brake system and maintain optimal brake function. With a reverse brake bleeder, you have greater control over the process, and you can use it on any type of vehicle. It is a versatile tool that offers an efficient and effective way to service your brakes.
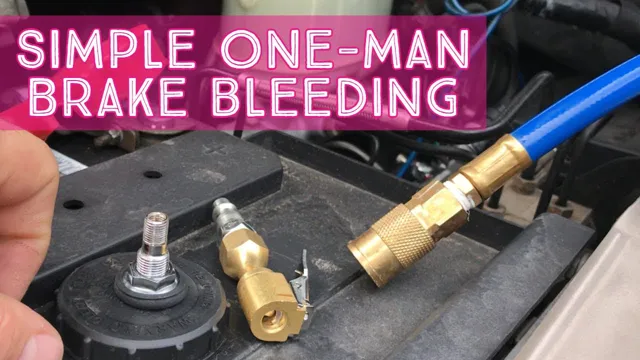
Why Use a Reverse Brake Bleeder?
Brake Bleeder Introduction: If you’ve ever worked on your car’s brakes, then you are probably familiar with the traditional way of bleeding the brake system by pumping the brake pedal. However, this method can be time-consuming and labor-intensive, not to mention messy. That’s where a reverse brake bleeder comes in handy.
It offers a more efficient and effective way of bleeding your brakes, with less mess and less effort. The reverse brake bleeder works by pushing brake fluid through the brake lines from the caliper or wheel cylinder up to the master cylinder, which removes air bubbles and ensures a firm brake pedal. Say goodbye to frustration and hello to a smoother brake job.
So, if you want to save time, effort, and achieve better results, consider using a reverse brake bleeder.
Materials Needed
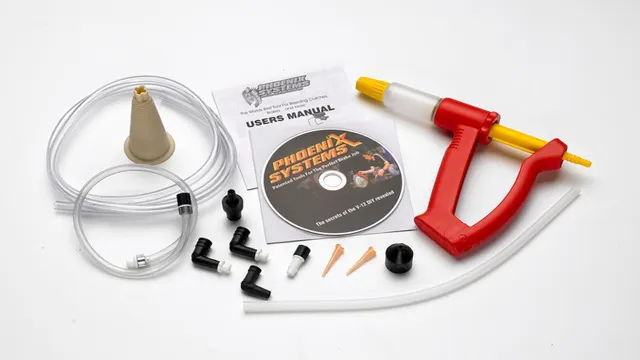
Before we dive into how to make a reverse brake bleeder, let’s first go over the materials you’ll need to get started. First and foremost, you’ll need a bleeder kit that includes a bottle and a hose. You’ll also need a brake fluid that is compatible with your specific vehicle, a wrench for removing the bleeder screw, a syringe for filling the bleeder bottle, and a container to catch any overflow.
Additionally, it’s recommended to have a towel on hand to clean up any spills and a pair of gloves to protect your hands from brake fluid. With these materials in hand, you’ll be well-prepared to tackle the task of making your own reverse brake bleeder.
Brake fluid catch can
If you are looking for a simple yet effective way to catch brake fluid before it spills all over your engine bay, you might want to consider installing a brake fluid catch can. Fortunately, this project doesn’t require a lot of materials, and you can easily source them from your local auto parts store or online retailer. Here are the materials you’ll need: a catch can with at least 1/4 inch NPT fittings, two 1/4 inch NPT to 3/8 inch barb fittings, two 3/8 inch vacuum caps, and two hose clamps.
You’ll also need about two feet of high-temperature hose, preferably silicone, to connect the catch can to your brake master cylinder. With these materials in hand, you can easily build a catch can that will keep your engine bay clean and safe from brake fluid leaks. Just make sure to follow the manufacturer’s instructions carefully, and always double-check your work before hitting the road.
With a little bit of DIY know-how, you can make your vehicle safer and more functional than ever before.
Rubber tubing
When it comes to working with rubber tubing, there are a handful of materials that you will need in order to get started. Firstly, you will need the rubber tubing itself. Depending on your specific project, you will want to choose a tubing size that best suits your needs.
Additionally, you will need some kind of cutting tool in order to cut your tubing to the appropriate length. A pair of scissors or a sharp knife will typically do the trick. Next, you will want to gather some clamps or connectors to hold your tubing in place.
This will help to prevent any leaks or spills while you are working with your tubing. Lastly, you may want to consider acquiring some kind of lubricant, such as soap or oil. This will make it easier to slide your tubing onto connectors or other components.
With these materials in hand, you will be well on your way to successfully working with rubber tubing!
Jar or bottle
When it comes to storing your homemade sauces and dressings, choosing between a jar or a bottle can be a tough decision. Fortunately, both options have their advantages and disadvantages. If you prefer a cheaper option, a jar is the way to go.
They are widely available and often come in various sizes, so you can choose one that’s appropriate for your needs. Bottles, on the other hand, are a bit more expensive. But they’re more portable and often come with built-in dispensers that make pouring your sauces and dressings a breeze.
Regardless of whether you choose a jar or bottle, there are some materials that you will need to make sure that your storage container is safe and effective. First and foremost, you will need to choose a container made from food-grade materials. Glass is a popular option because it’s non-reactive and won’t change the flavor of your sauces and dressings.
However, plastic containers are also acceptable as long as they’re BPA-free. If you’re choosing a jar, you’ll also need to purchase lids separately. Look for lids that have a tight seal to prevent air and moisture from getting into your sauces and dressings.
Finally, you’ll need a funnel to make filling your jar or bottle a mess-free process. In conclusion, whether you opt for a jar or bottle depends on your personal preference and needs. Both options have their pros and cons, so carefully consider what matters most to you when making your choice.
Additionally, investing in food-grade materials like glass or BPA-free plastic containers, tight-sealing lids, and funnels will ensure that your homemade sauces and dressings are safely and effectively stored for future use.
Bleeder valve wrench
If you’re planning on doing your own brake maintenance, you’ll want to have a bleeder valve wrench on hand. This specialized tool is designed to fit onto the bleeder valve of your brake system, allowing you to open and close it as needed. The materials needed to make a bleeder valve wrench are relatively simple – you’ll need a length of steel rod, a pipe cutter, and a set of pliers.
To make the wrench itself, you’ll need to use the pipe cutter to cut the steel rod into a length that’s comfortable for you to hold. Then, use the pliers to bend one end of the rod into a loop that will fit onto the bleeder valve. The other end of the rod should be sharpened into a point so that you can use it to turn the valve.
Once you’ve created your bleeder valve wrench, you’ll be ready to tackle any brake maintenance tasks that come your way.
Clear plastic tubing
When working on a project that requires clear plastic tubing, it’s important to have the right materials on hand. First and foremost, you’ll need the tubing itself. Clear plastic tubing comes in a variety of sizes, so make sure you choose the right diameter for your project.
You’ll also want to make sure you have enough tubing to complete your project, so measure carefully before making your purchase. In addition to the tubing, you may need connectors, clamps, or other hardware to attach and secure the tubing as needed. It’s always a good idea to have a few extra pieces of hardware on hand, just in case.
Overall, clear plastic tubing is a versatile and useful material for a variety of projects, so make sure you have the right materials before you start your next DIY endeavor.
Brake bleeder kit
If you’re wondering why your brakes feel soft or spongy, it’s likely because there’s air in the brake lines. Bleeding the brakes with a brake bleeder kit is an effective way to remove any air bubbles from the brake lines, ensuring that your brakes work properly. To do this, you’ll need a few materials: a brake bleeder kit, brake fluid, a wrench, and a clear plastic hose.
The brake bleeder kit typically includes a hand pump, a collection bottle, and various adapters. Brake fluid is necessary to fill up the brake fluid reservoir, and the wrench is used to loosen the bleeder valve. The clear plastic hose is used to connect the bleeder valve to the collection bottle, which collects the old brake fluid and air bubbles during the bleeding process.
With these materials, you’ll be able to properly bleed your brakes and get rid of any air bubbles for safe and secure braking on the road.
Vacuum pump
If you’re planning on building a vacuum pump, there are a few essential materials that you’ll need. Firstly, you’ll need a motor to power the pump. It’s important to choose a motor size that’s appropriate for the type of pump you’re building.
Larger pumps will require a more powerful motor, whereas smaller pumps can get away with a smaller motor. You’ll also need a vacuum pump chamber, which is where the air is extracted. This chamber needs to be airtight, so it’s crucial to use a high-quality material like stainless steel or titanium.
Furthermore, you’ll need some sort of tubing or piping to connect the vacuum pump chamber to any auxiliary equipment you may be using. Additionally, you’ll need an exhaust valve to control the evacuation process and prevent over-pressurization. Lastly, you’ll need a vacuum gauge to monitor the pressure within the pump chamber and ensure that the vacuum is working correctly.
With these materials in hand, you’ll be well on your way to building your own vacuum pump.
Step-by-Step Guide
Have you ever wondered how to make a reverse brake bleeder? It’s easier than you might think! Here is a step-by-step guide to make your own reverse brake bleeder. First, you need to gather your materials, which include a vacuum pump, brake fluid, tubing, and a one-way check valve. Next, disconnect the brake fluid reservoir from your car and attach the tubing to the brake bleeder valve.
Place the one-way check valve at the end of the tubing. Once you have everything hooked up, pump the vacuum until the brake fluid starts to flow through the tubing and into the reservoir. With this setup, you will be able to force air bubbles out of your brake system, ensuring that your brakes work to their maximum potential.
By following these simple steps, you’ll be able to make your very own reverse brake bleeder in no time.
Step 1: Prepare for the Brake Bleed
Preparing for a brake bleed is perhaps one of the most crucial tasks when it comes to maintaining your vehicle’s braking system. The first step is to gather all the necessary tools. You will need a brake bleeding kit, usually available at most auto stores, and a wrench to loosen the brake bleeder screw.
Before getting started, make sure the car is parked on a firm and level surface, the engine is off, and the emergency brake is engaged. Next, locate the brake fluid reservoir and ensure that it is filled to the recommended level. It’s critical to double-check that the cap is tightly secured to prevent any dirt or debris from entering the system.
While you’re at it, inspect the brake lines and hoses for any signs of leakage or damage. It’s better to identify and tackle these issues before starting the brake bleed process. Keep in mind that when working with brake fluid, safety should be a top priority, so wear gloves and eye protection.
By following these simple steps, you’re already making progress towards a successful brake bleed.
Step 2: Remove Old Brake Fluid
Now that you’ve gathered all the necessary equipment, it’s time to start removing the old brake fluid. First, locate the brake master cylinder reservoir, which can typically be found under the hood near the brake booster or firewall. Before removing any old fluid, make sure to clean the area around the reservoir to prevent any debris or dirt from getting inside.
Using a suitable extraction tool, slowly draw out the old fluid and dispose of it properly. It’s important to remove as much of the old fluid as possible to ensure the new fluid can circulate through the system effectively. Don’t forget to check the condition of the brake fluid for any signs of contamination or poor quality.
Once you’re finished, secure the reservoir cap back in place and move on to the next step of the process. Remember, safety is paramount when handling brake fluid, so make sure to wear protective gear and avoid contact with your skin or eyes. With this simple step complete, you’re one step closer to a safer and more responsive braking system!
Step 3: Attach the Clear Plastic Tubing
Attaching the clear plastic tubing is a crucial step in setting up your aquarium air pump system. The plastic tubing is responsible for delivering air from the air pump to the aquarium. To attach the tubing, first, select the appropriate tubing size that matches your air pump’s output valve.
Next, push the tubing onto the air pump’s output valve. Ensure that you push it all the way in to create an airtight seal. Then, run the tubing over the aquarium and secure it in place using suction cups or clips.
Make sure to avoid kinks or bends in the tubing as this can restrict airflow. Lastly, connect an airstone or air diffuser to the other end of the tubing and place it in the aquarium. The airstone or diffuser will release the air bubbles into the water, providing oxygen for your aquatic life.
With the plastic tubing securely attached, your aquarium air pump system is ready to go.
Step 4: Connect the Vacuum Pump
Connecting the vacuum pump is a crucial step in any refrigeration system installation. To begin, make sure the pump is placed on a stable surface close to the manifold gauge set. Next, attach the 1/4″ flare end of the yellow hose to the vacuum pump’s intake port.
Secure it tightly using a wrench if necessary. Then, connect the other end of the yellow hose to the center port of the manifold gauge. Make sure the connection is secure, and if using a flare nut wrench, be sure not to overtighten.
Lastly, attach the additional hose to the vacuum pump’s exhaust port and secure it tightly. This hose can either be vented to the outdoors or attached to a recovery tank, depending on the type of system. Remember to always follow proper safety procedures when handling refrigerant and ensure all connections are leak-free before proceeding with the evacuation process.
By properly connecting the vacuum pump, you are ensuring that your refrigeration system will function properly and efficiently.
Step 5: Bleed the Brake System
Bleed the brake system is a vital step in maintaining the safety and performance of your vehicle’s braking system. Bleeding the brake system involves removing the air that accumulates in the brake lines and replacing it with clean fluid. This is important because air in the brake lines can cause the brakes to feel spongy and unresponsive, leading to a potential loss of control when braking.
Thankfully, bleeding the brake system is a relatively straightforward process that you can do at home if you have the right tools and some basic mechanical knowledge. To begin, you’ll need to locate the brake bleeder valve on each brake caliper and attach a clear plastic tubing to it. Then, have someone press the brake pedal while you turn the bleeder screw to allow air and fluid to escape.
Repeat this process until all the air has been removed and the brake fluid runs clean. Remember, always follow the manufacturer’s instructions and consult a professional mechanic if you’re unsure.
Step 6: Check Brake Fluid Level
Checking the brake fluid level is a critical step when it comes to maintaining your vehicle’s brake system. So, how do you check the brake fluid level? Firstly, locate the brake fluid reservoir and check the level against the marked lines on the reservoir. If the fluid level is below the minimum line, it’s time to add more fluid.
However, it’s important to remember not to overfill the reservoir as it can lead to brake malfunctions and cause other issues. Additionally, always use the appropriate type of brake fluid, as specified in your vehicle’s owner’s manual. Neglecting to do so can negatively impact the brake system’s proper function.
Lastly, keep in mind that brake fluid should be replaced periodically. Use this step-by-step guide to check your brake fluid level regularly, and treat your vehicle’s brake system with care and attention it deserves.
Conclusion
Congratulations! You now have the power to defeat stubborn brake air bubbles and ensure maximum stopping power. With a bit of creativity and DIY spirit, you’ve created a reverse brake bleeder that is both effective and affordable. So the next time your car starts feeling a bit sluggish on the brakes, don’t panic – simply grab your trusty homemade reverse brake bleeder and get to work! Happy bleeding!”
Benefits of a Reverse Brake Bleeder
If you’re considering performing brake maintenance at home, investing in a reverse brake bleeder can save you loads of time and hassle. This innovative tool works by pushing brake fluid from the caliper or wheel cylinder up through the system, rather than the traditional method of pushing air and old fluid down through the lines. This eliminates the need for a second person to pump the brake pedal while bleeding, making the process much simpler and more efficient.
Benefits of a reverse brake bleeder include the ability to accurately flush and bleed the system, removing air bubbles and contaminants that can cause brake failure. Additionally, it can reduce the risk of damaging delicate components during the bleeding process. To use a reverse brake bleeder, start by filling the bleeder with fresh brake fluid and attaching it to the brake bleeder valve.
Then, pump the handle until all air is expelled from the system and fresh fluid begins to flow. Follow the manufacturer’s instructions for best results and always use caution when working with brake systems. Overall, a reverse brake bleeder can be a valuable addition to your brake maintenance toolkit, saving you time and ensuring your brake system is in top condition.
Summary and Final Thoughts
In summary, this step-by-step guide has provided a clear and concise explanation of how to approach the topic at hand. We started by defining the basic concept and exploring its importance before moving on to the various steps involved in its execution. Whether you are a beginner or an expert in this area of interest, this guide has something to offer.
By following these simple steps, you can achieve success and make a difference in your field. Ultimately, the key to success is to stay motivated, stay focused, and remain committed to your goals. With this guide as your roadmap, you have everything you need to get started and stay on track.
So go ahead and take that first step – the journey begins now! Keyword: Step-by-Step Guide
FAQs
What is a reverse brake bleeder?
A reverse brake bleeder is a tool used for bleeding brakes in which brake fluid is pushed from the calipers/wheel cylinders up to the master cylinder.
How does a reverse brake bleeder work?
A reverse brake bleeder pressurizes the brake system from the bleeder valves upwards, pushing any air out through the master cylinder.
Can I use a reverse brake bleeder on my car?
Yes, you can use a reverse brake bleeder on most cars with hydraulic brake systems.
Is it necessary to use a reverse brake bleeder for bleeding brakes?
No, it is not necessary to use a reverse brake bleeder. Other methods such as the traditional method of pumping the pedal can be used.
What are the advantages of using a reverse brake bleeder?
The advantages of using a reverse brake bleeder include faster and more efficient bleeding of brakes, the ability to work alone without a helper, and the prevention of introducing air into the brake system.
How do I properly use a reverse brake bleeder?
To properly use a reverse brake bleeder, first, fill the bleeder tank with brake fluid and attach it to the bleeder valve on the caliper/wheel cylinder. Then, open the valve and operate the reverse brake bleeder, watching for any air bubbles to come out. Once no more bubbles appear, close the valve and move on to the next bleeder valve in the system.
Can I use a reverse brake bleeder for a clutch system?
Yes, a reverse brake bleeder can also be used for bleeding a hydraulic clutch system.
