How to Make a Bench Grinder from Scratch: A Comprehensive Guide
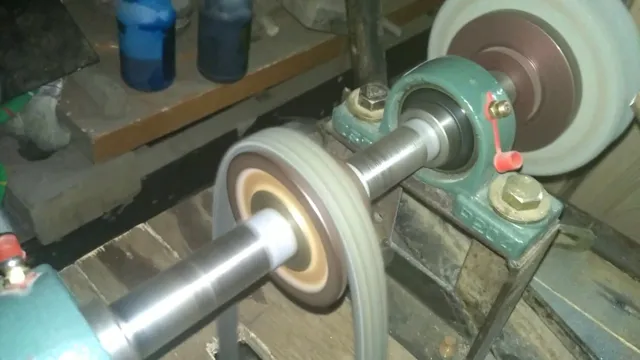
If you’re a DIY enthusiast and have been searching for a way to make your own bench grinder, then look no further. In this guide, we will explain how to make a bench grinder from scratch, including the tools and materials you’ll need and step-by-step instructions to get the job done. A bench grinder is an essential tool for sharpening blades and removing rust or corrosion from metal parts, making it a must-have for any workshop or garage.
Buying a new one can be expensive, which is why many people prefer to make their own. However, if you’re not careful during the process, you could end up with a grinder that’s flimsy and ineffective, so it’s important to follow our guide closely. Firstly, we’ll take you through the various materials you’ll need.
From motors to grinding wheels, we’ll make sure you have everything required to get started. Next, we’ll explain how to connect the motor to the grinding wheels, ensuring it’s secure and stable. We’ll also provide guidance on the ideal size and shape of your bench grinder to guarantee it meets your specific needs.
And we’ll look at the different safety measures you should take to protect yourself and anyone else who might use the tool. In short, this guide covers everything you need to know about building your own bench grinder from scratch. Whether you’re a professional or a hobbyist, this project is sure to be a worthwhile addition to your workshop.
So, if you’re ready to get started, let us guide you through the process.
Introduction
If you’re looking to take on a DIY project, building your own bench grinder can be a challenging yet rewarding experience. First and foremost, you’re going to need a few key materials, such as a motor, a set of wheels, and a mounting bracket. You can typically find these items online or at your local hardware store.
Once you have your materials, you’ll need to follow a set of step-by-step instructions, which can often be found in online forums or instructional videos. It’s important to take your time and ensure that all the components are securely fastened together before using the grinder. With a little bit of patience and effort, you’ll soon have your very own custom-made bench grinder that you can be proud of.
So go ahead and grab your tools, it’s time to get started!
What is a bench grinder?
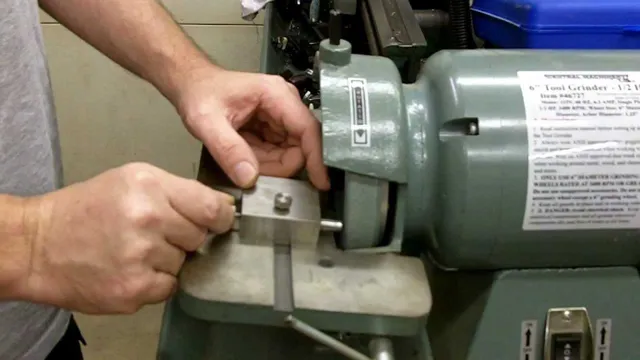
A bench grinder is a tool used in workshops for sharpening, smoothing, and shaping metal objects. It consists of two abrasive wheels, one on each side of a motor-driven spindle, that rotate at high speeds. The size of the wheels can vary, and the most common ones are 6 and 8 inches.
The tool is mounted on a workbench or bolted onto a stand, making it a stationary machine. When turned on, the wheels spin counterclockwise and the operator holds the metal object in contact with the abrasive surface, creating friction that grinds away the material. Bench grinders are versatile machines that can also be used to polish or buff surfaces with the right attachments.
So, whether you’re a metalworker, mechanic, or DIY enthusiast, having a bench grinder in your workshop is an essential piece of equipment.
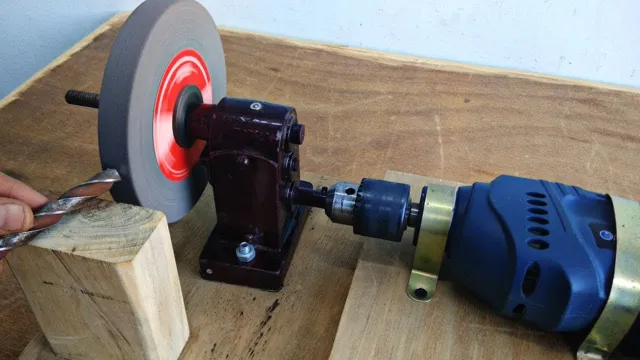
Benefits of making your own bench grinder
Making your own bench grinder can provide numerous benefits. Firstly, you get to customize the tool to meet your individual needs. This means that you can design and build a grinder that is ideal for your specific projects.
Secondly, making your own bench grinder can be a cost-effective option as you can use parts that you already have or buy components at a lower cost than purchasing a pre-made grinder. Additionally, you can also choose the materials and parts that are durable and long-lasting, ensuring that the equipment lasts longer without the need for expensive repairs or replacements. Lastly, making your own bench grinder can provide you with a great sense of satisfaction and accomplishment, especially if you enjoy DIY projects.
With a little bit of creativity, you can build a grinder that is not only practical but also visually appealing and unique.
Materials Needed
If you’re looking to make a bench grinder, there are a few materials you’ll need to gather first. Firstly, you’ll need a motor, which can be salvaged from an old fan or even purchased new from a hardware store. You’ll also need a spindle to connect the motor to the grinding wheels, which can be found at most hardware stores.
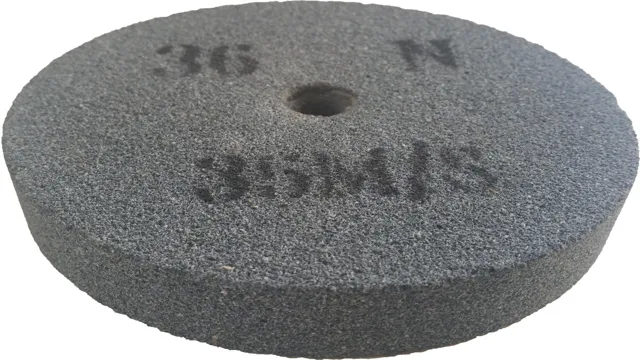
Next, you’ll need some grinding wheels, which come in a range of sizes and grits. It’s important to choose the right size and grit for the type of grinding you’ll be doing. Other materials you may need include a belt and pulleys, a base or stand for your grinder, and safety equipment like goggles and gloves.
It’s important to follow safety guidelines when using a bench grinder, so make sure you have the proper equipment and know how to use it safely. Overall, making a bench grinder can be a fun and rewarding project as long as you have the right materials and take the necessary precautions.
List of materials needed
To start a project, gathering all the necessary materials is essential. Depending on the project, the materials needed can vary greatly. For example, a woodworking project will require specific tools and lumber, while a scrapbooking project will need paper, glue, and embellishments.
It is always a good idea to make a list of everything needed before starting the project. This can prevent trips to the store in the middle of working and avoid frustration. Some common materials needed for crafting projects include adhesives, scissors, rulers, paint, brushes, markers, fabrics, yarns, and beads.
Additionally, it is important to have a clean and organized workspace to work efficiently. By having all the materials needed beforehand, the focus can be solely on creating and achieving the desired outcome.
Where to buy materials
If you are looking to embark on a DIY project, it is essential to know where to buy the necessary materials. Most people make the mistake of rushing to buy their materials without researching the best place to purchase them. Several factors need to be considered when selecting where to buy your materials.
You could get your materials from the nearest hardware store, but it is advisable to compare prices with other stores around the area. Additionally, you can opt for online stores that offer a vast selection of materials allowing you to select precisely what you need. When shopping online, make sure to verify the shipping and handling fees, as they can add up to the total cost.
Consider shopping at specialty stores for unique materials that you might need. Always have a budget to ensure that you do not overspend on materials. By doing proper research, you can find a store that offers quality materials at an affordable price.
Step-by-Step Guide
Making your own bench grinder might sound like a daunting task, but with a little bit of patience and hard work, it can be easily achieved. Here is a step-by-step guide on how to make a bench grinder. Firstly, gather all the equipment and materials you will need, including a motor, bearings, wheel guards, eye shields, switch, and grinding wheels.
Next, assemble the motor and attach the wheel guards and eye shields. Make sure to attach the switch and wiring correctly. Next, attach the bearings and mount the grinding wheels onto the motor shaft.
Finally, test the bench grinder to ensure that everything is running smoothly. Making your own bench grinder can be a rewarding experience, and with a bit of creativity, you can customize it to suit your own specific needs. So, if you’re up for a challenge, why not give it a go?
Step 1: Assemble the motor
Assembling a motor may seem like a daunting task for those who are unfamiliar with the process. However, with this step-by-step guide, you’ll be able to build your motor without any hassle. The very first step is to assemble the motor.
To put it together, you’ll need to follow the manufacturer’s instructions closely and ensure that every component is placed correctly. Starting with the frame, you’ll need to attach the motor mounting feet to each end and secure them in place. Once this is complete, attach the stator, which is the stationary component, to the frame with bolts.
Next, insert the rotor, which is the rotating component, into the stator and secure it in place. Finally, attach the end bells to the frame to enclose the motor. By following this step, you’ll have successfully assembled a motor which can be used in a variety of electrical devices.
Step 2: Create the base
Now that we’ve gathered all the materials and tools for our project, it’s time to start creating the base! We’ll be using the wooden planks we purchased earlier, but before we start assembling, we need to measure and cut the planks to the desired size. Using a measuring tape, we’ll measure the length and width of the base, and then we’ll use a saw to carefully cut the planks to size. Once we’ve got all the pieces cut, we’ll start assembling them by laying them flat on the ground.
We’ll use wood glue to attach the planks together and to hold them in place while we drill pilot holes and insert screws to securely attach them. This creates a sturdy base that will support the weight of our project. With a little bit of elbow grease, our base is starting to take shape! The key to a successful base is making sure your measurements are accurate and ensuring that everything is properly assembled to provide a solid foundation for your project.
Step 3: Attach the motor to the base
Now, let’s move on to the next step in building our robot. Once you have attached the wheels to the base, it’s time to connect the motor. Start by positioning the motor on the base, making sure it’s securely fastened.
Then, take your screws and carefully drill them into the pre-drilled holes on the base. You want to avoid over-tightening the screws, as this can cause damage to your robot. Once the motor is securely attached, you can begin to connect the wires.
Each motor will have two wires, usually a red and black wire. Connect them to your motor driver board, making sure to match the colors correctly. Once everything is connected, give your robot a quick test to see if the motor is working properly.
Congratulations, you’re one step closer to having a functional robot!
Step 4: Create the tool rest
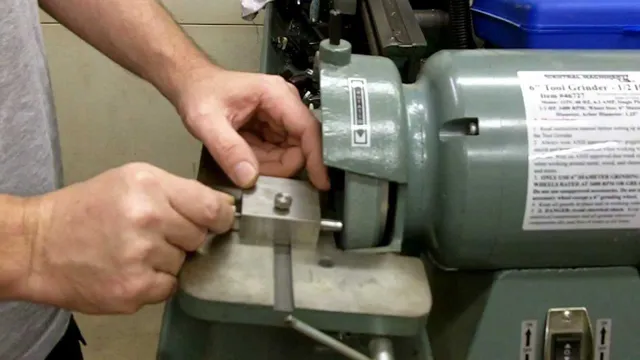
Now that we have created the base of the grinder, it’s time to move on to the next step: creating the tool rest. The tool rest on a bench grinder is the part that holds your chisels, drills, and other tools steady while you work. The first step in creating a tool rest is to cut a piece of sheet metal to the desired size.
Then, using a bench vise, bend the sheet metal to the desired shape. This will likely require some trial and error, so take your time and don’t be afraid to make adjustments as needed. Once you have the right shape, drill a hole in the bottom of the tool rest where it will attach to the base.
Finally, attach the tool rest to the base of the grinder using bolts or screws. Make sure the tool rest is securely attached and level. With this step completed, your bench grinder is starting to come together, and you’ll be one step closer to getting your tools in tip-top shape.
Step 5: Attach the tool rest to the base
After assembling the base and column, it’s now time to attach the tool rest to the base. The tool rest is an essential part of any lathe as it supports the turning tool and helps you achieve precision in your work. Start by attaching the tool rest base to the slot in the base of the machine.
Ensure that you align the grooves on the tool rest base and the base of the machine properly. Secure the tool rest base to the machine using the bolts and nuts provided in the packaging. Once the tool rest base is firmly attached, attach the tool rest itself to the base.
Place the tool rest on top of the tool rest base and insert a locking bolt through the holes in both components. Tighten the locking bolt to secure the tool rest in place. Congratulations! You have successfully attached the tool rest to the base of your lathe.
Now, you can start working on your lathe with confidence and ease, knowing that your turning tool is supported and that you have achieved the necessary precision in your work.
Step 6: Attach the grinding wheel
The final step in setting up your bench grinder is to attach the grinding wheel. This is where the real work gets done, so it’s important to ensure the wheel is securely in place before you start using it. First, make sure the grinder is turned off and unplugged.
Then, carefully position the grinding wheel on the spindle and use the spanner wrench to tighten the nut on the spindle to hold the wheel in place. Make sure the wheel is centered and not wobbling before you start using the grinder. It’s also important to choose the right grinding wheel for the task at hand.
Depending on the material you’re working with, you may need to use a different type of wheel. By following these steps and taking precautions, you can ensure a successful and safe grinding experience.
Tips and Tricks
Making your own bench grinder can be a fun and rewarding DIY project. With a few basic tools and some mechanical know-how, anyone can turn an old motor and some scrap metal into a functional bench grinder. To start, you will need an old electric motor, some steel rods, nuts and bolts, and a few basic hand tools.
Begin by fabricating the base and frame of the grinder using the steel rods and nuts/bolts. Secure the motor to the frame, making sure it is centered and level. Next, attach the grinding wheels to the motor shaft and give the grinder a test run.
If everything checks out, you’re ready to go! Having your own bench grinder can be a handy tool for any workshop or DIY project. So, why not make one yourself and save some money on buying a new one? With a little bit of effort, you can create a powerful and reliable bench grinder that will last for years to come.
Safety precautions to take
When it comes to safety precautions, there are a few tips and tricks that can help ensure that you stay safe and avoid any potential hazards. One important tip is to always wear appropriate safety gear, such as helmets, gloves, and protective clothing. This is especially true if you’re engaging in activities like biking, skiing, or skateboarding.
Another important tip is to stay aware of your surroundings and be on the lookout for potential hazards, such as uneven terrain or obstacles in your path. It’s also a good idea to familiarize yourself with basic first aid skills so that you’re prepared in case of an emergency. And finally, when it comes to staying safe, it’s important to always use common sense and take necessary precautions to avoid putting yourself or others in danger.
So if you want to stay safe and avoid any potential hazards, be sure to follow these tips and tricks and always prioritize safety first.
How to maintain your bench grinder
Maintaining your bench grinder can seem like a daunting task, but it’s actually a simple process that can prevent major issues down the line. One important tip to remember is to always keep your grinder clean. Often, debris and metal shavings can accumulate in the nooks and crannies of your machine, leading to potential malfunctions.
Another trick is to regularly lubricate your grinder’s moving parts. This helps reduce friction and ensures that the machine runs smoothly and efficiently. Finally, make sure to keep an eye on the wear and tear of your grinding wheels.
Sharp and properly aligned wheels are crucial to achieving a consistent and polished finish. By following these simple tips and tricks, you can ensure that your bench grinder stays in top condition for years to come.
Conclusion
In conclusion, making a bench grinder is not just a mere DIY project, it’s a journey. A journey that involves precision, creativity, and a passion for working with your hands. It’s a process that requires you to blend your technical know-how with your artistic flair to create a functional and aesthetically pleasing tool that will serve you for years to come.
So if you’re looking to unleash your inner artisan and create something truly unique, then fire up your welding machine, sharpen your cutting tools, and get ready for one heck of a ride. Because with a little bit of patience, sweat, and creativity, you too can make your own bench grinder and bask in the glory of a job well done.”
FAQs
What materials do you need to make a bench grinder?
To make a bench grinder, you’ll need a motor, a tool rest, grinding wheels, a base, and hardware.
Can you convert a bench grinder into other tools?
It is possible to convert a bench grinder into other tools, such as a buffer or a polisher, by swapping out the grinding wheels with different accessories.
What safety precautions should you take when using a bench grinder?
When using a bench grinder, wear eye protection, secure loose clothing and tie back long hair, and use a dust mask to prevent breathing in particles.
How do you maintain a bench grinder?
To maintain a bench grinder, keep it clean and free of debris, sharpen or replace the grinding wheels regularly, and lubricate any moving parts.
What size grinding wheels should you use on a bench grinder?
The size of the grinding wheels you should use on a bench grinder depends on the size of the grinder itself, but typically ranges from 6 to 10 inches in diameter.
How do you dress a grinding wheel on a bench grinder?
Dressing a grinding wheel on a bench grinder involves using a specialized tool to remove debris and reshape the wheel to a desired profile.
Should you use a variable speed bench grinder?
A variable speed bench grinder can be useful if you’ll be working with a variety of materials or tasks, as it gives you more control over the speed of the grinding wheels.

