How to Make a Bench Grinder at Home: A Complete Guide for DIY Enthusiasts
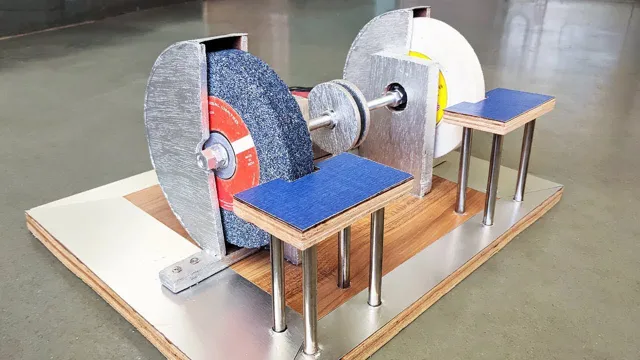
Have you ever found yourself in a situation where you need to sharpen a dull knife or chisel, but you don’t have a grinder? Maybe you’re tired of using a manual whetstone and want to upgrade your sharpening game? If so, building your own bench grinder might just be the solution you need! With some basic tools and materials, you can create a powerful grinding machine that can tackle even the toughest of jobs. Not only is building your own bench grinder a fun project, but it also allows you to customize the machine to fit your specific needs. Whether you need a smaller grinder for sharpening small tools, or a larger one for heavy-duty grinding, you can tailor the machine to your liking.
Plus, by building it yourself, you’ll gain valuable experience in metalworking and mechanical engineering. In this blog post, we’ll guide you through the process of building your own bench grinder from start to finish. We’ll discuss all the materials you’ll need, the tools required, and how to assemble the machine step-by-step.
We’ll also offer tips on how to maintain and operate the grinder safely, so you can use it for years to come. So, whether you’re a DIY enthusiast, a woodworker, or just someone who wants to upgrade their sharpening game, building your own bench grinder is a rewarding project that’s sure to impress. Let’s get started!
What You Will Need
If you’re wondering how to make a bench grinder at home, then the good news is that it’s actually quite simple to do. However, before you get started, there are a few things that you will need. Firstly, you will require a motor of some sort – a salvaged one from an old appliance or a motor that is readily available online.
You will also need a spindle, which can be fashioned from an old bolt or piece of metal. In addition, you will need a piece of wood that will act as the base for your bench grinder. This can be any size you like, depending on how big or small you want the final product to be.
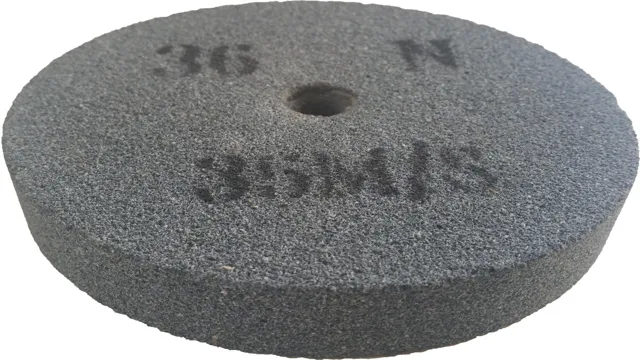
Finally, you will need a grinding wheel and the necessary materials to attach it securely to the spindle. With all of these things in hand, you’re ready to take the first steps toward building your very own bench grinder.
Choosing the Right Motor and Wheel Assembly
When choosing the right motor and wheel assembly for your project, there are a few key things you’ll need to consider. First and foremost, you need to determine the specific requirements of your project, including the weight of the load you’ll be carrying and the terrain you’ll be traversing. It’s also important to consider the size of your workspace and the level of maneuverability you require.
Once you’ve identified your project requirements, you’ll want to consider the available motor and wheel options. Some popular options include stepper motors, brushed DC motors, and brushless DC motors, each with their own advantages and disadvantages. Similarly, there are a range of wheel types to choose from, including solid rubber wheels, pneumatic wheels, and casters.
The key is to find the right combination of motor and wheel that meets your specific needs and is compatible with your other project components.
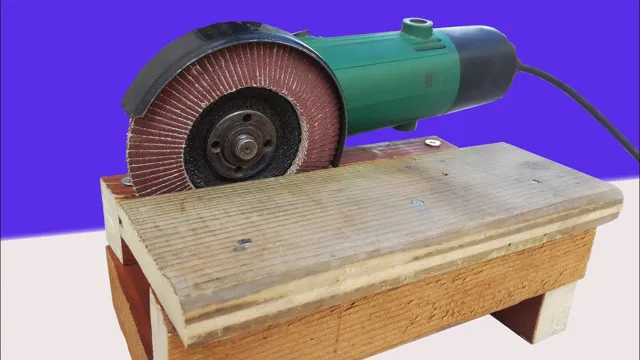
Selecting Your Tools and Materials
When it comes to starting a new DIY project, there are a few essential tools and materials that you will need to get started. First and foremost, you will need a good set of basic tools, including a hammer, screwdrivers, pliers, and a tape measure. These will come in handy for everything from hanging shelves to assembling furniture.
Additionally, depending on the specific project you are working on, you may need other specialized tools, such as a saw, drill, or sander. In terms of materials, it all depends on what you are building or creating. If you are doing woodworking, you will need wood, sandpaper, and stain or varnish.
If you are working with metal, you will need metalworking tools and materials, such as welding equipment or sheet metal. Other projects may require specialized materials, such as fabric, paint, or clay. It’s important to plan ahead and make sure you have everything you need before you begin your project.
Consider making a list and checking it twice, to ensure you don’t forget any important tools or materials. This will help you avoid any frustrating interruptions or delays in your project. With the right tools and materials, you can tackle any DIY project with confidence and ease!
Building Your Bench Grinder
If you’re a DIY enthusiast looking for a new project, consider building your own bench grinder at home. Contrary to popular belief, making a bench grinder is not as difficult as it sounds. All you need are a few basic tools and materials to get started, including a motor, a set of wheels, a mounting board, and a few bolts.
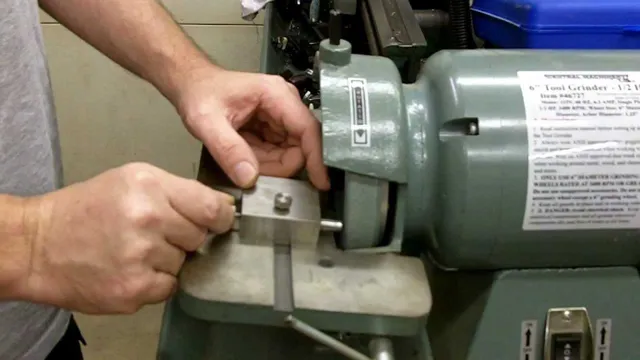
First, attach the motor to your mounting board and secure it with bolts. Next, attach your wheels to the motor shaft using collars and spacers. Finally, attach the mounting board to your workbench and test your new bench grinder.
By following these simple steps, you can create a powerful and versatile tool that can handle all your grinding and sharpening needs. Not only will you save money by making your own bench grinder, but you’ll also gain a sense of pride and accomplishment knowing that you built it yourself. So why not give it a try and see what you can create?
Creating the Base
Building a bench grinder requires a sturdy and stable base. The base is the foundation on which the grinder will stand, and it must be built to withstand the vibrations caused by grinding. When creating the base, it’s important to choose the right materials and design it to fit the specific dimensions of the grinder.
One option is to use steel tubing to create a frame and then fill it with concrete to add weight and stability. Another option is to use a wooden frame that can be reinforced with metal brackets. Whichever method is chosen, it’s crucial to ensure that the base is level and securely attached to the grinder to prevent any accidents or mishaps during use.
By creating a solid base, the bench grinder will be able to deliver precise and efficient grinding performance for years to come.
Attaching Your Motor
If you want to build your own bench grinder, you’ll need to know how to attach a motor to it. The first step is to figure out what type of motor you have and what kind of mounting bracket it needs. Some motors come with a mounting plate that can be bolted directly to the grinder, while others require a custom bracket.
Once you’ve determined the appropriate mounting system, you’ll need to drill holes in both the motor and the grinder base to attach them securely. It’s important to make sure the motor is level and properly aligned with the grinding wheel before tightening any bolts. You may also need to adjust the motor’s speed or belt tension to ensure optimal performance.
With a little bit of know-how and some elbow grease, you’ll have your own custom bench grinder up and running in no time.
Installing the Wheel Assembly
To build your bench grinder, one of the essential components is the wheel assembly. First, gather all the necessary parts that came with your kit. You’ll need the two wheels, wheel flanges, washers, mounting bolts, and nuts.
Begin by attaching the wheel flanges securely to both wheels. Place a washer onto each bolt and then thread the bolts through the holes in the wheel flanges. Next, slide the wheels onto the spindle and hold them in place.
Then, insert the mounting bolts through the holes in the base of the grinder, and secure them in place with nuts. Make sure the wheels are centered, and secure the nuts tightly. You don’t want the wheels to wobble or loosen during use, which can be dangerous.
Once the wheel assembly is securely in place, you can move on to wiring up the motor. With proper installation, your bench grinder will be ready to sharpen blades, polish metal, and much more.
Testing and Troubleshooting
If you’re looking for an affordable and practical solution for all your DIY projects, why not try making your own bench grinder? It may sound like a complicated process, but with the right tools and instructions, it can be done easily at home. The first step is to choose a motor that can drive your bench grinder and mount it securely on a stable surface. You will also need grinding wheels that suit the type of material you’ll be working on and make sure they are mounted correctly.
To avoid accidents, it is important to test and troubleshoot your bench grinder before using it. You can start by checking the rotation direction of the wheels and ensuring they are not misaligned. Then, turn on the motor and listen for any unusual noise or vibrations.
Also, make sure the wheels don’t wobble, as it could result in uneven grinding. With a little bit of testing and troubleshooting, you’ll have a functioning bench grinder at home that can be used for a variety of projects such as sharpening blades, buffing metals, and cleaning rusted tools. Try it out now and see the difference it can make in your DIY projects!
Testing Your Bench Grinder
Bench grinder Are you having trouble with your bench grinder? Before you start taking it apart or calling a repairman, there are a few simple tests you can do to troubleshoot the problem. First, check the power supply. Make sure the grinder is plugged in and the outlet is working properly.
If the power supply is fine, move on to testing the abrasive wheels. Start by turning on the grinder and letting it run for a few seconds. Look and listen for any unusual vibrations or noises that might indicate a problem with the wheels.
Next, check the condition of the wheels themselves. Look for signs of wear or damage, such as cracks or chips. If the wheels appear to be in good condition, try using them to grind a small piece of metal.
Make sure the grinder is set up properly and you are using the correct type of wheel for the job. If the grinder still isn’t working properly, it may be time to take it apart and inspect the internal components. Check the motor and wiring to make sure they are functioning correctly.
By following these simple tests and troubleshooting steps, you can save time and money by fixing your bench grinder yourself. With a little patience and attention to detail, you can get your grinder back in working order and back to grinding away!
Troubleshooting Common Issues
When it comes to testing and troubleshooting, there are a few common issues that can cause frustration for even the most experienced technician. One of the most prevalent issues is connectivity problems. This could mean that the device or system is not connecting to the network properly or that the network itself is not functioning correctly.
To troubleshoot this issue, start by checking all physical connections and make sure that everything is properly plugged in and turned on. Next, try resetting the device or system and the network. If the problem persists, it may be necessary to look for software issues or even hardware malfunctions.
Another common issue that can cause headaches is slow performance. This could be due to a variety of factors, including outdated software, insufficient memory, or a virus or malware infection. To address this issue, run a full system scan and update all software to the latest version.
Additionally, consider adding more memory or storage space if necessary. Finally, always be sure to back up your data regularly to avoid any potential loss in the event of a system failure or crash.
Safety Measures to Consider
If you’re wondering how to make a bench grinder at home, it’s important to note the safety measures that should be followed. Firstly, eye protection is essential when operating any kind of power tool. You should always wear safety goggles to prevent debris or sparks from getting into your eyes.
Additionally, it’s important to wear gloves and long sleeves to protect your hands and arms from any heat or debris that may fly off the grinder. Always make sure the grinder is securely mounted to a sturdy surface and never operate it near any flammable materials. Lastly, make sure you’re familiar with the specific instructions of the grinder you’re using and never modify any parts or attempt to use it in any way that’s not recommended by the manufacturer.
By taking these precautions, you can safely operate your homemade bench grinder.
Conclusion
In conclusion, making a bench grinder at home is not only a great way to save money, but also a chance to exercise your creativity and ingenuity. With some basic tools and a little bit of tinkering, you can transform an old motor and some spare parts into a versatile and powerful grinding machine. Whether you’re a DIY enthusiast, a professional craftsman, or just someone who enjoys the satisfaction of building things from scratch, making your own bench grinder is a project worth trying.
So dust off those old motors, fire up your imagination, and let the sparks fly!”
FAQs
What materials do I need to make a bench grinder at home?
To make a bench grinder at home, you will need a motor, a shaft, bearings, a grinding wheel, a pulley, a belt, and a frame to mount everything on.
Is it possible to make a bench grinder without a motor?
No, a motor is essential for a bench grinder to function properly. It provides the power needed to rotate the grinding wheel.
Can I use any type of grinding wheel for my homemade bench grinder?
No, it is important to choose the right grinding wheel for your bench grinder based on the material you will be grinding. Consult a grinding wheel manufacturer or supplier for advice.
How do I mount the motor on my homemade bench grinder?
To mount the motor, you will need to create a frame or base to hold it securely in place. You can use metal or wood, but make sure it is sturdy and not prone to vibrations.
How can I ensure safety when using my homemade bench grinder?
To ensure safety, wear eye protection and gloves when using your bench grinder. Make sure all parts are securely mounted and in good condition, and never exceed the maximum RPM of your grinding wheel.
Can I modify a bench grinder that I already own to make it more powerful?
No, modifying a bench grinder can be dangerous and is not recommended. If you need a more powerful grinder, it is better to purchase a new one that meets your needs.
How do I maintain my homemade bench grinder?
To maintain your bench grinder, regularly clean and oil the bearings and inspect all parts for wear or damage. Replace any worn or damaged parts before using the grinder again.

