How to Cut Threads on a Metal Lathe: A Comprehensive Guide for Beginners
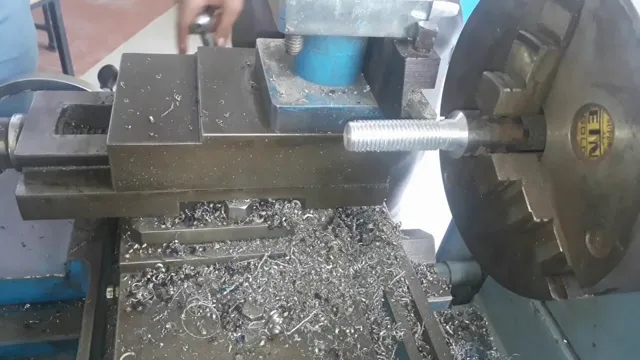
If you’re new to metalworking, the idea of cutting threads on a metal lathe can seem intimidating. But don’t worry – it’s actually a straightforward process that can be easily mastered with practice. First, it’s important to understand that a lathe is essentially a machine that rotates a workpiece while a tool cuts into it.
When it comes to cutting threads, the goal is to create a precise, helical groove along the surface of the workpiece. This is typically done using a threading tool, which is designed to cut at a specific angle and pitch. Before you start cutting threads, you’ll need to make sure you have the right tools and materials on hand.
This includes a lathe, a threading tool, a workpiece (such as a metal rod or pipe), and lubricant (which helps to prevent friction and heat buildup during the cutting process). You’ll also need to know the specific thread size and pitch you’re trying to create, as this will determine the angle and depth of the cuts you make. Once you have everything you need, it’s time to start cutting threads.
This typically involves setting up the workpiece in the lathe, selecting the appropriate cutting speed, and gradually making your way down the surface of the workpiece with the threading tool. It’s important to take your time and be patient during this process, as even slight errors or deviations can lead to a poorly-formed thread. In conclusion, cutting threads on a metal lathe is a valuable skill to have if you’re interested in metalworking.
With the right tools, materials, and mindset, anyone can learn to create precision threads that are strong, reliable, and aesthetically pleasing. So why not give it a try and see what you can create?
What is a Metal Lathe?
A metal lathe is a machine that is designed to shape and form metal objects with precision and accuracy. One of the key tasks that a metal lathe can perform is cutting threads. This process involves removing material from a workpiece to create precise helical grooves on the surface.
To cut threads on a metal lathe, you will need to set up the lathe properly, including setting the speed, tool height, and feed rate. You will also need to choose the right tool for the job, such as a threading insert or a tap and die set. Once you have everything set up correctly, you can proceed with the cutting process, which typically involves moving the cutting tool along the workpiece at a constant rate to create the desired thread pattern.
Overall, cutting threads on a metal lathe is a complex process that requires a high degree of skill and attention to detail, but with practice, it can be mastered.
Definition and Parts
A metal lathe is a tool used in machining to shape metals into different parts and components. It is a machine that rotates a workpiece on its axis while a cutting tool moves along the material to remove excess material and create the desired shape. Metal lathes come in different sizes and shapes depending on the specific machining needs.
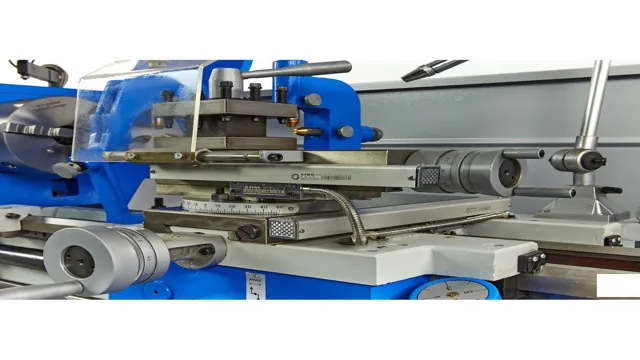
They are designed with several main parts, including the headstock, tailstock, bed, carriage, and cutting tool. The headstock holds the workpiece and provides power to rotate the material. The tailstock supports the other end of the workpiece and may include a spindle for support.
The bed is a flat surface that provides support for the entire machine and has accurately machined ways that allow the carriage to move along its length. The carriage carries the cutting tool and moves along the bedways, adjusting the cutting depth and feed rate as necessary. Finally, the cutting tool, attached to the carriage, removes material from the workpiece to create the desired shape.
Whether in a small home workshop or a large industrial setting, metal lathes are used to fabricate essential parts and components for many different industries.
Types of Metal Lathes
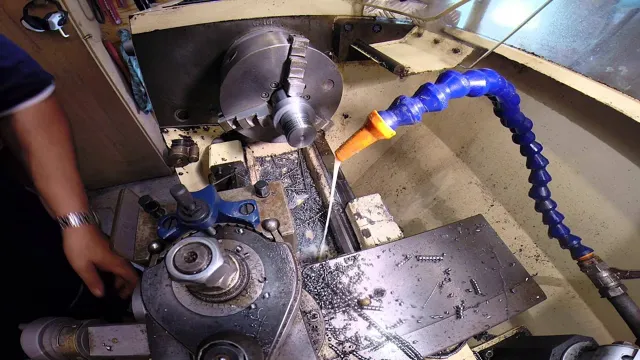
A metal lathe is an essential piece of machinery in metalworking shops, used for turning or shaping materials like metal, wood, or plastic. It works by rotating the material being worked on against a cutting tool, allowing the user to remove material gradually until they achieve the desired shape or finish. There are several types of metal lathes, including bench lathes, engine lathes, and turret lathes.
Bench lathes are small and portable and are ideal for hobbyists or those with limited space. Engine lathes are larger and can handle larger pieces of material and are commonly used in industrial settings. Turret lathes are highly automated and are used for high volume production work.
Each type of metal lathe has its own unique features and capabilities, so it’s important to choose the right one for your specific needs. Whether you’re a hobbyist or an industrial worker, a metal lathe is an essential tool for turning raw materials into finished products.
Preparation
Cutting threads on a metal lathe can be a daunting task, but with the proper preparation, it can be a smooth process. First, you must make sure that your lathe is set up properly and that all necessary tools and materials are at hand. Your lathe should be clean and in good condition, with the chuck securely tightened.
The cutting tool should be sharp and properly aligned with the workpiece. You should also determine the pitch of the threads you need to cut and select the appropriate threading tool. Before beginning, make sure to measure and mark the area for the threads, and use a center drill to create a starting point for the threading tool.
With these preparations in place, you’ll be ready to cut your threads with precision and accuracy, yielding a high-quality finished product.
Thread Cutting Tools and Materials
When it comes to thread cutting tools and materials, preparation is key to achieving a successful outcome. Before even starting your project, make sure you have all the necessary tools and materials on hand. This includes a solid work surface, the appropriate thread cutting tool, and the material you will be cutting the thread into.
It’s also important to ensure that both the tool and material are clean and free of any debris that might impair the quality of the thread being cut. Taking the time to properly prepare your workspace and tools will not only help you achieve precision cuts, but it will also help increase the longevity of your tools, saving you time and money in the long run. So, take that extra few minutes to prepare properly, and see the difference it can make in your thread cutting projects.
Setting up the Lathe
Setting up a lathe can seem overwhelming at first, but with the right preparation, it can be a smooth process. Before beginning, make sure to clear the area around your lathe of any dust or debris. Ensure that the lathe is on a sturdy and level surface, and that there is enough room for you to move around the machine comfortably.
Additionally, make sure that you have all the necessary tools and materials within reach, such as cutting tools, measuring tools, and lubricant. By taking the time to properly prepare your workspace, you can ensure that you have a safe and efficient lathe setup, allowing you to focus on your project without any unnecessary distractions or interruptions.
Cutting the Threads
Cutting threads on a metal lathe is a crucial skill that every machinist and hobbyist should have. The process involves carefully creating grooves on a metal rod or pipe to produce uniform and precise shapes that fit perfectly with bolts or screws. To cut threads on a metal lathe, you need to start by securing the rod or pipe firmly onto the chuck and then setting the correct angle and pitch.
Once the setup is complete, you can begin to cut the grooves by gradually bringing the cutting tool closer to the metal while advancing the cross slide. The right speed, depth, and feed rate are crucial for producing high-quality threads. It takes some practice to get the hang of it, but with patience and attention to detail, anyone can master the art of cutting threads on a metal lathe.
So, if you want to create custom bolts, screws, or any other part that requires threading, don’t hesitate to learn this essential skill and unleash your creativity with metalworking!
Selecting the Right Pitch and Depth
When it comes to cutting threads, selecting the right pitch and depth is crucial for ensuring a strong and functional connection. The thread pitch refers to the distance between each peak of the thread, while the thread depth is how far the thread penetrates into the material. Choosing the correct pitch and depth will depend on the type of material being used and the application it will be used for.
For example, a finer thread pitch may be more suitable for a softer material, while a coarser pitch may be better for a denser material. Additionally, the depth of the thread should be deep enough to provide sufficient holding strength, without compromising the integrity of the material. Overall, taking the time to properly select the right pitch and depth when cutting threads can make a significant difference in the final product.
Setting the Tool Bit
Cutting threads requires the tool bit to be set at the correct angle to ensure the best results. The tool bit is positioned at a 60-degree angle to the horizontal axis of the lathe for cutting metric threads and at a 29-degree angle for cutting imperial threads. It is essential to ensure that the tool bit is perpendicular to the workpiece to produce accurate threads.
Before cutting threads, ensure that the tool bit is sharp and in good condition to prevent poor performance and damage to the workpiece. The tool bit should also be lubricated to reduce friction and aid in smooth cutting. Setting the tool bit at the correct angle is essential for producing threads with the accurate size and shape required for the specific application.
With precision and patience, cutting threads can be done efficiently and effectively.
Starting the Cut
When starting the cut, it’s important to begin with the proper tools and technique. One of the most crucial steps is cutting the threads. This requires a steady hand and a well-positioned cutter wheel.
It’s important to make sure the cutter wheel is straight with the pipe and that it’s making consistent contact. The threads should be cut cleanly and without any jagged edges to ensure a proper seal when connecting the pipes. Remember to use lubricant to prevent friction and avoid damaging the threads.
Taking the time to cut the threads properly will save you time and money in the long run by preventing leaks and ensuring a secure connection. So, don’t rush through this critical step and make use of the right tools and techniques to get the job done right.
Continuous or Progressive Cutting
When it comes to cutting threads, there are two common methods that woodworkers use: continuous or progressive cutting. Continuous cutting involves cutting the entire thread in one pass, while progressive cutting involves making multiple passes to gradually cut the thread. Both methods have their advantages and disadvantages, and it really depends on personal preference and the project at hand.
Some woodworkers prefer continuous cutting because it is quicker and produces a cleaner finish, while others prefer progressive cutting because it allows them to make adjustments as they go. Ultimately, it all boils down to what works best for the individual woodworker and the specific project they are working on. So, whether you are a fan of continuous cutting or prefer to take things one step at a time with progressive cutting, the important thing is to find what works best for you and your woodworking needs.
Finishing the Threads
If you want to create screws, bolts, or any other metal parts that require threading, you’ll need to know how to cut threads on a metal lathe. The process is straightforward, but it requires some practice to perfect. First, you’ll need to choose the right threading tool, which should have the appropriate shape, width, and pitch for the threads you want to create.
Then, you’ll need to set the gears on the lathe to match the desired pitch of the threads. Next, you’ll slowly move the cutting tool until it makes contact with the piece of metal, then making sure it’s centered, start rotating the chuck. As it moves, the tool will gradually cut out the threads you need.
It’s important to use plenty of lubricant to prevent overheating and sticking. Finally, you can use a thread gauge to check the depth and quality of your threads. With time and patience, you’ll be able to create accurate and precise threads that perfectly match your needs.
Checking for Accuracy
When it comes to checking for accuracy in your writing, it’s important to finish all the threads of your thought. This means making sure that all the necessary points have been addressed and that there are no loose ends or contradictions that might confuse or mislead your reader. Finishing the threads also means double-checking your facts, sources, and references to ensure that everything is correct and up-to-date.
Remember, accuracy is key in any type of writing, whether you’re creating content for a blog, writing an academic paper, or even just sending an email. That’s why it’s important to take the time to review and revise your work before publishing it. By doing so, you’ll not only ensure that your message is clear and concise, but you’ll also build trust with your audience by demonstrating your attention to detail and commitment to providing reliable information.
So, take the time to finish those threads and check for accuracy before hitting that publish button. Your readers (and your credibility) will thank you!
Removing the Thread Cutting Tool
When it comes to threading, removing the thread cutting tool is an important step to finishing the threads. Once you have cut the threads using the tool, you need to take it out carefully to avoid any damage or distortion. Simply turn off the machine and select the reverse button on it to reverse the direction of the spindle.
Once the spindle is moving in reverse, you can slowly remove the tool from the threading area. This will ensure that the threads are finished smoothly and neatly, and you can move on to the next step of your project. Remember, taking your time and being careful is key to achieving the best results.
Conclusion
In summary, cutting threads on a metal lathe requires patience, precision, and a good understanding of the machine. It’s not a task for the faint of heart, but with practice and a steady hand, you can become a threading magician. And hey, who knows, maybe one day you’ll be able to thread a needle with your eyes closed! So remember, measure twice, cut once, and don’t be afraid to thread the needle (or in this case, the metal rod).
Happy machining!”
Safety Tips
When it comes to finishing threads, safety should always come first. It’s important to ensure that the needle is properly secured before cutting the excess thread, this will prevent any accidents caused by the needle falling out. Additionally, it’s advisable to cut the thread at least an inch away from the final stitch to prevent it from unraveling.
It’s also a good idea to double knot the ending to provide added stability, especially for items that will be frequently used or washed. Remember, taking the time to properly finish threads will not only ensure a professional-looking finished product, but will also prevent any unwanted accidents or incidences.
FAQs
What is a metal lathe used for?
A metal lathe is a machine tool that is used to shape and cut metal pieces. It can be used for various operations like drilling, turning, facing, and threading.
What are the types of threads that can be cut on a metal lathe?
The most common types of threads that can be cut on a metal lathe are straight or parallel threads, tapered threads, and knuckle threads. Additionally, specialty threads like square threads, buttress threads, and ACME threads can also be cut depending on the specific lathe and cutting tools used.
What are the steps to cut threads on a metal lathe?
The steps to cut threads on a metal lathe are as follows:
1. Set up the lathe with the correct cutting tool and work holding device.
2. Determine the pitch (number of threads per inch) and depth of cut required for the thread.
3. Engage the half nuts on the lathe and slowly advance the cutting tool into the workpiece.
4. Use the cross slide to move the cutting tool across the workpiece to create the thread profile.
5. Repeat the process for each pass until the desired thread is achieved.
Is it necessary to use a special cutting tool for threading on a metal lathe?
Yes, it is necessary to use a cutting tool specifically designed for threading on a metal lathe. The cutting tool will have a profile that matches the thread profile desired, allowing it to effectively remove the metal material from the workpiece and create the proper thread shape.
Can threading be done on a manual metal lathe or does it require a CNC lathe?
Threading can be done on both manual and CNC metal lathes. With manual lathes, the operator will manually control the cutting tool and work holding device to create the thread. With CNC lathes, the process is automated and the machine follows a program to create the thread.
What safety precautions should be taken when cutting threads on a metal lathe?
When cutting threads on a metal lathe, safety goggles or a face shield should be worn to protect the operator’s eyes from metal chips and debris. Additionally, loose clothing and jewelry should be avoided, and long hair should be tied back. The cutting tool and workpiece should be properly secured to prevent movement or kickback, and the lathe should be turned off and/or locked out when making adjustments or shutdowns.
Are there any lubricants or cutting fluids that should be used when cutting threads on a metal lathe?
Yes, it is recommended to use a cutting fluid or lubricant when cutting threads on a metal lathe. This can help to reduce heat and friction, which can extend the life of the cutting tool and improve the quality of the thread. The specific type of cutting fluid or lubricant used will depend on the material being machined and the cutting tool being used.

