How to Change Wheel on Dewalt Angle Grinder the Easy Way
Want to learn how to change the wheel on your Dewalt angle grinder? Whether you’re a professional contractor or a DIY enthusiast, changing the wheel on your angle grinder is an essential skill that you must master. The process may seem daunting, but with the right tools, technique, and guidance, it’s a quick and easy task that should take just a few minutes. In this blog, we’ll walk you through every step of the process, from preparing your angle grinder to removing the old wheel and installing the new one.
By the end of this guide, you’ll be able to change the wheel on your Dewalt angle grinder like a pro. So, grab your safety glasses and let’s get started!
Step 1: Turn Off and Unplug the Grinder
When it comes to replacing the wheel on your DeWalt angle grinder, there are a few essential steps you need to follow to ensure your safety and prevent damage to your grinder. The first step is to turn off your grinder and unplug it from the power source. This will eliminate the risk of electric shock and prevent any accidental start-ups during the wheel change process.
You can also remove the battery if you’re using a cordless grinder. It’s important always to follow the manufacturer’s instructions when it comes to changing the wheel on your DeWalt angle grinder, as this will help you avoid problems and prolong the life of your grinder. With your grinder turned off and unplugged, you’re now ready to move on to the next step in the process.
Make sure the grinder is turned off and unplugged from the power source.
Grinders can be a handy and useful tool in any workshop or home. Whether you’re sharpening knives or working on a woodworking project, a grinder is a machine that can speed up any task. However, it’s important to remember that safety should always come first when operating any machine or tool, including a grinder.
Prior to beginning any work, it’s vital to ensure that the grinder is turned off and unplugged from the power source. This is step one in any operation. By doing this, you prevent any accidental starting of the machine or any electrical mishaps.
Always take a few seconds to verify the safety of the machine, and never forget that accidents can happen if you’re not careful. Keep in mind that this easy and quick safety step could save your life.
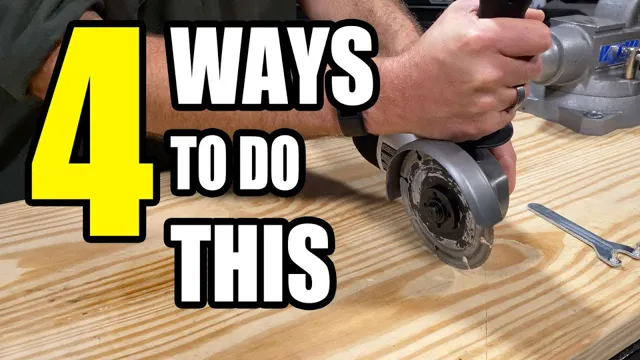
Step 2: Remove the Old Wheel
To change a wheel on a Dewalt angle grinder, the first step is to remove the old wheel. This may seem like a simple task, but it’s important to do it correctly to avoid any accidents or damage to the grinder. First, unplug the grinder from the power source to ensure your safety.
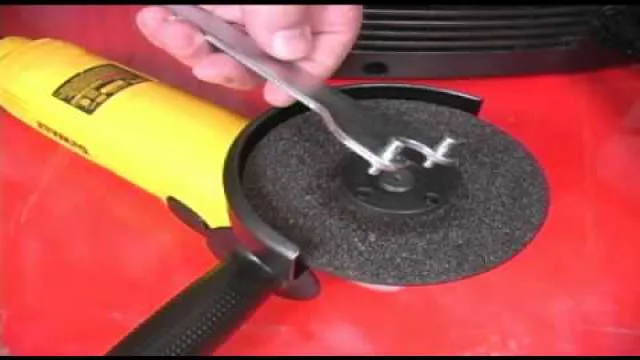
Then, locate the wheel lock button on the top of the grinder near the wheel. Press and hold this button while using a spanner wrench to loosen the nut holding the wheel in place. Once the nut is loose, remove it and the outer flange.
The old wheel should now slide right off the shaft. Be sure to inspect the old wheel for any signs of wear or damage before disposing of it properly. With the old wheel removed, you can move on to installing the new one.
Use a wrench to loosen the wheel nut and take off the old wheel.
When it’s time to change your car’s tire, the first step is to remove the old wheel. You’ll need a wrench to loosen the wheel nut, so be sure to have one on hand. Once you have the wrench, locate the nut on the wheel and rotate it counterclockwise to loosen it.
It may take some effort, but don’t give up! Keep turning the wrench until the nut is loose enough to remove by hand. Then, push the wheel toward you gently to release it from the hub. Be prepared to catch it as it comes off.
Now you’re ready to move on to the next step! Remember, it’s crucial to use the correct size wrench to avoid damaging the nut or injuring yourself. It’s a simple process, but if you have any doubts or concerns, it’s always best to consult a professional. With a little elbow grease and caution, anyone can change a tire and be back on the road in no time.
Step 3: Clean the Spindle
Now that you’ve removed the old wheel, it’s time to clean the spindle of your Dewalt angle grinder. This is an important step to ensure that your new wheel is securely fastened to the tool and prevent accidents from happening. Start by wiping the spindle clean with a moist cloth.
If there are any stubborn residues, use a mild solvent or degreaser to remove them. You may also use a wire brush to scrub off any rust or corrosion on the spindle. Once the spindle is dry, inspect it thoroughly for any damages or cracks.
If you spot any, do not proceed with the installation and replace the spindle immediately. Once you’ve confirmed that the spindle is clean and damage-free, you’re ready to install the new wheel onto your Dewalt angle grinder.
Clean the spindle with a cloth to ensure the new wheel fits properly.
When it comes to replacing a wheel on your bike, it’s important to make sure the spindle is clean before installing the new wheel. This will help ensure that the new wheel fits properly and functions smoothly. To clean the spindle, start by wiping it down with a dry cloth to remove any dirt or debris.
Once you’ve removed as much grime as possible, switch to a damp cloth and give the spindle a thorough cleaning. You may want to use a mild detergent or bike-specific cleaning solution to help cut through any stubborn dirt or grease. When you’re finished cleaning, be sure to dry off the spindle completely before installing the new wheel.
By taking the time to clean the spindle before installing the new wheel, you’ll help ensure that the new wheel fits securely and spins smoothly, making for a safer and more enjoyable ride. So don’t skip this important step!
Step 4: Install the New Wheel
Now it’s time to put on the new wheel. First, make sure it is the correct size and type for your Dewalt angle grinder. Remove it from its packaging and inspect it for any defects or damage.
Next, slide the new wheel onto the spindle and screw on the flange nut by hand. Use the wrench to tighten it as much as you can. Do not use excessive force or the nut may become damaged.
Once you have secured the nut, give the new wheel a spin to check for wobbling or any abnormalities. If everything looks and feels good, you are ready to start using your newly repaired Dewalt angle grinder! Remember to always wear the appropriate safety gear and follow all manufacturer instructions when using power tools.
Place the new wheel on the spindle and tighten the nut with a wrench until it is secure.
Congratulations, you’ve made it to the final step of changing your tire – installing the new wheel! This step is crucial to getting your vehicle back on the road safely, so pay close attention. First, take the new wheel and line up the holes with the wheel studs on the spindle. You might need to rotate the wheel a bit to get it to slot in properly, but don’t force it.
Once the wheel is in place, grab your trusty wrench and tighten the nut on the spindle, making sure that it is secure. You want to use enough force to prevent the wheel from wobbling, but be careful not to over-tighten the nut. Doing so can damage the threads on the spindle or even warp the brake rotor.
This step might seem simple, but it’s important to get it right. If you’re unsure, don’t be afraid to double-check your work or ask a mechanic for help. Now that your new wheel is securely in place, you’re ready to hit the road again!
Step 5: Test the Grinder
After successfully replacing the wheel on your DeWalt angle grinder, it’s important to test it out before using it for any serious grinding job. To do this, start by plugging in the grinder and turning it on. If you notice any unusual sounds or vibrations, immediately turn it off and inspect the new wheel to ensure it’s properly aligned.
Run the grinder for a minute or two without applying too much pressure, just to ensure everything is running smoothly. If everything checks out, you’re good to go! Remember to always wear proper safety gear when operating an angle grinder, including eye protection and gloves, and to practice proper grinding techniques to avoid injury. With a little practice, changing wheels on a DeWalt angle grinder can be a quick and easy process that will help you tackle even the toughest grinding jobs with ease.
Turn on the grinder and test the new wheel to make sure it’s working correctly.
After installing the new grinding wheel, it’s important to make sure that it’s working correctly before you start using it for any tasks. To test the new wheel, turn on the grinder and observe how smoothly it turns. If the wheel wobbles or produces any unusual noises, you may need to make some adjustments to ensure that the wheel is installed correctly.
Remember to check the wheel’s alignment and tighten the hardware as necessary. A poorly installed wheel can cause damage to the tool or even injure the user, so don’t underestimate the importance of checking that everything is in working order. Once you’re confident that the grinder is working correctly, you can start using it for your intended tasks.
Keep in mind that regular maintenance and inspections can help ensure that your grinder stays in good condition and continues to perform well. Don’t forget to wear safety gear while using the grinder, including eye protection and gloves, to stay safe while working with this powerful tool.
Conclusion
Changing the wheel on your Dewalt angle grinder may seem like a daunting task, but it’s actually as easy as pie! With a few simple steps and the right tools, you can make the switch in no time. Don’t let a dull or damaged wheel slow down your work – take control of your angle grinder and keep grinding away with ease. Remember, doing it yourself not only saves you time and money, but it gives you a sense of accomplishment and independence.
So go ahead, grab your wrench and get to work – your Dewalt angle grinder (and your workload) will thank you!”
Changing the wheel on a Dewalt angle grinder is a simple process that can be done quickly and easily following the above steps.
Once you’ve completed all the necessary steps to change the wheel on your Dewalt angle grinder, it’s time to test it out. But before you go ahead and start grinding away, there are a few things you need to keep in mind. First, double-check that the new wheel has been securely tightened onto the grinder.
You don’t want it flying off while you’re using it – that’s a recipe for disaster. Second, make sure the wheel is spinning in the right direction. This is usually indicated by an arrow printed on the wheel, but if you’re not sure, consult the manufacturer’s instructions.
Finally, turn the grinder on and give it a test run. Make sure it’s running smoothly with no unusual sounds or vibrations. If you notice anything out of the ordinary, turn the grinder off immediately and double-check that everything has been assembled correctly.
Once you’re satisfied that everything is in working order, you’re ready to go. Happy grinding!
FAQs
What tools do I need to change the wheel on my Dewalt angle grinder?
You will need a wrench, a new wheel, and possibly a screwdriver, depending on your model of angle grinder.
How do I remove the old wheel from my Dewalt angle grinder?
First, unplug the grinder and remove the retaining nut on the spindle. Then, slide the old wheel off the spindle and dispose of it properly.
Can I use any type of replacement wheel on my Dewalt angle grinder?
No, you need to use a wheel that is compatible with your Dewalt angle grinder model. Check the manual or ask a customer service representative for guidance.
How do I install the new wheel on my Dewalt angle grinder?
Slide the wheel onto the spindle and replace the retaining nut, tightening it securely with a wrench.
Do I need to balance the new wheel before using my Dewalt angle grinder?
Yes, it is recommended to balance the new wheel before use to prevent vibration and maximize performance.
What should I do if my Dewalt angle grinder is not working properly after changing the wheel?
Double-check that the wheel is installed correctly and balanced. If the problem persists, contact Dewalt customer service for further assistance.
Can I reuse the retaining nut when changing the wheel on my Dewalt angle grinder?
It is recommended to replace the retaining nut with each wheel change to ensure proper tightening and safety.

