How to Change Blade in Olfa Utility Knife – The Ultimate Step-by-Step Guide

Have you found yourself struggling to change the blade of your OLFA utility knife? Don’t worry, you’re not alone. Swapping out a dull blade for a sharp one can seem like a daunting task, but with the right tools and a bit of guidance, it can be a quick and easy process. In this blog post, we’ll walk you through the step-by-step process of changing the blade in your OLFA utility knife, so you can get back to tackling your DIY projects with ease.
Whether you’re a seasoned DIYer or new to the game, we’ve got you covered. So, grab your utility knife and let’s get started!
Introduction
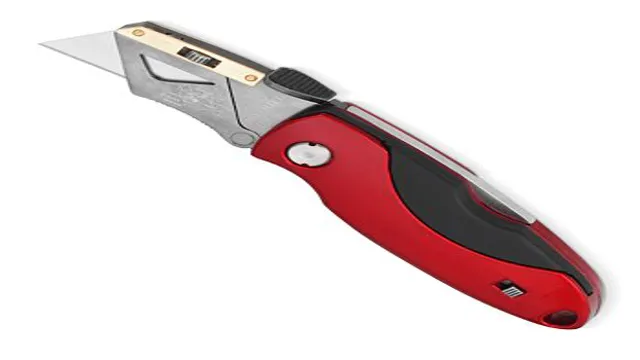
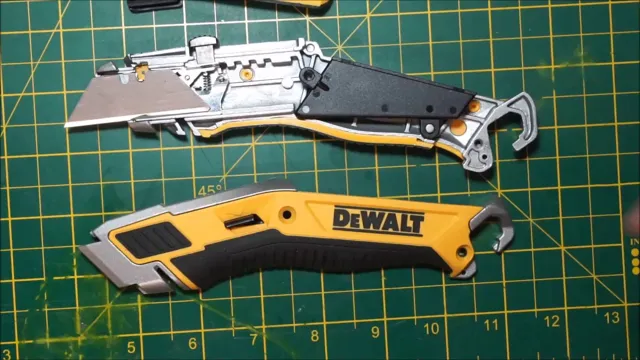
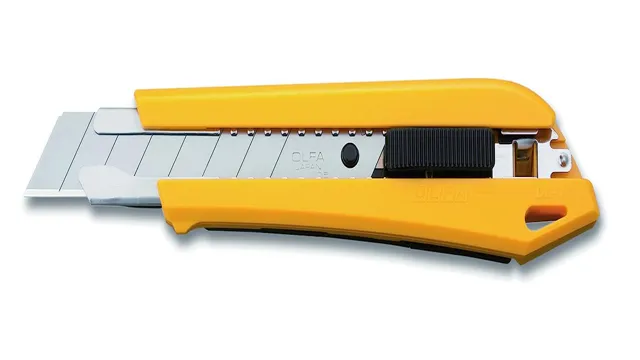
If you work with a utility knife frequently, chances are you’ll need to change the blade at some point. One popular brand of utility knife is Olfa, and changing the blade in an Olfa utility knife is easy once you know how. First, locate the blade release mechanism, usually a small tab or button on the knife’s handle.
Hold the knife firmly, then press or slide this mechanism to release the current blade. Next, carefully remove the old blade from the knife, being cautious not to cut yourself. Finally, insert the new blade into the knife, making sure it is securely in place before using the knife again.
With a little practice, you’ll be able to change the blade in your Olfa utility knife quickly and easily, ensuring that your knife always operates at peak efficiency.
Explanation of OLFA knife and its blade
If you are looking for a reliable and versatile cutting tool, an OLFA knife might just be what you need. This type of knife is a popular choice for DIY enthusiasts, graphic designers, and professionals in various industries who require precise and effortless cutting of various materials. The OLFA knife features a distinctive design, which includes a retractable blade, allowing you to safely store it in your pocket or toolbox without worrying about accidentally getting cut.
With its sharp and durable blade, it can easily slice through thick or thin materials such as paper, vinyl, leather, and even wood with ease. So if you’re looking for an all-purpose knife that will never let you down; an OLFA knife is a worthy investment that you’ll never regret.

Step-by-Step Guide
Changing the blade in an Olfa utility knife can seem like a daunting task, but with these simple steps, it can be done easily and quickly. Firstly, retract the blade into the handle and lock it in place. Then, flip the blade and locate the two notches on either side of the blade.
Insert a screwdriver or another tool into one of these notches and twist gently to release the blade from the handle. Take out the old blade and replace it with a new one, ensuring that the notches on the new blade are aligned with the notches in the handle. Finally, gently push the blade back into the handle until it locks in place and you’re done! Keep in mind that when disposing of the old blade, it’s important to wrap it in paper or a protective sheath to prevent injury.
With these simple instructions and a little bit of caution, you’ll be able to safely and easily change the blade in your Olfa utility knife in no time.
Step 1: Unlock Blade
Unlocking the blade on your device may seem like a daunting task, but it can actually be quite simple and straightforward. The first step in unlocking the blade is to locate the button or mechanism that is used to release the blade. This may vary depending on the type of device you have, but it is typically located near the blade itself or on the handle of the device.
Once you have located the release button or mechanism, you will need to press or slide it in order to release the blade from its locked position. This will allow you to fully extend the blade and use it for its intended purpose. When unlocking the blade, it is important to be careful and avoid any potential hazards or injuries.
By taking the time to properly unlock the blade, you can ensure that your device is functioning safely and effectively. So don’t hesitate to follow these simple steps and unlock your device’s blade today!
Step 2: Remove Old Blade
Removing your old blade is an essential step that you must take before installing a new one. The first thing you need to do is turn off your lawnmower completely and disconnect its spark plug. This will ensure that your lawnmower doesn’t start accidentally while you’re removing the blade, which can be extremely dangerous.
It’s crucial to wear gloves and safety glasses during this process to avoid any possible injuries. Next, you need to locate the bolt that’s holding your blade in place and use a wrench to loosen it. Remember, the blade rotates counterclockwise, so you’ll need to turn the bolt clockwise to loosen it.
Once the bolt is loose, you can remove it entirely, along with the blade. Make sure you’re holding on to the blade firmly and carefully because it can be heavy. Finally, take a moment to inspect the blade’s condition.
If it’s damaged, dull, or bent, it’s time to replace it with a new one. Removing your old blade is a straightforward process, but it’s essential to do it correctly to avoid any potential danger.
Step 3: Insert New Blade
Now that you have removed the old blade, it’s time to insert the new one. Make sure that the replacement blade is the same size as the old one and that it fits securely into the holder. Take the blade and carefully slide it into the holder until you feel resistance.
Then, using your fingers, tighten the holder to secure the blade in place. Make sure that the blade is facing in the right direction, with the sharp edge facing outwards. You don’t want to end up with a dull blade that won’t cut properly! Once the blade is securely in place, you’re ready to use it.
Remember to dispose of the old blade safely and recycle the packaging of the new one. With this simple step-by-step guide, you won’t have any trouble inserting a new blade into your tool, and you’ll be back to work in no time!
Step 4: Lock Blade
Locking the blade is an essential step when using any type of knife. To ensure safety and efficiency, it’s crucial to lock the blade in place. Firstly, make sure the blade is open and held securely.
Then, locate the locking mechanism, which may vary depending on the type of knife. Some may have a button or lever while others require you to turn a screw or release a catch. Press or turn the lock to secure the blade in position.
You should hear a click or feel a slight resistance to confirm it’s locked correctly. Always double-check to make sure the blade is secure before using the knife. Following this step will prevent any unwanted injuries or accidents.
Remember to unlock the blade when you’re finished using the knife to avoid any damage to the locking mechanism or blade itself.
Tips and Warnings
If you’re using an Olfa utility knife, there will come a time when you need to change the blade. It’s a simple process, but it’s important to do it correctly to avoid injury. Here are some tips to help you change the blade in your Olfa utility knife safely:
First, make sure that the knife is turned off and that the blade is fully retracted into the handle. Next, locate the blade release button or mechanism on the knife.
This is usually located near the blade holder. Hold the knife securely in one hand and use your other hand to press the blade release button.
This should release the old blade from the holder. Carefully remove the old blade and dispose of it safely.
Never attempt to remove a dull blade by hand, as you could cut yourself. Slide the new blade into the blade holder, making sure that it’s properly aligned and seated securely.
Release the blade release button and test the blade before using the knife again. Make sure that it’s locked in place and that there’s no movement or wobble.
Safety Precautions
When it comes to safety precautions, there are a few essential tips and warnings to keep in mind. Firstly, always wear appropriate protective gear for the task at hand, such as gloves, goggles, or helmets. It may seem like overkill, but these items can protect you from serious injury or even save your life in some instances.
Another thing to keep in mind is to be aware of your surroundings. Whether you’re working with heavy machinery or simply taking a walk in a busy area, it’s important to stay alert and avoid distractions. If you’re ever in doubt about a situation, it’s much better to err on the side of caution and proceed with extra care.
And lastly, always follow the instructions and guidelines provided for the equipment or task you’re working with. Failure to do so can have serious consequences. Overall, taking precautionary measures is key to ensuring your safety and the safety of those around you.
Using Proper Blade for OLFA Knife
When it comes to using an OLFA knife, using the proper blade is crucial. It not only ensures that the job is done right but also keeps you safe from possible accidents or injuries. Before using an OLFA knife, always choose the right blade for the job.
OLFA knives have a variety of blades, each designed for specific cutting needs. Make sure to read the packaging or labels of the blades before using them to ensure that they are compatible with your knife. It is also important to be mindful of the blade’s sharpness and when it needs to be replaced.
Dull or damaged blades can lead to uneven cuts or slip-ups, which can cause serious injuries. Always replace your blades regularly to avoid any potential hazards. Remember, a proper blade for an OLFA knife is essential for an efficient and safe cutting experience.
Conclusion
Changing the blade in your Olfa utility knife is like flipping to a fresh page in your notebook – it’s quick, easy, and makes all the difference. So don’t get stuck with a dull blade, follow these simple steps and keep your cuts sharp and precise. Happy cutting!”
FAQs
What is an Olfa utility knife used for?
An Olfa utility knife is a versatile cutting tool used for various purposes, including trimming and cutting materials such as cardboard, paper, and plastic.
Can I change the blade on my Olfa utility knife?
Yes, you can change the blade on your Olfa utility knife. It is designed to allow for easy blade replacement without the need for additional tools.
What is the recommended way to change the blade on an Olfa utility knife?
To change the blade on your Olfa utility knife, you should first retract the blade and hold the knife firmly. Then, carefully and securely remove the old blade and insert the new one, making sure it is locked in place before use.
How often should I change the blade on an Olfa utility knife?
The frequency of blade changes will depend on how often you use the knife and the type of material you are cutting. However, it is generally recommended to change the blade when it becomes dull or damaged to ensure safe and effective use.
Are Olfa utility knife blades interchangeable with other brands?
No, Olfa utility knife blades are specifically designed for use with Olfa knives and may not be interchangeable with other brands.
Do Olfa utility knife blades come in different sizes?
Yes, Olfa utility knife blades come in various sizes and styles, including straight edge, serrated edge, and snap-off blades.
Can Olfa utility knife blades be recycled?
It depends on the local recycling facilities available in your area. However, most Olfa utility knife blades are made of high-quality steel and can be recycled with other metal objects.

