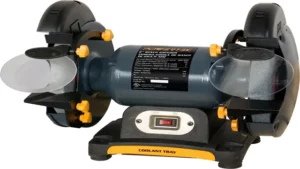
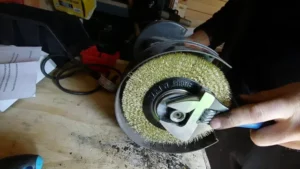
Are you a DIY enthusiast or a professional seeking to change your bench grinder’s wheel? Look no further as this article will guide you through the steps of changing a wheel on a bench grinder. The wheel is an integral part of a bench grinder responsible for shaping, sharpening, and buffing various materials. Therefore, it’s crucial to understand the procedure to replace your worn-out wheel for optimal performance and safety.
Imagine trying to cut a piece of wood with a blunt axe. The result would be frustrating, unproductive, and unsafe. Similarly, a bench grinder with a worn-out wheel performs inadequately, jeopardizing your work’s quality and safety.
Therefore, a well-maintained bench grinder wheel ensures optimal performance and output, ensuring your work’s quality and safety. So, how do you go about changing the wheel on your bench grinder? What equipment do you need, and how do you ensure safety during the process? These are some of the questions that we’ll answer in this article. Whether you’re a DIY enthusiast or a professional, you’ll gain insights and tips to change your bench grinder’s wheel safely and optimally.
Gather Tools
If you’re looking to change a wheel on a bench grinder, the first thing you’ll need to do is gather the necessary tools. Depending on the type of grinder and the wheel you want to change, you’ll likely need a wrench or spanner, pliers, and possibly a clamp or vise. It’s important to make sure you have the correct size wrench for your particular grinder, as using an ill-fitting tool can cause damage and make the process more difficult.
Once you have your tools gathered, you can begin the process of safely removing the old wheel and installing the new one. Remember to always wear appropriate personal protective equipment, including safety glasses and gloves, when working with power tools like bench grinders. With the right tools and precautions in place, you’ll be able to easily change out your bench grinder wheel and get back to your projects in no time.
– Safety goggles – Wrench – Replacement wheel – Bench grinder manual – Gloves (optional)
As you gear up to replace a damaged wheel on your bench grinder, there are a few essential tools that you’ll need to gather before getting started. Safety goggles are an absolute must-have, as flying debris from grinding can cause serious eye injury. A wrench will come in handy for removing the nut that holds the old wheel in place.
You’ll also need to have a replacement wheel that is compatible with your grinder, so be sure to check the manual for specifications. Speaking of the manual, it’s always a good idea to have it on hand as a reference tool for specific instructions or safety precautions. Gloves are optional, but they can provide an extra layer of protection from heat and sharp edges.
With these tools in tow, you’ll be well-prepared to tackle your bench grinder repair project and get back to perfecting your woodworking or metalworking skills in no time.
Prepare the Grinder
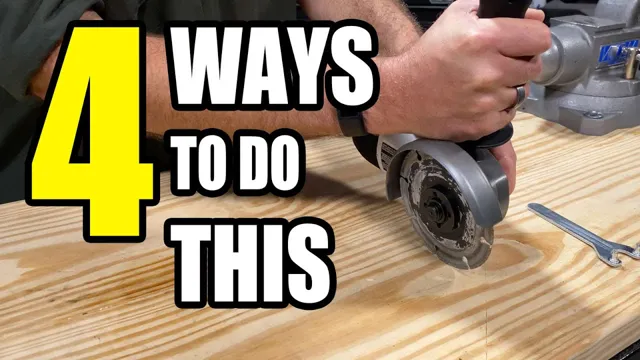
If you need to change a wheel on a bench grinder, first, you need to prepare the grinder for the process. Turn off and unplug the grinder to ensure your safety. Then, remove the safety guard carefully by following the manufacturer’s instructions and securing the wheel in place with the wheel wrench.
Make sure the grinder is stable and won’t move during the wheel replacement. It’s also crucial to choose the right type of wheel for the task at hand, as every wheel serves a specific purpose. Once you have the replacement wheel, you can insert it into the spindle, making sure that it’s secured tightly.
After installing the wheel, you can replace the safety guard, plug the grinder back in, and test the new wheel to ensure it’s working correctly. Remember, safety should always be your priority when using a grinder, so be careful and follow the manufacturer’s instructions strictly.
– Turn off and unplug the bench grinder. – Loosen the lock nut holding the current wheel in place.
When it comes to using a bench grinder, it is important to properly prepare the tool before getting started. Before doing anything, turn off and unplug the grinder to ensure your safety. Once that is done, the next step is to loosen the lock nut holding the current wheel in place.
This will allow you to remove the old wheel and install a new one if necessary. Make sure you have the correct replacement wheel before attempting to make any changes, and be sure to follow the manufacturer’s instructions for installation. Checking the condition of the grinding wheel is also important, as a worn or damaged wheel can be dangerous to use.
Taking the time to properly prepare your grinder will not only help ensure your safety, but also help to extend the life of your tool. Remember, a little bit of preparation can go a long way in making sure your bench grinder is working properly.
Remove the Old Wheel
When it comes to changing a wheel on a bench grinder, the first step you want to take is removing the old wheel. Before getting started, make sure the grinder is unplugged and secure. You don’t want the grinder to accidentally turn on while you’re working on it! Then, use a wrench to loosen the nut holding the wheel in place.
Once you’ve removed the nut, you should be able to slide the old wheel off of the spindle. Be sure to inspect the old wheel for any signs of wear or damage before disposing of it. With the old wheel removed, you can now move on to installing the new one.
– Carefully lift the wheel off the spindle. – Inspect the spindle to ensure it is clear of debris. – Inspect the wheel for any damage.
Removing an old wheel from your vehicle may seem like a daunting task, but it’s actually quite simple. Begin by carefully lifting the wheel off the spindle. Be sure to inspect the spindle to ensure that it’s clear of any debris that may have accumulated.
This will ensure that the new tire fits snugly and will be secure when installed. Next, inspect the old wheel for any damage or wear and tear. It’s important to identify any cracks or other signs of damage, as driving on a damaged wheel can lead to serious accidents on the road.
Once you’ve removed the old wheel and inspected both the spindle and the wheel, you’ll be ready to install the new one. Remember to take your time and be cautious to ensure a smooth, safe replacement process. With these simple steps, you can quickly replace an old, worn-out tire and get back on the road with confidence.
Install the New Wheel
Changing a wheel on a bench grinder may seem like a daunting task, but it’s actually quite simple. Once you’ve removed the old wheel, it’s time to install the new one. First, make sure the new wheel is the right size and type for your grinder.
Check the manufacturer’s instructions or the label on the wheel for this information. Once you have the correct wheel, use the wrench provided or a spanner to tighten the nut onto the spindle, making sure the wheel is centered and secured. Use your hands to turn the wheel and make sure that it spins freely.
If it doesn’t, adjust the nut until it does. Once you’re satisfied, plug in the grinder and test it out. Remember, it’s important to wear safety gear and follow all manufacturer’s instructions when changing a grinding wheel to ensure that the job is done safely and correctly.
– Follow the instructions in the bench grinder manual to properly install the new wheel. – Tighten the lock nut to securely hold the new wheel in place.
Installing a new wheel on your bench grinder is a relatively simple process. However, it is essential to follow the instructions in the manual to ensure you do it correctly. The first step is to remove the old wheel from the spindle by unscrewing the lock nut and carefully pulling the wheel off.
Once you have removed the old wheel, it is time to install the new one. The size and type of wheel should match the recommendations in the manual. Place the new wheel on the spindle and align it carefully.
Then, tighten the lock nut securely to hold the new wheel in place. Remember to use a wrench to ensure the lock nut is tightened firmly. It is also crucial to check the tightness of the lock nut regularly to avoid accidents.
After you have installed the wheel, you are ready to use your bench grinder safely and effectively. By following these simple steps, you can successfully install a new wheel and take advantage of your bench grinder’s benefits.
Test the Grinder
If you’re looking to change the wheel on your bench grinder, there are a few steps you can follow to make sure it’s done safely and effectively. First, make sure the grinder is unplugged and the wheel has stopped moving before attempting to change it. Next, loosen the wheel nut with a wrench and remove the old wheel.
When installing the new wheel, make sure it’s the correct size and type for the grinder. Then, tighten the wheel nut securely, making sure the wheel is centered properly. Finally, test the grinder to make sure it’s running smoothly before using it for any projects.
Remember to always wear proper protective gear, such as safety glasses and gloves, to protect yourself from any flying debris. By following these steps, you can easily change the wheel on your bench grinder and keep it in top working condition.
– Turn on the bench grinder and test it to ensure the new wheel is functioning properly. – Adjust the tool rests and spark guard as needed.
Once you’ve successfully mounted the new wheel onto your bench grinder, it’s time to test it out and make sure everything is working properly. Turning on the grinder and running the wheel for a few seconds should give you a good indication of its functionality. Check for any abnormal noises, excessive vibrations, or wobbling.
If everything seems to be running smoothly, the new wheel should be good to go. However, if you notice any issues, it’s best to stop the grinder immediately and investigate further. Additionally, don’t forget to adjust the tool rests and spark guard as needed, ensuring they are set up in safe positions for the new wheel.
With the proper adjustments made, your bench grinder should be back in top working condition and ready to tackle any task you throw at it. Let’s get grinding!
Conclusion
Congratulations! You have now mastered the art of changing a wheel on a bench grinder. With a little bit of elbow grease and some caution, you can easily switch out your dull or damaged wheel for a fresh one. Just remember to always wear protective gear and never attempt to change the wheel while the grinder is still plugged in.
Happy grinding!”
FAQs
What tools do I need to change a wheel on a bench grinder?
You’ll need a wrench, pliers, and a replacement wheel.
How often should I change the wheel on my bench grinder?
It’s recommended to change the wheel every six months to a year, or when it becomes worn or damaged.
Can I change the wheel on my bench grinder myself, or should I hire a professional?
If you have experience with power tools and feel confident in your abilities, you can change the wheel yourself. However, if you’re not comfortable, it’s best to hire a professional.
How do I remove the old wheel from my bench grinder?
Use the wrench or pliers to loosen the nut holding the wheel in place, then carefully lift the wheel off the spindle.
How do I install the new wheel on my bench grinder?
Place the new wheel on the spindle, making sure it’s centered and aligned with the other wheel. Tighten the nut securely with the wrench or pliers.
What should I do if the new wheel doesn’t fit my bench grinder?
Make sure you’ve purchased the correct size and type of wheel for your grinder. If it still doesn’t fit, double-check your grinder’s manual or consult a professional for assistance.
How do I test the new wheel to make sure it’s working properly?
Turn on the grinder and spin the wheel for a few seconds to make sure it’s running smoothly and there are no wobbles or vibrations. Always wear appropriate safety gear when testing power tools.
