If your car battery has gone dead or is not holding charge as it should, then you need to recharge it. One of the best ways to do this is by using a car battery charger. But if you’re not familiar with how they work or how to attach them properly, it can be quite overwhelming.
Don’t fret, though! In this blog post, we will guide you step-by-step on how to attach a car battery charger. Whether you’re a beginner or an experienced DIYer, we’ve got you covered! So, let’s jump right in and learn how to ensure that your car battery is charged and ready to go.
Gather Necessary Materials
Attaching a car battery charger can be a daunting task, but with the right materials, it can be an easy and simple process. The first thing you need to do is gather all the necessary materials. You will need a car battery charger, safety glasses, gloves, and a wrench.
Make sure that the charger you pick is compatible with your car battery, as there are different types of chargers in the market. Wear safety glasses and gloves to protect your eyes and hands from any accidents or injury. Also, using a wrench will be handy to loosen and tighten the connections.
Once you have all the necessary materials, you’re ready to start the process of attaching your car battery charger. By following the proper steps and utilizing the right tools, you will have your car battery charged up in no time.
Car battery charger
If you’ve found yourself stranded with a dead car battery, fear not! With the right tools and a bit of elbow grease, you can easily revive your vehicle’s battery using a car battery charger. The first step is to gather the necessary materials, which include the car battery charger itself, a pair of safety glasses, gloves, and a trickle charger. Make sure to read the charger’s manual before getting started, as some models may require specific materials or instructions.
Once you have everything you need, park your car in a well-ventilated area and be sure to turn off all electronic devices, including the headlights and radio. Safety first! With your equipment in hand and safety gear on, you’re ready to tackle the task of charging your car battery.
Gloves and safety glasses
When it comes to safety measures at home or in the workplace, gloves and safety glasses should always be a top priority. Gathering the necessary materials beforehand will help ensure that you are properly protected. Safety gloves come in a variety of materials, including latex, nitrile, and vinyl.
Make sure to choose the right type of glove for the task at hand, taking into account any allergies, the material being handled, and the level of dexterity required. Safety glasses should be selected based on the type of work being done, as different tasks require different levels of eye protection. For example, if you are using power tools, you’ll need glasses that can withstand high-impact debris.
By taking the time to gather the appropriate gloves and safety glasses, you can prevent accidents and injuries from occurring. It’s better to be safe than sorry!
Wrench or pliers
When it comes to fixing or constructing things, the type of tool you use can make a world of difference. Wrenches and pliers are two common tools that people often use interchangeably, but they serve very different purposes. Before getting started on your project, it is important to gather the necessary materials, including the appropriate tools for the job.
If you are working on a project that involves turning bolts and nuts, then a wrench is the way to go. Wrenches come in many different sizes and shapes, so make sure you choose the right one for the job. On the other hand, if you need to grip and twist wire or cables, then pliers are the tool you need to use.
Pliers also vary in size and shape, and some have additional features, such as wire-cutters or crimpers. Remember that using the wrong tool for the job can cause damage, delay your progress, and even be dangerous, so make sure you choose the right tool for the task at hand.
Locate the Battery
If you’re looking to attach a car battery charger, the first step is to locate the battery itself. While this may seem obvious, it’s important to know that car batteries can be located in different places depending on the make and model of your vehicle. The most common location is under the hood, but some vehicles have the battery located in the trunk or even under the rear seat.
Once you’ve found the battery, you’ll want to ensure that it’s turned off before attempting to attach the charger. This means making sure the car’s electrical system is off, including turning off the radio and lights, and removing the keys from the ignition. Once the battery is off, you can attach the charger cables, starting with the positive (red) cable and then the negative (black) cable.
It’s important to make sure the cables are securely attached and that the charger is set to the correct voltage and amperage for your specific battery. With these steps completed, you’re ready to recharge your car battery!
Open the hood
Opening the hood of your car may seem daunting, especially if you’re not entirely familiar with the process. Once the hood is open, you can access the battery, which is essential for keeping your car running smoothly. To locate the battery, start by opening the hood and securing it in place with the prop rod.
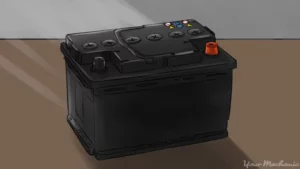
Once the hood is open and secure, look for a rectangular or square-shaped box that’s typically located near the engine. This is the battery, and it’s usually held in place with a bracket or clamp. Sometimes, the battery is covered by a plastic shroud, so you may need to remove this in order to access it properly.
Once you’ve located the battery, it’s important to check it regularly for signs of wear and tear, such as corrosion or leaking. By keeping your battery in good condition, you can ensure that your car starts up reliably every time you turn the key, keeping you on the road and on the go.
Locate the battery
When it comes to troubleshooting an issue with your device, the first step is often locating the battery. Depending on the make and model, the battery may be in a variety of places. For some phones and tablets, the battery may be located in the back cover and easily accessible with a simple latch or button.
Other devices may require you to unscrew the back cover or even remove it entirely to access the battery. Some laptops have batteries that are not user-replaceable and require professional service. The best way to locate the battery in your device is by consulting the user manual or searching online for your specific make and model.
It is always important to handle the battery with care and follow proper disposal instructions if necessary. By taking the time to locate and assess your device’s battery, you can better understand any issues you may be experiencing and take the appropriate steps to resolve them.
Preparing the Charger
Attaching a car battery charger can seem like a daunting task, but with a few simple steps, you can do it easily. The first step is to prepare the charger. Check the voltage of your car battery and ensure that the charger you have is compatible with it.
You can find this information in the owner’s manual or on the battery itself. Next, locate the battery and ensure that it is switched off. Connect the charger’s positive lead to the positive terminal of the battery and the negative lead to the negative terminal.
Make sure that the connections are secure and that there are no loose wires. Finally, turn on the charger and monitor the charging process. Once the battery is fully charged, turn off the charger and disconnect it from the battery.
Remember to always follow the manufacturer’s instructions and safety precautions when using a car battery charger. With a little bit of practice, you can easily attach a car battery charger and keep your car battery in good working condition.
Turn off the charger
When it comes to preparing your charger, there are a couple of things you should keep in mind before plugging it in. First and foremost, make sure that the charger is intended for the device you are going to be using it with. Using an incompatible charger can not only damage your device but also pose a safety hazard.
Additionally, before plugging in the charger, ensure that the outlet or power source is functional and safe to use. Once you have confirmed these two aspects, you can go ahead and plug in your charger. However, it is crucial to remember to turn off the charger after it has finished charging your device.
Leaving it on can not only lead to overheating but also contribute to energy wastage, resulting in higher electricity bills. By turning off the charger, you can ensure that your device stays safe and reduce your carbon footprint.
Connect the charger to the power source
When it comes to charging your electronic devices, it’s important to properly prepare your charger before connecting it to a power source. The first step is to ensure that the charger is compatible with your device by checking the voltage, wattage, and amperage requirements. Once you’ve confirmed compatibility, make sure that the charger is in good condition and that there are no visible signs of damage or wear.
Before plugging the charger into the power outlet, it’s also important to check the outlet for any visible damage or issues, such as bent prongs or frayed wires. This will ensure that the charger is able to safely draw power from the source without causing any electrical issues or damage. When you’re ready to connect the charger to the power source, make sure that the power switch is in the off position before plugging it in.
This will prevent any sudden power surges or spikes from damaging your device or the charger itself. Once the charger is plugged in, turn the power switch back on and wait for the device to begin charging. By following these simple steps for preparing your charger and connecting it to the power source, you can ensure that your device charges safely and effectively without any unnecessary issues or risks.
Whether you’re charging a phone, laptop, or other electronic device, taking the time to properly prepare your charger can help to extend its lifespan and prevent any potential damage.
Connect the Charger to the Battery
Attaching a car battery charger may seem like a daunting task, but with the right tools and steps, it can be done quickly and easily. Before connecting the charger to the battery, it is important to ensure that both are the correct match for each other, as using an incompatible charger on a battery can cause damage. Once you have a suitable charger, make sure that the car is turned off and any electrical loads, such as lights or the radio, are switched off.
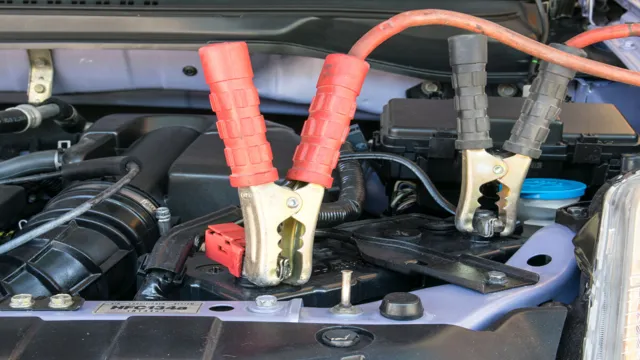
Then, connect the positive clamp of the charger to the positive terminal of the battery, ensuring that it is securely attached. Next, connect the negative clamp of the charger to a solid, unpainted metal part of the car’s chassis, away from the battery and any moving parts. Finally, switch on the charger and wait for it to reach full capacity, which may take several hours depending on the state of the battery.
By following these simple steps, you can safely and effectively attach a car battery charger to ensure that your car is always ready to go.
Identify the positive and negative terminals
When it comes to connecting a charger to a battery, it’s essential to identify the positive and negative terminals first. Typically, the positive terminal will be denoted with a “+” symbol, while the negative terminal is marked with a “-” sign. It’s crucial to connect the charger correctly, as if you reverse the terminals, it can damage the battery or even cause an explosion.
Once you’ve identified the terminals, make sure that the charger’s plug matches the battery’s socket before connecting them. It’s a common mistake to try and force the charger into the wrong socket, which can lead to damage and possibly injury. Always double-check that you’re using the correct charger for the battery before connecting them.
Additionally, some chargers may have a switch or button that needs to be turned on before charging begins. Simply flipping this switch or pressing the button should start the charging process. Overall, it’s important to take your time and be careful when connecting a charger to a battery.
By following these simple steps, you can ensure that your battery stays healthy and charged for a long time.
Connect the positive charger clamp to the positive terminal
When it comes to charging your battery, it’s important to connect the charger properly to avoid damaging your vehicle or the charger itself. One of the first steps to take when connecting a charger to a battery is to connect the positive charger clamp to the positive terminal. This is because the positive clamp will carry the positive charge from the charger to the battery.
You may notice that the positive terminal is marked with a “+” sign or is colored red to indicate it’s the positive side. It’s important to make sure the clamp is securely connected to the terminal, so the charge can flow freely from the charger to the battery. Once the clamp is secured tightly, you can move onto connecting the negative charger clamp to the negative terminal, which will complete the circuit and allow the battery to charge fully.
By ensuring that you connect the charger to the battery correctly, you can protect both your vehicle and the charger while charging your battery efficiently.
Connect the negative charger clamp to the negative terminal
When it comes to charging your car battery, it’s important to follow the correct steps to ensure that you do it safely and effectively. One crucial step in the process is connecting the negative charger clamp to the negative terminal of your battery. This step is important as it helps to complete the charging circuit and allows electricity to flow to the battery.
Before you attempt to connect the charger, make sure that both the charger and battery are turned off to prevent any electrical shock or damage to the battery. Once you’ve checked that, locate the negative terminal on the battery, which is usually marked with a minus sign (-). Then, carefully attach the negative charger clamp to the negative terminal, ensuring that the connection is secure and snug.
Remember not to touch any metal parts while making the connection, as doing so could result in electrical shock. By taking these steps and connecting the negative charger clamp to the negative terminal, you’ll be one step closer to getting your car battery fully charged and ready to go.
Charge the Battery
If you’re wondering how to attach a car battery charger, it’s a pretty simple process that can help you avoid the frustration of a dead battery. The first step is to make sure the car is turned off and the charger is unplugged. Next, identify the positive and negative terminals on your car battery.
The positive terminal will typically have a red cover or indicator, while the negative will have a black one. Connect the charger’s positive clip to the positive battery terminal and the negative clip to the negative terminal. Make sure the clips are securely fastened and that there are no loose wires.
Once everything is connected, plug in the charger and switch it on. Depending on your charger, it may take a few hours to fully charge the battery. When the charger indicates that the battery is fully charged, remove the clips in reverse order – negative clip first, then positive.
It’s important to be careful when working with car batteries, so make sure to wear protective gloves and goggles and to read the instructions carefully. With these steps, you should be able to charge your car battery safely and easily.
Turn on the charger
When you realize that your phone battery is running low, the first thing you need to do is to turn on the charger. It may seem like a simple task, but it’s crucial to ensure that your device charges correctly and in the shortest time possible. The next step is to connect the phone to the charger using the appropriate cable.
It’s essential to choose a charger compatible with your phone model to avoid damaging the battery. Before plugging in the charger, inspect it for any visible signs of damage. If the charger is broken or frayed, you risk causing harm to your device.
Once you connect the charger, the charging icon should appear on your phone screen to indicate that the battery is charging. Charging your phone for an extended period can also have adverse effects on the battery. Therefore, it’s best to unplug the charger once your phone reaches 100%.
Remember to keep your charger clean and store it in a cool and dry place to ensure it maintains optimal performance. So the next time you need to charge your phone, turn on the charger, connect it, and let your device charge quickly and efficiently.
Wait for the battery to fully charge
When it comes to charging your electronic devices, it’s essential to wait for the battery to fully charge. Many people make the mistake of unplugging their device once it reaches a certain percentage, but this can actually lead to a shorter battery lifespan in the long run. When you unplug your device before it’s fully charged, you’re essentially interrupting the charging cycle.
This can cause the battery to lose its capacity over time, leading to a shorter overall battery life. To avoid this issue, it’s best to be patient and wait for your device to fully charge before disconnecting it from the power source. While it may be tempting to unplug your device and start using it as soon as possible, this can lead to a lower battery life and more frequent charging cycles.
One way to ensure you’re charging your device properly is to use a charger specifically designed for your device. Using a cheap or incorrect charger can also cause battery issues over time, so it’s important to invest in a good quality charger. Overall, charging your device may seem like a simple task, but it’s important to do it correctly to maximize your battery’s lifespan.
So next time you’re charging your phone, tablet, or other electronic device, take a deep breath, be patient, and wait for that battery to fully charge. Your battery (and your future self) will thank you for it!
Disconnect the Charger
If you’re wondering how to attach a car battery charger, you’ve come to the right place. First, make sure your car is turned off and in park. Then, open the hood of your vehicle and locate the battery.
You’ll need to connect the positive (red) charger clamp to the positive battery terminal, followed by the negative (black) clamp to the negative terminal. It’s important to remember to connect the charger in this sequence, or you could damage your car’s electrical system. Once you’ve connected the charger, turn it on and let it charge the battery for the recommended amount of time.
When finished, turn the charger off and disconnect the clamps in the reverse order you connected them. Always be careful when working with batteries and chargers to avoid injury. Remember, never connect or disconnect the charger while the engine is running, and always disconnect the charger before starting your car.
So, next time you need to charge your car battery, follow these steps carefully and your car will be up and running in no time!
Turn off the charger
If you’re concerned about your phone’s battery life, then disconnecting your charger when it’s fully charged is essential. Leaving your phone plugged in can damage the battery’s health, leading to shorter battery life. Simply turning off the charger isn’t enough – you need to physically unplug it from the socket.
This will help extend your phone’s battery life and prevent unnecessary wear and tear on the battery. So, next time you’re finished charging your phone, don’t forget to disconnect the charger and give your phone’s battery the break it deserves. Remember, a little effort in unplugging your charger can go a long way in saving your phone’s battery life!
Disconnect the negative clamp from the battery
After you have safely charged your vehicle’s battery, it’s important to disconnect the charger properly. Start by disconnecting the negative clamp from the battery. Before doing so, ensure that the charger is turned off and unplugged from the power source.
Then, loosen the clamp and gently lift it off the battery terminal. Keep in mind that the negative clamp should always be removed first to avoid any potential sparks or electric shocks. Once the negative clamp is disconnected, you can move on to removing the positive clamp.
Again, loosen the clamp and lift it off the battery terminal slowly and carefully. Once both clamps are removed, you can safely store the charger until the next time you need it. With these steps, you can safely disconnect the charger and avoid any mishaps while maintaining a healthy battery for your vehicle.
Disconnect the positive clamp from the battery
After fully charging your battery, it’s now time to disconnect the charger. Before doing this, be sure to disconnect the positive clamp from the battery to avoid a spark or any electrical accident. Once you have disconnected the clamp, turn off the charger and ensure that it’s unplugged from the outlet.
It’s crucial to remember that leaving the charger connected to your battery can cause it to overcharge or even generate heat, which may lead to fire or explosion. To avoid damaging your battery or your charger, make sure to disconnect them after every charging cycle. Just like how we unplug appliances after using them, disconnecting your charger is also one way of ensuring your safety, and the safety of your vehicle.
Always remember, disconnecting the charger is an easy and simple task, but it’s a crucial part of maintaining your battery’s longevity.
Conclusion
So there you have it folks, the foolproof guide to successfully attaching a car battery charger. It’s like connecting the dots, but with cables and electricity. Just remember to take the necessary safety measures, make sure the charger is compatible with your battery, and don’t be afraid to ask for help if it’s your first time.
With these steps, you’ll have your car up and running in no time, and you can pat yourself on the back for being a DIY guru (or just pretend that you are). Charge on, my friends!”
FAQs
What type of car battery charger should I use?
You should use a charger that fits your car’s battery specifications and has a suitable charging rate.
Can I attach a car battery charger while the engine is running?
No, you should always turn off the car’s engine and disconnect any electronic devices before attaching a charger.
How long does it take to fully charge a car battery with a charger?
The time it takes to charge a car battery depends on the battery’s capacity and the charging rate of the charger. It can take anywhere from a few hours to overnight.
Can I charge a completely dead car battery with a charger?
Yes, you can use a car battery charger to charge a completely dead battery, but it may take longer to charge and may require special care.
What safety precautions should I take when using a car battery charger?
Always wear protective gear, follow the charger’s instructions, and avoid overcharging or overheating the battery.
Do I need to remove the battery from the car to charge it with a charger?
No, you can connect the charger to the battery while it is still in the car, but make sure to follow all safety precautions.
What should I do if my car battery won’t hold a charge even after using a charger?
If your car battery won’t hold a charge, it may be time to replace it with a new one.
