Ready to try your hand at welding? Assembling a welding machine may seem intimidating at first glance, but it’s actually a fairly straightforward process. By following a few simple steps, you can have your new welding machine up and running in no time. Whether you’re a beginner or an experienced welder, assembling your own machine can be a rewarding experience that helps you understand the inner workings of your equipment.
So, grab your safety gear and let’s dive in!
Introduction
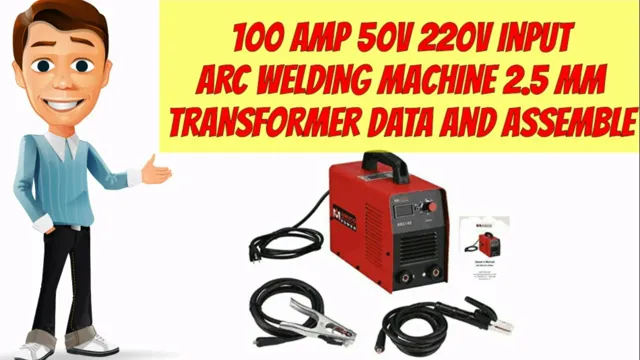
To assemble a welding machine, you need to follow a few simple steps. Firstly, make sure you have all the necessary tools and components. A welding machine typically consists of a power source, a welding gun, and the cables that connect them.
It’s important to check that all these components are compatible with each other and meet safety standards. Next, connect the power source to the welding gun using the appropriate cables. Make sure to secure each connection tightly to ensure that there is no risk of electrocution or malfunction.
Finally, test your machine to make sure it works properly. You can do this by welding a test piece of metal and checking that the weld is strong and free of defects. With these steps, you’ll be able to assemble your welding machine and start welding like a pro!
What is a welding machine?
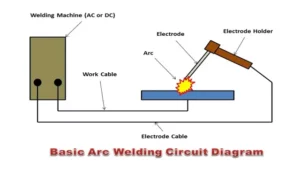
A welding machine is a tool used to join two or more pieces of metal by melting them together with the use of heat. It works by applying an electrical current to create an arc of electricity between the base metal and an electrode, which then melts the metal and fuses the two pieces together. Welding machines are commonly used in a variety of industries, including construction, manufacturing, and automotive repair.
They come in different types, including stick welding, TIG welding, and MIG welding, each with its own unique set-up and weld properties. A welding machine can be a powerful tool, but it does require some technical knowledge and skill to use effectively. So, if you’re considering using a welding machine for your next project, it’s important to do your research first and seek out proper training to ensure a safe and successful outcome.
Why assemble your own welding machine?
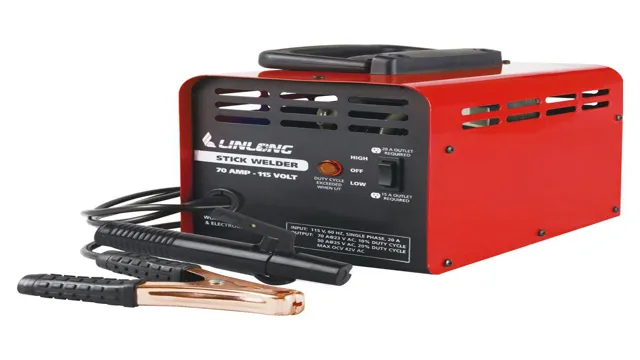
Welding machines are a critical piece of equipment in the metallurgy industry. They’re utilized to join metals, repair damaged parts, and manufacture various objects. Buying a welding machine can be an expensive endeavor, especially if one is looking for a high-grade machine.
However, the process of assembling a welding machine is a viable alternative that’s both cost-effective and rewarding. With the help of readily available resources on the internet, assembling a welding machine has never been easier. Along with being cost-effective, assembling your own machine allows for more customization options, as well as the satisfaction of creating something with your own hands.
Additionally, assembling a welding machine doesn’t require a high level of technical expertise, making it accessible to anyone with an interest in the field. By assembling your own welding machine, you can tailor it to your specific needs and save a significant sum of money in the process.
Step-by-Step Guide
Assembling a welding machine can seem daunting, but with a step-by-step guide, it can be done easily. First, make sure you have all the necessary tools and parts for assembly. These may include a user manual, screws, and an Allen key.
Next, unpack all the parts of the welding machine and lay them out on a clean, flat surface. Use the user manual as a guide to connecting all the components such as the welding gun, wire feeder, and power source. Remember to secure all the parts firmly while avoiding over-tightening.
Once all the parts are connected, double-check to ensure that the wiring is correctly done and that the power source is off. Finally, test your newly assembled welding machine by running a test weld. At this point, it’s vital to wear protective gear such as gloves, masks, and safety glasses.
By following these simple steps, your welding machine will be ready to use in no time!
Step 1: Unpack and Organize Parts
When you receive a new product, the first step is to unpack and organize the parts. This is an essential task that will make the assembly process smoother and quicker. First, find a clear and open space to work.
Then, carefully unpack all the parts and lay them out in an organized manner. Check the instructions to ensure that you have all the necessary parts and tools. If there are any missing pieces, don’t hesitate to contact the manufacturer for replacement.
Next, group similar parts together, such as screws, bolts, and nuts, to make them easy to find when needed. Sorting and arranging the parts can save you time and frustration later on. By taking the time to properly unpack and organize the parts, you can move onto the next step of assembly with confidence and ease.
Step 2: Assemble the Welding Gun
Now that you’ve prepared the necessary materials, it’s time to assemble your welding gun. Follow this simple step-by-step guide to make sure you do it right. First, insert the electrode holder into the handle and tighten it securely.
Then, attach the nozzle onto the front of the gun. Make sure it is aligned correctly and tightened in place. After that, insert the contact tip into the nozzle and tighten it.
Keep in mind that the contact tip should be compatible with the wire size you will be using. Lastly, attach the gas diffuser onto the back of the nozzle and tighten it. Double-check all the connections to ensure they are secure.
Congratulations! You’ve now successfully assembled your welding gun and you’re ready to start welding. With this process, it’s important to use compatible parts with the specific type of welding you’ll be doing. So, be sure to do your research and use the right equipment to ensure the best results.
Step 3: Connect the Cables
Now that you have assembled all the necessary components of your computer, it’s time to connect the cables. This is a crucial step in the building process as it ensures all the parts can communicate with each other effectively. The first cable you’ll need to connect is the power supply unit cable, which is usually found at the top of the motherboard.
Once this is in place, you can then attach the SATA cables to connect your storage devices to the motherboard. Don’t forget to connect your peripherals, such as your keyboard, mouse, and monitor, to the appropriate ports. It’s essential to ensure you connect the cables correctly to prevent any damage to your components.
If you’re unsure, consult your motherboard manual or seek the assistance of an expert. By connecting the cables correctly, you’re taking the final step in building your own customized computer that’s tailored to your specific needs and preferences.
Step 4: Attach the Ground Clamp
When it comes to welding, attaching the ground clamp is a crucial step that cannot be overlooked. The ground clamp serves as a safety mechanism and ensures that the welding machine is properly grounded. It is essential to check the ground cable for any damage or wear and tear before attaching the ground clamp.
Once you have confirmed that the cable is in good condition, attach the clamp to a clean metal surface as close to the welding area as possible. This will ensure that the electrical current flows properly through the circuit, preventing any accidents or damage to the machine. It is important to note that a loose or improperly attached ground clamp can cause a range of issues including poor weld quality and even electrical shocks.
Taking the time to attach the ground clamp properly will not only ensure a safe and effective welding experience but will also improve the overall quality of the weld.
Step 5: Install the Gas Regulator
When it comes to installing a gas grill, it’s essential to include a gas regulator in the process. This small but crucial component ensures that the gas flow from the propane tank to the grill is regulated and controlled, making it safer to use. To install the gas regulator, first ensure that the propane tank valve is closed before you begin.
Then, attach the regulator to the valve by screwing it in place, making sure it’s tight and secure. Next, attach the other end of the regulator to the grill by screwing it onto the port labeled “inlet” or “gas inlet.” Finally, check all connections to make sure there are no leaks, which you can do with a solution of soapy water.
Apply the solution to all connections and observe for any bubbles, which signify a gas leak. Remember that a properly installed gas regulator is paramount to your safety, so don’t skip this step!
Step 6: Connect the Gas Hose
Connecting the gas hose is the final step in setting up your gas grill, and it is crucial that you do it correctly. First, ensure that the propane tank is turned off and carefully remove the tank’s protective cap. Then, attach the regulator to the propane tank by screwing it on tightly.
Next, connect the gas hose to the regulator by aligning the pins and turning it clockwise until it clicks in place. Finally, open the propane tank by turning the valve counterclockwise. When you turn on the grill, you should hear the sound of gas flowing through the burner.
Make sure to check for leaks by brushing soapy water on the connections; if bubbles appear, you will need to tighten the connections and repeat the leak test. Always be sure to handle propane with care, and never use matches or lighters to check for gas leaks. By following these steps, you can safely and correctly connect your gas hose and enjoy a delicious grilled meal using your newly installed gas grill.
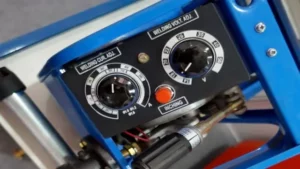
Step 7: Adjust the Welding Settings
When it comes to welding, adjusting the welding settings is crucial for producing a high-quality weld. This step requires careful attention to detail and an understanding of the materials being welded. Before you start welding, you should check the manufacturer’s recommendations for suggested welding settings.
Once you have these settings, adjust your welding machine accordingly. The most important settings to consider are the welding current, voltage, and wire feed speed. The current determines the amperage of the weld and can vary depending on the thickness of the metal.
The voltage affects the arc length, which in turn affects the penetration and fusion of the metal. Lastly, the wire feed speed controls the rate at which the filler metal is added to the weld joint. While making adjustments, monitor the weld and make further adjustments as needed.
Remember to always prioritize safety when welding and wear appropriate personal protective equipment.
Troubleshooting Tips
Assembling a welding machine can seem like a daunting task, but with the right approach, it can be an easy job. First, ensure you have all the required components: welding torch, ground clamps, welding cables, power source and a welding mask. Once all the components are in place, connect the welding cables to the welding machine and the ground clamps to the workpiece.
Then, connect the welding torch to the welding machine and tighten it. Check all the connections and make sure they are tight and secure. Turn on the power source and adjust the settings accordingly.
Put on your welding mask and start welding. If you face any issues during the assembly or welding process, consult the manual or seek professional help. By following these steps, you can successfully assemble your welding machine and start creating your masterpieces with ease.
Common Assembly Problems
Assembling furniture can be a stressful task, even for the experienced DIYer. Common issues that arise during assembly include missing or damaged components, incorrect instructions, and misaligned parts. To troubleshoot these problems, start by carefully reviewing the instructions and comparing them to the pieces you have.
It’s also a good idea to double-check that you have all necessary tools and hardware. If a part is missing or damaged, contact the manufacturer for a replacement. When dealing with misaligned parts, try loosening and tightening bolts to adjust the alignment.
It can also be helpful to have a second person assist with assembly to ensure everything is lined up properly. Overall, taking your time and using patience will often lead to a successful assembly process.
How to Troubleshoot Assembly Issues
If you’re experiencing assembly issues with your product, don’t fret! There are a few troubleshooting tips you can try before resorting to throwing in the towel. Firstly, make sure you have the right tools and equipment needed for assembly. Double-check the instructions to ensure you’re not missing any key parts or steps.
If you’re still struggling, try taking a step back and looking at the big picture. Are all the components aligned properly? Is there anything obstructing the way? It may help to break down the process into smaller, more manageable steps. Don’t be afraid to ask for help from colleagues or even the manufacturer’s customer service team.
Remember, assembly issues happen to the best of us, but with a little patience and determination, you’ll get through it!
Conclusion
And there you have it, folks! With these simple steps, you can put together your very own welding machine to take on any metalworking challenge that comes your way. Just remember to read the manual, wear protective gear, and always use caution when handling live welding equipment. Because as we all know, welding is hot! “
FAQs
What are the necessary components required to assemble a welding machine?
The necessary components required to assemble a welding machine are a transformer, diode, capacitor, and a welding gun.
Is it necessary to have prior knowledge of welding machine assembly before attempting it?
It is preferable to have prior knowledge of welding machine assembly, but with the help of instructional manuals and videos, it can be done even without prior knowledge.
Can a welding machine be assembled at home by a novice?
Yes, a welding machine can be assembled at home by a novice with proper guidance and assistance.
Can a faulty component in a welding machine compromise its performance?
Yes, a faulty component in a welding machine can compromise its performance and in some cases, it might not work at all.
How much time does it take to assemble a welding machine?
The time required to assemble a welding machine depends on the complexity of the machine and the knowledge of the assembler. It can take anywhere from a few hours to a few days.
What safety precautions should be taken while assembling a welding machine?
The assembler should wear protective gear like gloves, goggles, and an apron. They should also ensure that the power supply is turned off and the machine is properly grounded.
How often does a welding machine need to be assembled?
A welding machine does not need to be assembled frequently. It should only be done when there is a fault or when a new machine is purchased.
