As a welder, nothing is more frustrating than a machine that doesn’t deliver the expected results. Your welding machine has to be adjusted correctly to make sure that it is emitting the right amount of current, voltage, and wire speed to produce the desired weld. Adjusting a welding machine can be a challenging process, but with some tips and tricks, you can ensure that your machine is working optimally.
In this blog, we will explore some essential tips and tricks for adjusting your welding machine and getting the best performance from it, including how to change the voltage and wire speed, how to maintain consistent speed, and how to troubleshoot common issues. Whether you’re a newbie or a seasoned veteran, the following tips and tricks will help you tackle any welding project with confidence and ease. So, grab your welding helmet, gloves, and let’s dive in!
Understanding Your Welding Machine
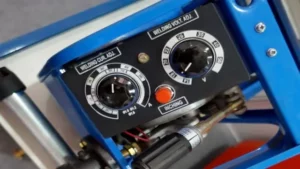
Adjusting your welding machine can be a crucial factor in achieving the desired results for your welding project. Before you start welding, you need to understand the settings on your welding machine and how they impact the final outcome. The most basic settings include the voltage and wire feed speed.
Voltage controls the intensity of heat produced, while the wire feed speed determines the rate at which the wire is fed into the weld. Other settings include the type of gas used, amperage, and polarity. As a welder, you need to understand how each setting affects the weld, and how to adjust them to achieve the desired outcome.
Experimenting with different settings and practicing can help you become more comfortable with your welding machine and improve your welding skills over time. Remember to follow safety protocols and always wear the recommended welding gear, including gloves, helmet, and safety glasses, among others, to prevent injuries.
Identifying the Components of Your Welding Machine
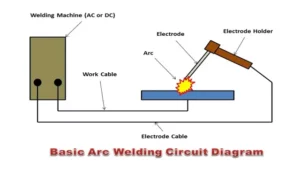
When it comes to welding, understanding your welding machine is crucial. It’s important to identify the components of your machine to ensure that you can use it properly and safely. The three main components of a welding machine include the power source, the electrode holder or welding gun, and the ground clamp.
The power source is the heart of your welding machine, providing the necessary electricity to create an arc between the electrode and the metal being welded. The electrode holder holds the electrode and is responsible for transferring the heat to the metal. The ground clamp completes the circuit and provides a safe path for the electrical current to travel back to the power source.
By understanding the components of your welding machine, you can ensure that you are using it safely and effectively.
Understanding the Purpose of Each Component
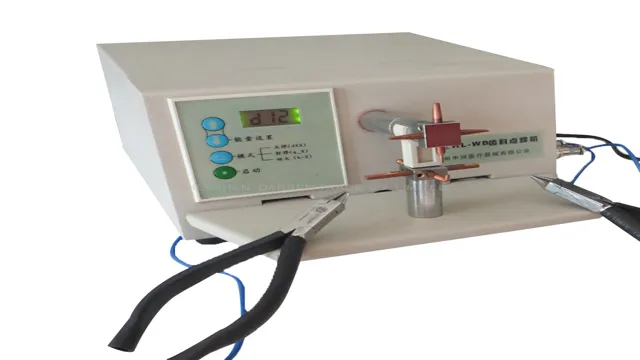
When it comes to welding, understanding your welding machine is crucial. Each component in a welding machine has its own purpose, and knowing what each one does can help you make better welding decisions. For instance, the power source is responsible for supplying the necessary electricity to create an arc, while the electrode holder connects to the power source and holds the welding electrode in place.
The ground clamp, on the other hand, is responsible for completing the electrical circuit and providing a return path for the electrical current. Understanding how all these components work together can help you achieve better welds and improve the longevity of your equipment. So, take the time to learn about your welding machine before you start welding, and you’ll be one step closer to becoming a successful welder.
How to Adjust Your Welding Machine
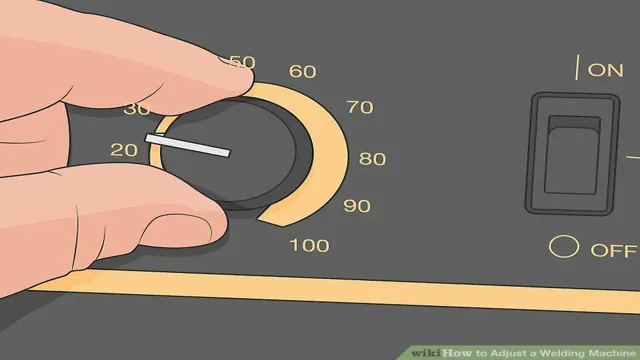
Adjusting your welding machine is a crucial step to getting the perfect weld. First, make sure your machine is turned off before adjusting the settings. The main settings you need to adjust are the voltage and wire speed.
Higher voltage will result in a hotter, more intense weld, while a higher wire speed will result in a faster feed of the welding wire. It’s best to start with a lower voltage and wire speed and gradually increase until you achieve the desired result. Other settings to consider are the amperage and polarity, which will depend on the type of welding and material you’re working with.
Always refer to your machine’s manual for specific instructions on how to adjust your welding machine. With a bit of patience and experimentation, you’ll be able to find the perfect settings for your welding needs.
Checking the Current and Voltage Settings
When it comes to welding, it’s important to ensure that your machine is set up correctly. One of the key things to check is the current and voltage settings. Most welding machines will have dials or buttons that allow you to adjust both of these.
To begin with, you should consult the manufacturer’s instructions to see what the recommended settings are for the type of welding you will be doing. Once you know this, you can begin making adjustments as needed. Start by setting the voltage to the recommended level, and then adjust the current until you achieve the desired welding output.
Keep in mind that different materials and thicknesses may require different settings, so be sure to experiment and make adjustments as needed. By taking the time to properly adjust your welding machine, you can ensure that you get a strong, high-quality weld every time.
Determining the Correct Settings for your Project
When it comes to welding, adjusting your machine to the correct settings is crucial for getting the desired results. Each project may require different settings based on the material, thickness, and type of joint being welded. It’s important to refer to your machine’s manual for guidance on how to adjust the specific settings.
The main settings that should be adjusted are the voltage, amperage, and wire speed. The voltage determines the heat of the arc, the amperage controls the amount of electricity flowing through the weld, and the wire speed impacts the length and quality of the weld. Adjusting these settings may take some trial and error, but starting with the recommended settings and making small adjustments can help achieve the desired outcome.
Remember, a well-adjusted machine can make a significant difference in the weld’s strength, appearance, and longevity.
Adjusting the Wire Feed Speed
Adjusting the wire feed speed is an essential skill in welding, as it enables you to control the flow of wire into your weld puddle. The wire feed speed refers to the rate at which the welding wire is delivered to the welding arc. When you adjust the feed speed, you can control the amperage of your weld and achieve an even and consistent weld bead.
To adjust the wire feed speed, you need to first determine what the appropriate speed should be for the thickness of your metal and the type of wire being used. Once you’ve determined that, you can make adjustments on your welding machine, either manually or automatically. By adjusting the wire feed speed, you can achieve a perfect welding bead and ultimately, produce a high-quality weld.
It might take some practice before you get the hang of it, but the results will be worth it.
Changing the Polarity
Adjust Welding Machine If you’re looking to adjust your welding machine, changing the polarity might be necessary. Polarity basically means the direction of current flow between the electrode and the base metal. A welding machine with direct current (DC) current can be set up for either negative or positive polarity.
If you’re welding with an electrode that produces positive ions, you’ll want to set your machine to negative polarity and vice versa. Adjusting your polarity can help you achieve better penetration and control over your weld, but it’s important to note that some electrodes may require a specific polarity. To adjust your welding machine’s polarity, first, check your machine’s manual to make sure that it’s capable of polarity changes.
Then, shut off the machine and locate the polarity switch, which is usually found near the power source. Make sure that your electrode and base metal are clean and free of debris before turning the machine back on and selecting the appropriate polarity setting. Remember to always wear proper safety gear while welding.
By adjusting your welding machine’s polarity, you can improve your welds and achieve better results. Whether you’re a professional welder or a DIY enthusiast, taking the time to make sure that your welding machine is set up correctly can make a big difference in the quality of your work. So, if you haven’t explored your machine’s polarity settings yet, now is the time to do it!
Safety Precautions for Welding
Adjusting a welding machine requires proper knowledge and skills to ensure optimal performance and safety. Before adjusting any settings, it is crucial to wear protective gear such as welding gloves, goggles, and apron to prevent sparks or harmful fumes. Some welding machines have multiple knobs and switches, making it essential to read the instruction manual carefully to understand which setting corresponds to each knob.
If you’re unsure about the correct settings, seek guidance from an experienced welder or consult with the manufacturer’s customer service. Additionally, it’s crucial to regularly inspect the welding machine for any signs of damage or malfunction before use. Failure to adhere to these precautions may result in serious injuries or damage to the welding machine.
Therefore, it’s crucial to take every necessary safety precaution and make adjustments with care to ensure a safe and effective welding experience.
Wearing Protective Clothing and Gear
When it comes to welding, safety should always be the top priority. One of the most important safety precautions is wearing protective clothing and gear. This includes a welding helmet, safety glasses, gloves, and a welding apron.
The welding helmet provides protection for the face and eyes from harmful rays and sparks. Safety glasses protect the eyes from flying debris and harmful fumes. Welding gloves provide protection from burns and electric shock.
A welding apron shields the entire body from sparks, heat, and metal spatter. It’s important to select the appropriate protective clothing and gear for the type of welding being done and to ensure proper fit and comfort. Remember, wearing protective clothing and gear not only prevents injuries but also ensures the quality and safety of the work being done.
So, always gear up before getting into a welding project, and stay safe!
Ensuring Proper Ventilation and Fire Safety Measures
When it comes to welding, safety should always be a top priority. One of the most important safety precautions for welding is ensuring proper ventilation. Welding releases fumes and gases that can be dangerous if inhaled.
To prevent health hazards, it is crucial to use a fume extraction system or work in a well-ventilated area. In addition to proper ventilation, fire safety measures must also be taken. Welding produces high heat, sparks, and molten metal, which can be a fire hazard.
It is important to keep the work area free of flammable materials and have fire extinguishers readily available. Moreover, personal protective equipment such as helmets, gloves, and safety goggles must be worn to prevent burns or other injuries. By taking these necessary safety precautions, both the welder and those around them can stay safe from potential hazards.
Conclusion: Perfecting Your Welding Techniques
Adjusting a welding machine is like tuning an instrument. With some basic knowledge and a few tweaks, you can fine-tune your machine to produce beautiful and precise welds. Remember that welding is not just about melting metal together, it’s an art form that requires patience, skill, and attention to detail.
So, take your time, experiment with different settings, and don’t be afraid to fail. With practice, you’ll soon be welding like a pro and producing masterpieces that will stand the test of time.”
FAQs
What are the common causes of improper welding machine adjustments?
Some common causes of improper welding machine adjustments include incorrect power settings, incorrect wire feed speed, and poor grounding.
How can I adjust my MIG welding machine for different materials?
To adjust a MIG welding machine for different materials, you need to change the wire type, gas mixture, and possibly the voltage and wire feed settings.
What is the proper procedure for adjusting the amperage on a stick welding machine?
To adjust the amperage on a stick welding machine, you need to turn the amperage control knob in the appropriate direction until you reach the desired setting.
How do I adjust the travel speed on my welding machine for TIG welding?
To adjust the travel speed on a TIG welding machine, you need to adjust the foot pedal or hand controls to achieve the desired amperage and travel speed.
What should I do if my welding machine is overheating during use?
If your welding machine is overheating during use, you should turn it off immediately and allow it to cool down. Check for any obstructions around the cooling fan or air vents and clean them if necessary.
How can I improve the arc stability on my welding machine?
To improve the arc stability on a welding machine, you can adjust the voltage or wire feed speed, clean the workpiece and electrode, or use a different shielding gas.
What safety precautions should I take when adjusting a welding machine?
When adjusting a welding machine, you should always wear appropriate protective gear, make sure the machine is turned off before making any adjustments, and follow the manufacturer’s instructions and safety guidelines.
