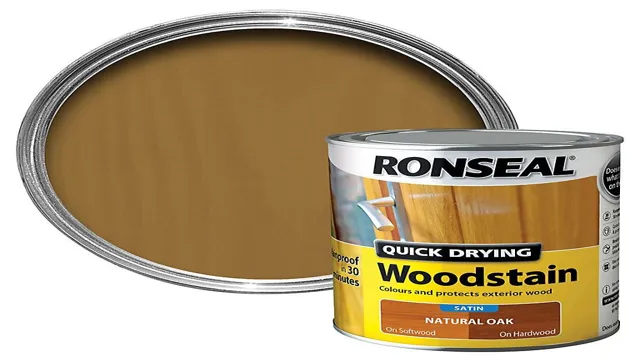
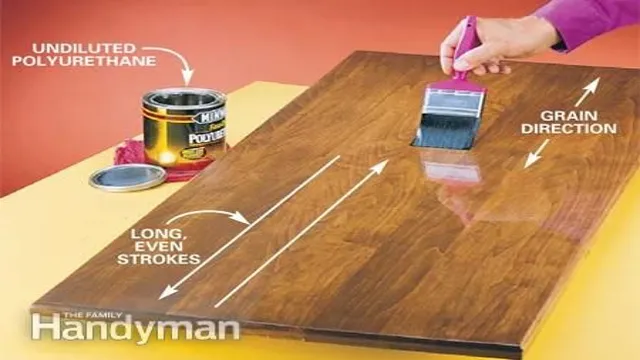
So, you’ve completed the arduous task of staining your wooden surface, but the process isn’t quite over yet. Applying polyurethane is the next crucial step in protecting your surface and giving it a glossy finish. However, timing is everything when it comes to applying poly after staining.
Rushing the process or waiting too long can result in an inferior finish that isn’t up to your expectations. So how do you determine the ideal time to apply polyurethane after staining? In this blog post, we’ll explore the timing considerations you need to take into account, so you can achieve a long-lasting and beautiful finish.
The Role of Drying Time
After staining your woodwork, it’s natural to feel excited to apply a protective top coat such as polyurethane. However, it’s essential to wait until the stain is completely dry before applying any type of finish. The drying time can vary depending on the type of stain and the environmental conditions.
On average, it’s recommended to wait at least 24-48 hours before applying polyurethane to ensure the stain is thoroughly dry. Applying poly too early can result in a cloudy, uneven finish or even cause the stain to smear or lift. So, it’s vital to exercise patience and let the stain dry completely before proceeding with the top coat.
Remember, rushing the process can lead to poor results, and it’s always better to take the extra time to ensure the finish is flawless.
Understanding Stain Drying Time
Stain drying time plays a crucial role in how well your project turns out. It refers to the amount of time it takes for the stain to dry and cure, which can greatly impact the appearance and durability of your project. If you rush the drying time, the stain may not have enough time to properly penetrate and adhere to the wood, resulting in a haphazard and uneven finish.
On the other hand, if you wait too long, the wood may absorb too much stain, leading to an overly dark or splotchy finish. Additionally, if you try to apply a topcoat before the stain is fully dry, the finish may crack or peel, ruining all your hard work. So, it’s important to follow the manufacturer’s instructions for drying time and allow your stain to fully cure before moving on to the next step.
Remember, patience is key when it comes to staining wood!

Factors That Affect Drying Time
Drying time can be affected by various factors, including the type of material being dried, the size and thickness of the material, the humidity of the surrounding air, and the temperature of the drying environment. For example, thicker materials will take longer to dry than thinner ones, while high humidity and low temperatures will slow down the drying process. Additionally, the drying method used, such as air drying or oven drying, can also impact the overall drying time.
It’s important to consider all of these factors when determining how long it will take to fully dry a material, as this can impact the quality and effectiveness of the end product. By understanding the role of drying time and the various factors that can affect it, you can ensure that your materials are dried properly and efficiently to achieve the desired results.
Choosing the Right Poly
If you’ve recently stained a piece of wood and are wondering when you can apply polyurethane, there are a few things to consider. The first thing to note is the type of polyurethane you’re using – oil-based or water-based. Oil-based polyurethane typically takes longer to dry than water-based, so you’ll want to wait at least 24 hours after staining before applying the oil-based polyurethane.
On the other hand, water-based polyurethane can generally be applied within 4-6 hours of staining. However, if the humidity is high, or the temperature is below 70°F, the drying time may take longer. It’s essential to ensure that the stain is completely dry before applying the polyurethane, or it may not adhere correctly, and your finish could end up looking uneven.
When in doubt, wait a little longer to be safe – it’s better to wait for a day or two extra than to rush the process and have to redo it. By giving your stain and polyurethane adequate drying time, you’ll ensure a beautifully finished project that will last for years to come.
Different Types of Poly
Polyurethane or simply poly comes in different types, each of which is best suited for specific applications. Understanding the different types of poly is crucial in selecting the right one for your project. For instance, polyester polyurethane is ideal for woodworking projects and provides limited UV resistance.
On the other hand, polyether polyurethane is commonly used in the manufacturing of furniture foams and provides better UV resistance. Meanwhile, polycarbonate polyurethane is great for applications that require high impact strength, while aromatic polyurethane is primarily used in the production of synthetic leather and provides excellent abrasion resistance. In conclusion, choosing the right poly depends on the application you intend to use it for, so make sure to consider the characteristics of each type before making a decision.
Compatibility with Stain
When it comes to staining your woodwork, choosing the right polyurethane can be crucial to the success of your project. Not all polyurethanes are created equal, and some may not be compatible with certain stains, which could cause your finished product to look blotchy or uneven. It’s important to consider the type of stain you’ll be using and select a polyurethane that is compatible with it.
Oil-based polyurethanes tend to work well with oil-based stains, while water-based polyurethanes are better suited for water-based stains. Additionally, if you plan on using a tinted polyurethane, it’s best to choose one that is already matched to your desired stain color to ensure a seamless finish. By taking these factors into account, you can choose the right polyurethane for your project and achieve the beautiful, long-lasting results you’re looking for.
Application Timeline
If you’ve recently stained a surface and are wondering how long after stain can I apply poly, the timeline will depend on a few factors. Firstly, it’s important to let the stain fully dry and cure before applying any polyurethane. This typically takes around 24 hours but can vary depending on the type of stain and the humidity of your environment.
Once the stain has cured, it’s safe to apply a coat of polyurethane. However, depending on the type of polyurethane you’re using, you may need to wait a few hours before applying another coat. Water-based polyurethane typically requires around 2-4 hours between coats, while oil-based polyurethane may require up to 24 hours.
Be sure to follow the manufacturer’s instructions for your specific product to ensure proper adhesion and a smooth finish. Overall, the application timeline for polyurethane after staining can range from a day to a few days depending on the stain and polyurethane products you’re using.
Recommended Waiting Time
When it comes to applying for a job or a school program, it’s natural to feel anxious about how long the process will take. Unfortunately, there’s no one-size-fits-all answer to the question of how long you’ll have to wait for a decision. Many factors can affect the application timeline, like the volume of applications, the complexity of the selection process, and the number of people involved in the decision-making process.
However, the recommended waiting time for an application decision is typically around two weeks to two months. During this period, you can monitor the status of your application, follow up with recruiters or admissions staff, and keep looking for other opportunities. Remember that waiting can be frustrating, but it’s an essential part of the process.
You can use this time to build your skills or network, or simply take a break and enjoy some downtime. Whatever you do, don’t lose hope – good things come to those who wait!
Prepping the Stained Surface
Before starting the staining process, be sure to prep your surface properly for best results. This process involves thoroughly cleaning the surface, sanding it down, and applying a pre-stain conditioner. It is essential to make sure the surface is completely clean and free of any dust or debris before staining as any dirt or residue will affect the overall finish.
Once the surface is clean, sanding it down will remove any existing finish and create a smooth and even surface to work with. After sanding, applying a pre-stain conditioner allows for more even absorption of the stain and helps to prevent blotching and uneven color. It is recommended to wait at least 24 hours after applying the pre-stain conditioner before staining.
Taking the time to properly prep your surface will ensure a beautiful and long-lasting stain.
Application Strategies
When it comes to applying for college, it’s never too early to start planning. In fact, creating an application timeline can help alleviate stress and ensure everything gets done in a timely manner. It’s important to begin by researching the schools you’re interested in and understanding their application requirements and deadlines.
For example, some schools have early decision or early action deadlines that typically fall in November, while regular decision deadlines are usually in January or February. Once you have a sense of the deadlines, work backwards to determine when you need to complete each part of the application process, such as submitting test scores, requesting transcripts, and writing essays. Most importantly, give yourself plenty of time to revise and refine your application materials, as rushing the process can result in errors or poorly written essays.
By creating a well-planned application timeline, you’ll be able to submit your best possible application and increase your chances of getting into your dream school.
Conclusion
As they say, patience is a virtue, and this holds true in the world of stain and polyurethane. While the temptation to rush through a project and apply polyurethane immediately after staining can be strong, it’s important to resist. To ensure a smooth and even finish, it’s recommended to wait at least 24 hours, or even up to 48 hours, before applying polyurethane over a freshly stained surface.
So go ahead and take a breather, grab a cup of coffee, or binge-watch your favorite show – just resist the urge to rush through the process. Your project will thank you in the end!”
FAQs
1. Can I apply polyurethane immediately after staining my wood?
It’s crucial to wait before applying polyurethane after staining even if the stain appears dry, wait for at least 24 hours.
2. Should I sand between staining and applying polyurethane?
Yes, sand your project before applying polyurethane to ensure that you have a smooth finish.
3. Can I apply multiple coats of polyurethane after staining?
Yes, you can apply multiple coats of polyurethane, but you need to allow each coat to dry for at least 24 hours before applying the next coat.
4. Should I use a water-based or oil-based polyurethane after staining?
It depends on the type of stain you used, but generally, oil-based polyurethane will give your wood a warm amber look and is more durable, while water-based polyurethane will dry clear and has a faster drying time.
5. Can I use a foam brush to apply polyurethane after staining?
Yes, you can use a foam brush, but it may leave bubbles in your finish, so it’s best to apply it with a natural bristle brush.
6. Can I apply polyurethane over painted surfaces?
Yes, you can apply polyurethane over painted surfaces to provide additional protection to your paint.
7. Should I apply polyurethane in a well-ventilated area?
Yes, you should apply the polyurethane in a well-ventilated area to avoid inhaling harmful fumes.


