If you are curious about the health of your engine, a compression tester is a simple tool that can tell you just that. Compression tests are used to determine the amount of pressure your engine can produce. This information lets you know if there are any issues with the engine’s internal workings, such as worn piston rings or valves.
But how do you use a compression tester? Don’t worry; it’s not as complicated as you might think. In just a few simple steps, you can check your engine’s compression and ensure that it’s running smoothly. So, let’s dive in and learn how to use a compression tester to keep your engine in top shape.
What is a Compression Tester?
If you are wondering how to diagnose engine problems or if your vehicle is losing power, a compression tester can help. This tool checks the conditions of the cylinders in your engine and measures their compression levels. Using a compression tester is relatively simple.
First, remove all the spark plugs from the engine. Next, screw the tester into one of the spark plug holes. Then, crank the engine over to take a reading.
Repeat this process for each cylinder in your engine. If you notice that any of the cylinders have much lower compression levels than the others, this may indicate a problem in that cylinder. This could be an issue with a piston, valve, or head gasket.
A compression tester is a critical tool for diagnosing and repairing engine problems, so it’s essential to have one in your toolkit.
Types of Compression Testers
A compression tester is a tool used to measure the compression pressure within an engine cylinder. This measurement helps to determine the engine’s health and detect any potential issues. There are several types of compression testers available, each designed to suit different needs.
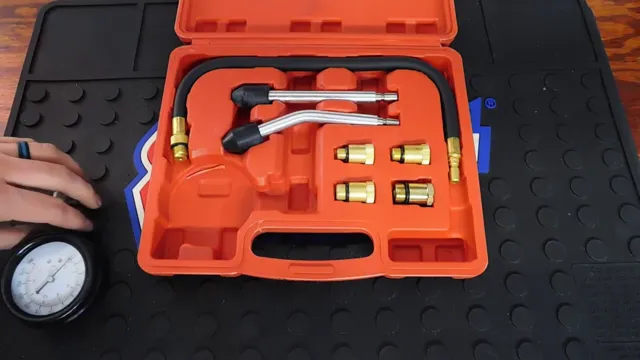
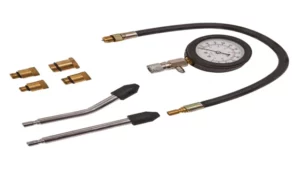
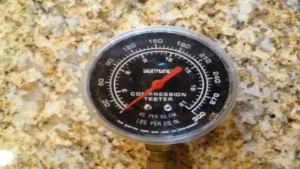
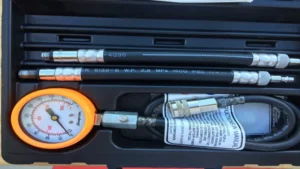
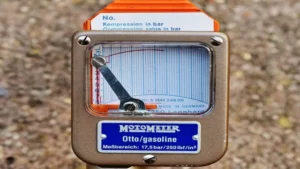
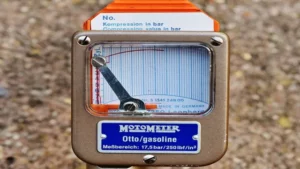
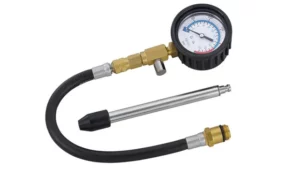
The most common type of compression tester is the mechanical compression tester, which consists of a pressure gauge and a threaded connector that attaches to the spark plug hole. Another type of compression tester is the digital compression tester, which is similar to the mechanical tester but has a digital display for more precise readings. The leak-down tester is another type of compression tester that measures cylinder leakage rather than compression pressure.
No matter which type of compression tester you choose, it’s important to use it regularly to ensure the optimal performance of your engine and avoid any potential problems.
Preparing for the Test
When preparing to use a compression tester, there are a few important steps you’ll want to follow. First, ensure that your engine is cool before attempting any testing. Then, locate the spark plug wires and remove one from a spark plug.
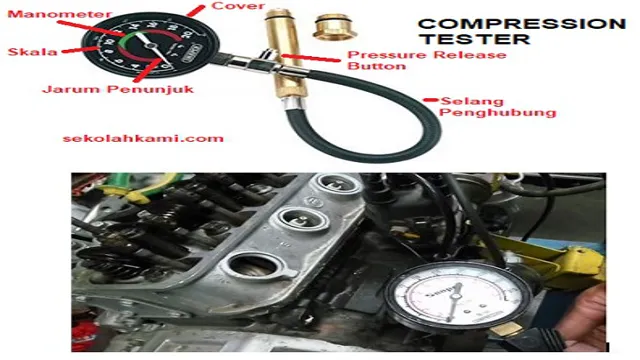
You’ll need to insert the compression tester into the spark plug hole, being sure to thread it in tightly. Next, crank the engine several times with the throttle wide open, making sure that the reading on the compression tester stabilizes. You’ll want to repeat this process for each cylinder in the engine, recording the readings in the order that you tested them.
Once you have readings for all cylinders, you can compare them to the specifications listed in your vehicle’s owner’s manual to determine if any of the cylinders are experiencing compression loss. Overall, using a compression tester is a simple process, but it’s important to take your time and follow each step carefully to ensure accurate readings.
Gathering Necessary Tools and Materials
Preparing for a test requires gathering the necessary tools and materials. Whether it’s a pen and paper for a written exam or a calculator for a math test, having the right tools can make all the difference. One important tool that is often overlooked is a good night’s sleep.
Getting enough rest can improve your focus and memory retention, which can ultimately lead to better test scores. It’s also important to review the material ahead of time to ensure that you’re familiar with the concepts and able to recall the information when needed. Additionally, it’s a good idea to bring water and snacks to keep your energy levels up and avoid distractions.
Overall, preparing for a test involves being organized and ready for anything that may come your way.
Locating and Accessing Spark Plugs
Preparing for the Test: Locating and Accessing Spark Plugs Before beginning the process of locating and accessing spark plugs, you should first prepare for the task ahead. This includes gathering the necessary tools and equipment, such as a socket wrench with an extension and a spark plug socket. It is also important to have a clean workspace and protective gear, such as gloves and safety glasses.
Once you have all of the necessary items, you should refer to your vehicle’s owner manual to locate the spark plugs and their specific positions. This is essential because different vehicles have varying numbers of spark plugs and different locations for them. It is also important to remember to disconnect the battery before beginning any work.
Taking these necessary steps and being prepared for the task at hand will ensure a safe and successful spark plug replacement process.
Performing the Test
If you’re wondering how to use a compression tester, don’t worry, it’s actually a pretty easy process! First, make sure your engine is warmed up and turned off. Next, remove all the spark plugs from the engine. Screw the compression tester into the spark plug hole for the first cylinder you want to test and then turn over the engine using either the starter or a crankshaft pulley.
You’ll notice that the gauge on the compression tester will start to move. Once the needle stops moving, you can take note of the reading on the gauge. Repeat this process for each cylinder in your engine and you’ll be able to compare the readings to see if there are any issues with your engine.
If the readings are significantly different between cylinders, that could be a sign of a problem, and you should consider getting your engine looked at by a mechanic. So, that’s how you use a compression tester – it’s an easy and quick way to make sure your engine is running smoothly!
Connecting the Compression Tester to Spark Plug Holes
Performing a compression test on your car’s engine is an important part of routine maintenance. To connect the compression tester to the spark plug holes, start by removing the spark plug wires. Then, remove the spark plug from the first cylinder and screw in the compression tester.
Next, turn the ignition key to start the engine and hold the accelerator down to full throttle. The compression tester should show a reading on the gauge. Repeat this process for all cylinders to ensure an accurate reading of the engine’s overall health.
Remember to write down the readings for each cylinder and compare them to the manufacturer’s specifications. Checking your engine’s compression is crucial in detecting any potential issues before they turn into costly repairs. Don’t neglect the importance of this simple but vital test.
Cranking the Engine and Recording Readings
When performing a compression test on an engine, it’s vital to crank the engine and record the readings accurately. This will give you an idea of the overall health of the engine and whether any repairs need to be made. First, you’ll need to remove the ignition coil and spark plug from one of the engine’s cylinders.
Then, you’ll insert the compression gauge into the spark plug hole and crank the engine several times. The compression gauge will give you a reading, which you should record. Repeat this process for all cylinders in the engine.
Ideally, all cylinders should have similar compression readings with a variance of no more than 10%. If there is a significant difference in compression between cylinders, it may indicate an issue with the engine, such as worn piston rings or a blown head gasket. By cranking the engine and recording the readings accurately, you’ll be able to diagnose any issues with the engine before they become major problems.
Interpreting Results and Troubleshooting
Performing an enzyme-linked immunosorbent assay (ELISA) test can provide valuable information about the presence or absence of a specific antigen. To begin the process, a sample is added to a well containing the antigen-specific antibody. If the antigen is present in the sample, it will bind to the antibody, and any unbound material is washed away.
A secondary antibody, which is linked to an enzyme, is then added, which will bind to the bound antigen-specific antibody. Any excess secondary antibody is washed away, and a substrate solution is added, which will undergo a color change in the presence of the enzyme. By measuring the absorbance of the solution in each well, we can determine whether or not the antigen is present in the sample.
If the results are not as expected, it might be necessary to troubleshoot the process by double-checking reagent concentrations or ensuring the correct incubation times were followed. Using ELISA, researchers can gain critical insights about the presence and levels of specific antigens, helping to diagnose diseases and monitor treatment effectiveness.
Safety Precautions
When it comes to using a compression tester, it is important to take safety precautions to avoid accidents and injuries. Always make sure that the engine is turned off and the key is removed from the ignition before beginning the compression test. Additionally, wear protective gear such as gloves and eye goggles to avoid any potential harm.
It’s also essential to properly ground the engine to avoid electrical shocks. Follow the manufacturer’s instructions and use the correct adapters for the engine. Start by removing the spark plugs and then screwing in the adapter.
Make sure that the tester gauge is zeroed and then crank the engine a few times to get an accurate reading. Be careful not to exceed the maximum pressure limit to avoid damage to the engine. Finally, don’t forget to properly store the compression tester in a safe place after use.
By following these safety precautions, you can confidently use a compression tester to diagnose engine problems without risking harm to yourself or the vehicle.
Handling High-Pressure Equipment Safely
When it comes to working with high-pressure equipment, safety should be your top priority. There are several precautions that you need to take to ensure that you and your colleagues stay safe while working with these types of machines. Firstly, make sure that you always wear suitable personal protective equipment (PPE) when handling high-pressure equipment.
This may include goggles, gloves, steel toe boots, and a hard hat. Secondly, carry out regular checks and inspections on the equipment to ensure that there are no leaks or other damage that could pose a risk. It’s essential to use the right tools and techniques when working on high-pressure equipment to avoid sparking or causing other hazards.
Finally, always follow the manufacturer’s instructions and carry out the required maintenance on these machines to avoid accidents. Remember, even the slightest mistake when working with high-pressure equipment can lead to disastrous consequences, so it’s better to be safe than sorry.
Avoiding Electrical Hazards and Burns
Electrical hazards can cause severe burns and even lead to fatal injuries. Therefore, it is crucial to take safety precautions while working with electrical equipment or being around them. First and foremost, make sure to turn off the power supply before you start working on any electrical device.
This ensures that there are no accidental shocks or burns. Additionally, use proper safety equipment such as gloves and protective goggles while working with electrical equipment. Avoid working on electrical devices when you are wet or in damp conditions, as water intensifies electric shocks.
Another vital safety measure is to ensure that all wiring and electric cords are in good condition and not frayed or damaged. Lastly, always follow the manufacturer’s instructions and safety guidelines while working with electrical devices to avoid any accidents. Remember, safety should always come first, and taking these simple precautions can prevent severe electrical injuries.
Conclusion
In conclusion, using a compression tester is like giving your engine a virtual pat on the back. It’s a quick and easy way to check your engine’s health and detect any potential issues before they become larger problems. With a compression tester, you can measure the amount of pressure your engine is producing, giving you peace of mind and saving you money on costly repairs down the road.
So, next time you’re under the hood, don’t forget to give your engine a little TLC with a trusty compression tester!”
FAQs
What is a compression tester used for?
A compression tester is used to test the compression levels in the cylinders of an engine.
How do you use a compression tester?
To use a compression tester, remove the spark plug from each cylinder and screw in the compression tester. Then, crank the engine and take note of the pressure reading on the tester.
What should the compression levels be in a healthy engine?
Compression levels can vary depending on the make and model of the engine, but generally, a healthy engine will have compression levels between 125-180 psi.
What causes low compression levels in an engine?
Low compression levels can be caused by a variety of issues, including worn piston rings, burned or warped valves, or a blown head gasket.
How often should you test your engine’s compression levels?
It is recommended to test your engine’s compression levels every 30,000 to 50,000 miles, or if you are experiencing performance issues.
Can a compression tester be used on any type of engine?
Compression testers can be used on most types of engines, including gasoline, diesel, and two-stroke engines.
Can a compression tester be used to diagnose issues other than engine compression?
While a compression tester is primarily used to test engine compression levels, it can also be used to identify other issues such as burned valves or blown head gaskets.
