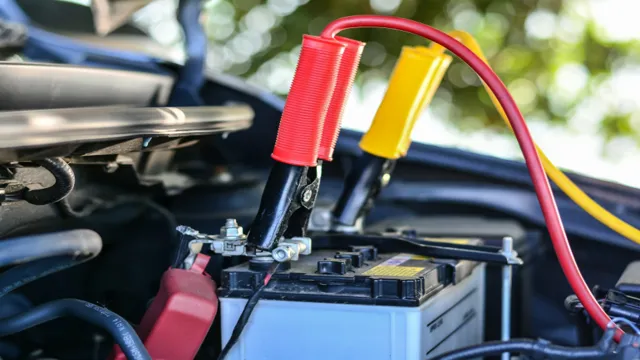
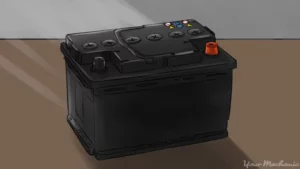
Have you ever found yourself with a dead car battery? It can be a frustrating and inconvenient situation to be in, but luckily, a car battery charger can come to your rescue. Connecting a car battery charger may seem daunting, but with a little guidance, it is a simple process that any car owner can do themselves. In this blog post, we will break down the steps to help you confidently connect your car battery charger and get your car back on the road in no time.
So, buckle up and let’s dive into the world of car battery chargers!
Checking Your Car’s Battery
If you’re having trouble starting your car, it could be a sign that your battery is getting weak. When this happens, you’ll need to recharge it using a car battery charger. Before connecting the charger, make sure to turn off your car’s ignition and remove any keys from the ignition switch.
Then, locate the battery and remove any covers or caps that might be in the way. Connect the positive (red) cable to the battery’s positive terminal and the negative (black) cable to the negative terminal. Make sure the connections are secure and avoid touching any metal parts of the car to prevent electrical shock.
Once the charger is connected, turn it on and wait for the battery to charge fully. This process can take anywhere from a few hours to overnight, depending on the charger’s capacity and the battery’s condition. When the charger indicates that the battery is fully charged, turn it off and remove the cables, making sure to disconnect the negative cable first.
With a fully charged battery, your car should start easily and reliably, giving you peace of mind on the road.
Checking for Corrosion
As a responsible car owner, it’s important to routinely check your car’s battery for any signs of corrosion. Corrosion is a common issue that can cause damage to your battery and potentially leave you stranded on the side of the road. To check for corrosion, start by visually inspecting the battery terminals for any buildup of white or greenish powder.
These powdery deposits are a clear sign of corrosion and should be addressed immediately. Using a wire brush or battery cleaner, gently remove the corrosion from the terminals and surrounding areas. It’s also important to check the battery for any cracks or leaks, especially if you live in an area with extreme weather conditions.
Remember, early detection and prevention are key to avoiding any costly repairs or safety hazards down the road. Don’t overlook the importance of maintaining your car’s battery, it’s a simple yet crucial step in ensuring your vehicle runs smoothly and safely.
Checking for Damage
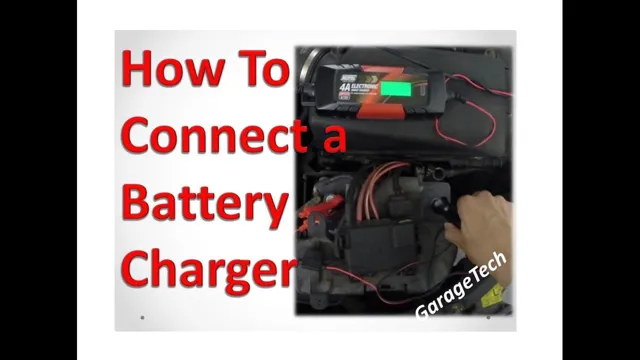
Checking your car’s battery is an essential part of vehicle maintenance. A dead battery can leave you stranded, and a faulty battery can cause a whole host of issues. So, how do you check for battery damage? The first step is to look at the battery itself.
Check for any signs of corrosion or damage to the terminals. Corrosion can cause poor connections, leading to a weak charge or no charge at all. The next step is to test the battery’s voltage.
You can use a voltmeter to check this. A fully charged battery should read between 12-16 volts.
Anything lower than that may indicate a weak battery that needs to be replaced. If you’re unsure about your battery’s condition, it’s always a good idea to have it tested by a professional. A qualified mechanic can perform a load test to determine if the battery is holding a charge properly.
By regularly checking your car’s battery for damage, you’ll avoid nasty surprises and keep your vehicle running smoothly.
Checking Voltage
Checking Your Car’s Battery It’s never a good feeling to try to start your car, only to hear a clicking sound or nothing at all. And the culprit is usually a dead battery. However, before heading out to buy a new one, it’s important to check if your battery is truly dead.
One way to do this is by checking the voltage. First, you’ll need a voltmeter, which can easily be found at any auto parts store. Then, locate your car’s battery and carefully detach the positive and negative terminals.
Next, set your voltmeter to read DC voltage and place the red lead on the positive terminal and the black lead on the negative terminal. A fully charged battery should read between 16 and 1
8 volts. If it reads below 14 volts, it’s likely time for a new battery.
Additionally, if the voltage reading is significantly higher or lower than the recommended range, it could indicate a problem with your charging system or alternator. By regularly checking your battery’s voltage, you can catch any issues before they leave you stranded on the side of the road.
Preparing the Charger
If you want to know how to connect a car battery charger, start by preparing the charger first. Before anything else, make sure that the charger is turned off and unplugged. Then, inspect the battery charger for any damage or defects.
Make sure that the charger’s cables and clamps are clean and free of corrosion. Check the charger’s output voltage and amperage ratings to ensure that it matches your car battery’s voltage and capacity. After ensuring that everything is in order, connect the charger’s positive cable or clamp to the positive post of your car battery and the negative cable or clamp to the negative post.
Double-check the connections to prevent any accidents. Once connected, turn on the charger and wait for it to complete the charging process. With these steps, you can safely and effectively charge your car battery using a battery charger.
Choosing the Right Charger
When preparing to use a charger, it’s important to make sure that it is compatible with your device. Not all chargers are created equal, and using the wrong one can damage your electronics. Once you have the right charger, it’s important to check the condition of the cable.
Cables can wear down over time, and a damaged cable can lead to slow charging or even a dangerous electrical short. Additionally, it’s a good idea to make sure that your charger is clean and free from dust and other debris. This can help prevent overheating and prolong the life of your charger.
Taking a few moments to prepare your charger before use can save you time and money in the long run.
Connecting the Charger to a Power Source
When it comes to charging your electronic devices, preparing the charger is the first step to connecting it to a power source. In order to do this, you need to make sure that the charger is compatible with your device and the power source. Check the specifications of your device and the charger to ensure that they match.
The next step is to locate an appropriate power source, whether it be a wall outlet or a USB port. Make sure that the power source is accessible and close enough to where you will be using your device. It is also important to make sure that the power source is working properly.
Once you have made sure that everything is ready, simply plug in the charger to the power source and your device. Using the correct charger and power source is essential for keeping your device safe and ensuring that it charges efficiently.
Setting the Charger’s Output
Preparing the Charger for Your Device’s Needs Before you can start using your charger, you’ll need to set its output to match your device’s specifications. This is an essential step because setting the charger’s output correctly ensures that your device will charge safely and efficiently. Most modern chargers come with adjustable voltage and amperage settings, and you can adjust them by using the appropriate switches or buttons.
If you’re not sure about your device’s charging needs, you can check the manufacturer’s website or user manual. Generally speaking, smartphones and tablets require a voltage output of 5V, while laptops might require a higher voltage output of around 19V. Similarly, the amperage output depends on the size and capacity of your device’s battery.
Keeping your charger’s output settings in line with your device’s requirements is crucial for its optimum performance. Remember, a mismatched output could result in a slow or faulty charge or, in some cases, damage your device. Once you’ve set the charger’s output, you can connect it to your device.
The current flow should be smooth and steady, with the charger maintaining a stable voltage and amperage output throughout the charging process. Your device should show a steady and progressive increase in the battery level. If you notice any irregularities, such as overheating or fluctuations in the charging level, stop the charging process immediately, and check your device’s compatibility with the charger.
Always ensure that you use certified chargers from reputable manufacturers, and don’t hesitate to seek professional help if needed. With these tips, you’re sure to have a fully charged device in no time!
Connecting the Charger to the Car Battery
If your car battery is low, it’s time to connect it to a charger to recharge. But do you know how to connect the car battery charger properly? First, ensure that your vehicle and charger are both turned off. Then, locate the positive and negative terminals on the battery.
The positive terminal is marked with a plus (+) sign and the negative terminal is marked with a minus (-) sign. Connect the red cable from the charger to the positive terminal and the black cable from the charger to the negative terminal. Make sure the connections are secure and tight.
Turn on the charger and let it run until the battery is fully charged. Always refer to the user manual to ensure you’re using the charger appropriately and safely. With these simple steps, you can easily connect the car battery charger and keep your vehicle running strong.
Locating the Battery
When it comes to connecting a charger to your car battery, the first step is to locate the battery. Depending on your vehicle’s make and model, the battery could be located in different places. Most commonly, it’s in the engine compartment, and you can find it easily by looking for a plastic or metal box with two cables running to it.
In some cars, however, the battery might be under the back seat, in the trunk, or behind the fender. Once you’ve located the battery, you need to attach the charger’s positive cable to the positive terminal of the battery and the negative cable to the negative terminal. It’s essential to make sure that the charger is turned off before doing this.
Also, ensure that you connect the red cable to the red terminal and the black one to the black. If you get them mixed up, there’s a chance that you’ll damage your car’s electrical system. With the cables correctly attached, you can now turn on the charger and charge the battery.
Remember to keep an eye on the charger’s indicator lights to ensure that everything is working correctly. By taking these simple steps, you can keep your car’s battery charged and ready to go when you need it.
Connecting the Charger’s Clamps to the Battery Terminals
When it comes to jump-starting your car battery with a charger, it’s important to know how to connect the charger’s clamps to the battery terminals properly. First and foremost, make sure the charger is turned off and unplugged from the wall before making any connections. Locate the positive and negative battery terminals and identify the charger’s matching red and black clamps.
Attach the red clamp to the positive terminal and the black clamp to the negative terminal. It’s crucial to connect the clamps in the proper sequence, as reversing the polarity can cause damage to both the battery and the charger. Once the clamps are securely attached, turn on the charger and allow it to do its job.
Keep an eye on the process and avoid leaving the charger unattended for extended periods of time. With the right connections and precautions, jump-starting your car battery with a charger can be a safe and effective solution.
Charging the Battery
If you’re wondering how to connect a car battery charger, don’t worry – it’s easier than you might think. First, make sure the charger and battery are compatible and gather all the necessary equipment. Next, connect the charger’s positive cable to the battery’s positive terminal and the negative cable to the negative terminal, being careful to avoid any contact between the cables.
Then, plug in the charger and turn it on, ensuring that it’s set to the correct charging rate for your battery. Finally, monitor the charging process, and once the battery is fully charged, turn off the charger and disconnect the cables in the reverse order they were connected. And that’s it! By following these steps, you can safely and efficiently charge your car battery without any hassle.
Monitoring the Charging Process
When charging the battery, it’s important to monitor the process to ensure safety and maintain the integrity of the battery. Many charging systems today have built-in monitoring functions that can alert you if there are any issues during the charging process. It’s important to use a charger that’s specifically designed for your battery type and follow the manufacturer’s instructions carefully.
Overcharging or charging at too high a voltage can damage the battery or even cause it to catch fire. In order to avoid this, it’s best to use a smart charger that can regulate the voltage and current going into the battery. During the charging process, it’s also important to keep an eye on the battery temperature as excessive heat can damage the battery.
Therefore, it’s recommended to check the charging progress frequently and discontinue the charging process if there are any signs of overheating or other issues. By monitoring the charging process closely, you can ensure that your battery stays in good condition and is able to provide optimal performance when you need it.
Disconnecting the Charger from the Battery
Charging the battery is an essential aspect of keeping your electronic devices powered and functioning. However, disconnecting the charger from the battery can be tricky, and failure to do so correctly could result in damage to your device’s battery. One common mistake that people make is pulling the charger out of the socket abruptly once the battery is fully charged, which can cause the battery to wear out quickly.
To prevent this from happening, it’s crucial to unplug the charger from the battery slowly and gently. Think of it as detaching a suction cup from a smooth surface; you don’t want to pull too hard and risk damaging the surface or the suction cup. Once you have detached the charger from the battery, it’s essential to keep the battery charged adequately to ensure that it stays in good condition.
By taking these precautions, you can safeguard your battery and maximize its lifespan.
Maintenance Tips
If you’re wondering how to connect a car battery charger, here are some basic steps to follow. First, ensure that the charger is compatible with your car’s battery type and voltage. Next, locate the battery terminals – the positive terminal will have a plus (+) sign, while the negative terminal will have a minus (-) sign.
Connect the red clamp to the positive terminal and the black clamp to the negative terminal. Be sure to connect the clamps securely to prevent any sparking or damage to the battery. Once you’ve connected the charger, plug it in and turn it on.
Most chargers will have a display that shows the charging progress and may have options for different charging modes. Leave the charger on until it reaches a full charge, then disconnect the clamps in reverse order (black clamp first, then red clamp). By properly maintaining your car battery and using a charger when necessary, you can extend the lifespan of your battery and ensure that your vehicle is always ready to go when you are.
Regularly Cleaning the Battery and Connections
Regularly cleaning the battery and connections of your vehicle is essential for proper maintenance. Over time, dirt and grime can accumulate on the battery and connections, causing corrosion and poor electrical conductivity. This can lead to starting problems, inefficiencies, and even battery failure.
To clean your battery and connections, start by disconnecting the negative battery cable. Then, use a wire brush to scrub away any build-up on the battery terminals and cable ends. You can also use a mixture of baking soda and water to help dissolve any corrosion.
Make sure to rinse thoroughly and dry everything completely before reconnecting the battery cable. Regular cleaning and maintenance of your battery and connections will help to ensure proper electrical functioning and extend the life of your battery.
Monitoring the Battery’s Voltage
Keeping tabs on your battery’s voltage is an essential element of maintaining your car’s health. It’s like monitoring your own health by getting regular checkups and keeping an eye on important indicators. The voltage of a car battery can tell you a lot about its condition, so it’s necessary to keep an eye on it.
Over time, batteries naturally lose their charge, and it’s crucial to know when the voltage is getting too low. A good rule of thumb is to check your battery voltage every six months, or more often if you notice signs of trouble like your car taking longer to start up. Ignoring a low battery voltage can cause more significant problems down the line, including engine trouble or even a battery replacement.
So don’t neglect this important car maintenance task and take charge of your car’s battery life today!
Using a Trickle Charger for Long-Term Storage
If you’re storing a vehicle for an extended period, a trickle charger can be a valuable tool in maintaining the battery’s health. Rather than letting the battery sit idle and potentially draining, a trickle charger will provide a low level of charge to keep the battery at full capacity. However, to make the most out of your trickle charger, it’s essential to follow a few maintenance tips.
Firstly, make sure the charger is compatible with your battery type, and avoid overcharging the battery as this can damage it. It’s also essential to keep the battery and charger in a cool, dry place to prevent any moisture damage. Lastly, be sure to check the battery’s charge level regularly, and disconnect the charger once the battery is fully charged.
Taking these steps can ensure your vehicle’s battery stays healthy and ready to go when it’s time to hit the road again.
Conclusion
Connecting a car battery charger is like a jigsaw puzzle – just match the positive and negative terminals, plug it in, and watch the magic happen. And if you’re feeling a bit overwhelmed, don’t worry – charging your car battery is electrifyingly easy!”
FAQs
What is a car battery charger?
A car battery charger is a device used to recharge and maintain the charge of a car battery.
How do I connect a car battery charger?
To connect a car battery charger, first ensure that the charger is turned off and the car engine is not running. Then, connect the charger’s positive clamp to the positive battery terminal and the negative clamp to the negative battery terminal.
Can I leave my car battery connected to the charger overnight?
It is not recommended to leave your car battery connected to the charger overnight. Overcharging can cause damage to the battery and potentially lead to a dangerous situation.
What should I do if my car battery is completely dead?
If your car battery is completely dead, first try charging it with a battery charger. If that does not work, you may need to replace the battery.
How long does it take to charge a car battery with a charger?
The length of time it takes to charge a car battery with a charger depends on the size of the battery and the output of the charger. Generally, it can take anywhere from a few hours to overnight to fully charge a car battery.
Can I jump-start my car instead of using a battery charger?
Yes, you can jump-start your car using jumper cables and another vehicle. However, using a battery charger is a safer and more reliable method of charging a car battery.
How often should I charge my car battery with a charger?
It is recommended to charge your car battery with a charger every 6-8 weeks to maintain its charge and extend its lifespan.
